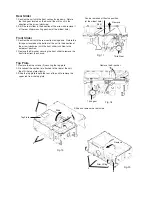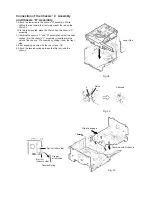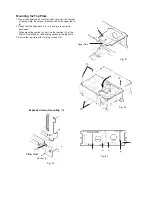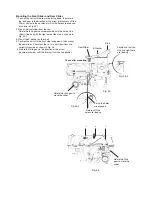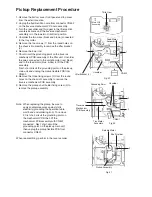
Connection of the Chassis "L" Assembly
and Chassis "R" Assembly
1. Attach the lower rod to the chassis "R" assembly. While
shifting the rod toward the front side, mount the rod on the
lifter unit.
With the rod mounted, place the lifter unit on the chassis "R"
assembly.
2. Combine the chassis "L" and "R" assemblies so that the hook
section (h) of the chassis "L" assembly is inserted into the
notch of the chassis "R" assembly by sliding it from the front
side.
3. After engaging, secure with the two screws (18).
4. Attach the tension spring between the lifter unit and the
chassis.
Fig. 38
Fig. 39
Fig. 40
Lower Rod
Notch
Attached
Slide to engage
Combine with R chassis
Set last (lifter side)
Proper
orientation
Tension Spring
Set first
(chassis side)
18
h
i
i
Summary of Contents for CH-X200
Page 1: ......
Page 19: ......
Page 21: ......
Page 22: ......
Page 23: ......
Page 24: ......
Page 25: ......
Page 26: ......
Page 27: ......
Page 29: ......
Page 30: ......
Page 31: ......
Page 32: ......
Page 36: ......
Page 38: ......
Page 39: ......
Page 40: ......
Page 41: ......
Page 42: ......
Page 43: ...Packing Materials and Accessories Parts List Block No M3MM Block No M4MM ...
Page 44: ......
Page 45: ......

