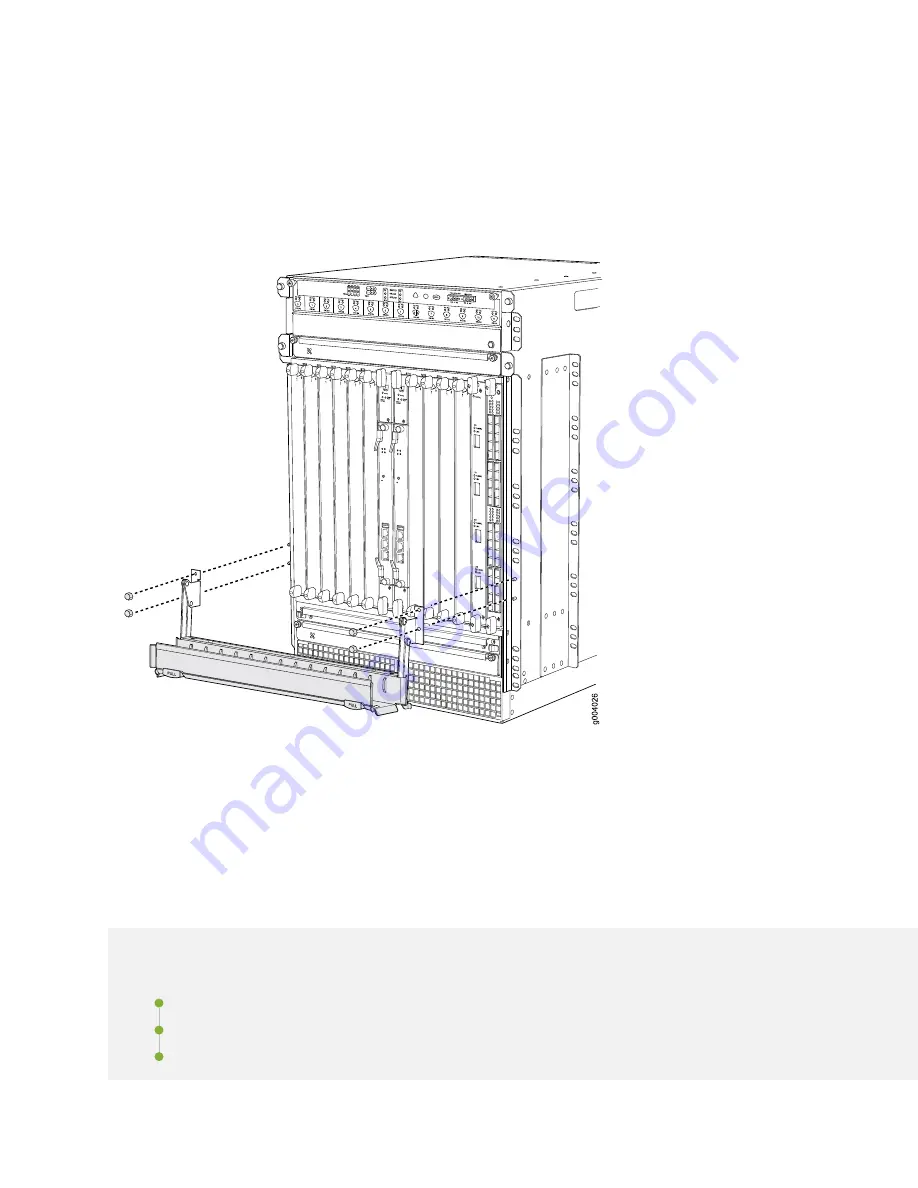
3. Insert the nuts on the corners in the standard cable manager onto the studs on the chassis.
4. Using a 7/16 in. (11 mm)nut driver, tighten the nuts securely.
Figure 155: Installing the Cable Manager
Replacing a Routing Engine in an SRX Series High-End
Chassis Cluster
IN THIS SECTION
Replacing a Routing Engine: USB Flash-Drive Method | 403
Replacing a Routing Engine: External SCP Server Method | 410
Replacing the Routing Engine: File Transfer Method | 417
402
Summary of Contents for SRX 5800
Page 1: ...SRX5800 Services Gateway Hardware Guide Published 2020 02 10 ...
Page 23: ......
Page 30: ...Figure 2 Rear View of a Fully Configured AC Powered Services Gateway Chassis 31 ...
Page 111: ...LEDs 112 ...
Page 121: ...Port and Interface Numbering 122 ...
Page 127: ...Port and Interface Numbering 128 ...
Page 161: ......
Page 179: ... One SRX5K MPC IOC2 Modular Port Concentrator with two Modular Interface Cards MICs 180 ...
Page 180: ... One SRX5K 40GE SFP I O card IOC 181 ...
Page 205: ......
Page 261: ......
Page 324: ...c Upload the configuration to RE2 from the USB device 325 ...
Page 365: ...Figure 143 Installing an SPC 366 ...
Page 367: ...368 ...
Page 422: ...5 CHAPTER Troubleshooting Hardware Troubleshooting the SRX5800 425 ...
Page 423: ......
Page 457: ......
Page 473: ...475 ...
Page 476: ...Restricted Access Area Warning 478 ...
Page 483: ...485 ...
Page 496: ...Jewelry Removal Warning 498 ...
Page 499: ...Operating Temperature Warning 501 ...
Page 509: ...DC Power Disconnection Warning 511 ...
Page 513: ...DC Power Wiring Sequence Warning 515 ...
Page 516: ...DC Power Wiring Terminations Warning 518 ...
Page 519: ...DC Power Disconnection Warning 521 ...
Page 523: ...DC Power Wiring Sequence Warning 525 ...


