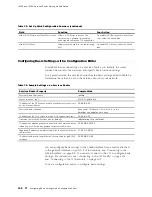
J4350 and J6350 Services Router Getting Started Guide
6.
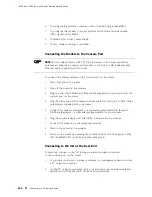
To configure the modem to answer a call on the first ring, enter
ATS0=1
.
7.
To configure the modem to accept modem control Data Terminal Ready
(DTR) signals, enter
AT&D1
.
8.
To disable flow control, enter
AT&K0
.
9.
To save modem settings, enter
AT&W
.
Connecting the Modem to the Console Port
NOTE:
Most modems have an RS-232 DB-25 connector. You must separately
purchase an adapter to connect your modem to the RJ-45 to DB-9 adapter and
Ethernet cable supplied with the router.
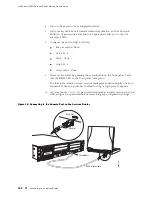
To connect the dial-up modem to the console port on the router:
1.
Turn off power to the router.
2.
Turn off the power to the modem.
3.
Plug one end of the Ethernet rollover cable supplied with your router into the
console port on the router.
4.
Plug the other end of the Ethernet rollover cable into the RJ-45 to DB-9 serial
port adapter supplied with your router.
5.
Connect the serial port adapter to a separately purchased DB-9 female to
DB-25 male adapter, or other adapter appropriate for your modem.
6.
Plug the modem adapter into the DB-25 connector on the modem.
7.
Connect the modem to your telephone network.
8.
Turn on the power to the modem.
9.
Power on the router by pressing the power button on the front panel. Verify
that the
POWER
LED on the front panel turns green.
Connecting to the CLI at the User End
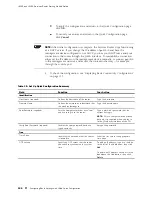
To remotely connect to the CLI through a dial-up modem connected
to the console port on the router:
1.
At your remote location, connect a modem to a management device such as
a PC or laptop computer.
2.
On the PC or laptop computer, start your asynchronous terminal emulation
application (such as Microsoft Windows Hyperterminal).
104
Connecting to a Services Router
Summary of Contents for J4350
Page 14: ...J4350 and J6350 Services Router Getting Started Guide xiv Table of Contents...
Page 22: ...2 J series Overview...
Page 68: ...J4350 and J6350 Services Router Getting Started Guide 48 Field Replaceable PIMs...
Page 75: ...Services Router User Interface Overview Figure 25 J Web Layout Using the J Web Interface 55...
Page 88: ...J4350 and J6350 Services Router Getting Started Guide 68 Using the Command Line Interface...
Page 90: ...70 Installing a Services Router...
Page 100: ...J4350 and J6350 Services Router Getting Started Guide 80 Site Preparation Checklist...
Page 112: ...J4350 and J6350 Services Router Getting Started Guide 92 Powering a Services Router On and Off...
Page 144: ...J4350 and J6350 Services Router Getting Started Guide 124 Verifying Secure Web Access...
Page 162: ...142 Maintaining Services Router Hardware...
Page 194: ...J4350 and J6350 Services Router Getting Started Guide 174 Troubleshooting Hardware Components...
Page 204: ...184 J series Requirements and Specifications...
Page 220: ...J4350 and J6350 Services Router Getting Started Guide 200 ISDN RJ 45 Connector Pinout...
Page 267: ...Part 5 Index Index 247...
Page 268: ...248 Index...

