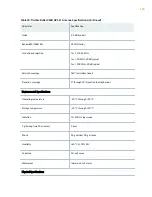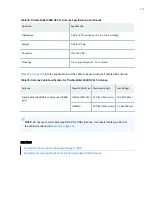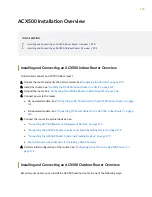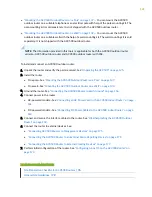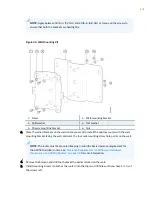
NOTE: Apply between 50 lb-in. (5.7 Nm) and 60 lb-in. (6.8 Nm) of torque on the screws to
ensure that both the brackets are held tightly.
Figure 36: Wall-Mounting Kit
1
—
Screw
4
—
Wall-mounting bracket
2
—
Split washer
5
—
Flat washer
3
—
Chassis-mounting bracket
6
—
Nut
3.
Place the joined brackets on the wall where you want to install the outdoor router with the wall-
mounting bracket facing the wall, and mark the four wall-mounting screw hole points on the wall.
NOTE: The router must be mounted keeping in mind the basic clearance requirement for
the ACX500 outdoor router. See
"Clearance Requirements for Airflow and Hardware
Maintenance on ACX500 Routers" on page 80
for more information.
4.
Remove the bracket, and drill four holes at the points marked on the wall.
5.
Install mounting screws (to anchor the router) into the top two drill holes until you have 1/4 in. of
the screws left.
134

