42
|
43
GB
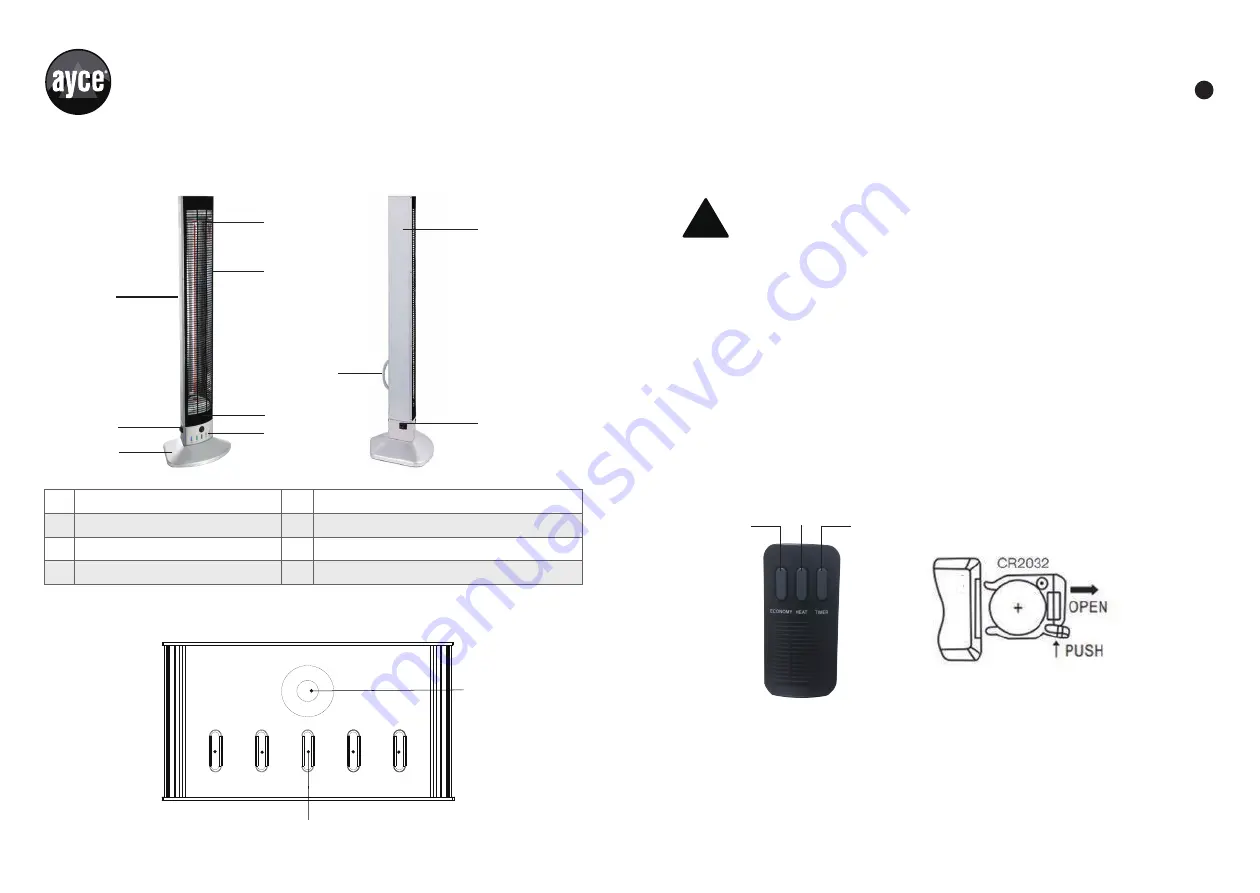
PARTS DESCRIPTION
INDICATING PANEL
Infrared heating elements
Safe- touch shell
Power switch
Base stand
1
3
5
7
2
4
6
8
Flocked grille
PIR economy sensor
Indicating panel
Carry handle
OPERATION
CAUTION!
Before first use, pulls out to remove the high density sponge slices on the
flocked grille.
Connect the power cord to the correct power supply; Press the power switch (part 5) to
position “I” to turn ON the heater, POWER indicators on Indicating Panel (Fig.1) will light
up, the appliance is standby.
Press the power switch to position “0” to turn OFF the heater.
REMOTE CONTROL
This Heater is equipped with a remote control (Fig.2). To avoid tampering, the heater is
operated by its Remote ONLY.
Please point to the remote receiver (Fig.1) when using the remote control.
Operational range of remote is approx 4m (open air) as it is infrared only.
If the battery voltage is low, please open the battery cover as shown in the figure and
replace with new battery (CR2032). (Fig.3)
Please note the positive pole and the negative pole of the battery; then put the battery
cover back.
Heating function [HEAT button]
Press the HEAT buttons on remote control (Fig.2) to select your preferred output power
setting of Low (600W), Medium (1200W), High (1800W) and OFF to meet the different usage
requirements by each press.
The HEAT indicator on Indicating Panel (Fig.1) will light up different brightness or light off
according to your setting.
1
2
4
6
3
5
7
8
3
5
PIR Economy sensor
POWER ECONOMY
TIMER HEAT
Remote Receiver
Fig. 1
Fig. 2
Fig. 3
HEAT
TIMER
ECONOMY
!


