


– 4 –
1
1
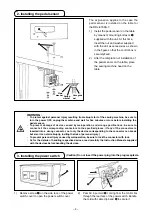
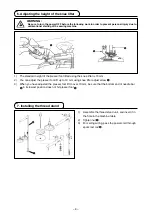
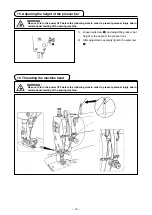
2. Installing the pedal sensor
The explanaton apples to the case the
pedal sensor s nstalled on the table for
the DDL-8700A-7.
) Install the pedal sensor on the table
by means of mountng bolt asm.
1
suppled wth the unt. At ths tme,
nsert the nut and washer suppled
wth the unt as accessores as shown
in the figure so that the control box is
securely fixed.
2) After the completon of nstallaton of
the pedal sensor on the table, place
the sewng machne head on the
table.
Spring
washer
Hexagonal
nat
1
Plain
washer
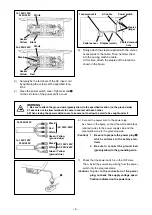
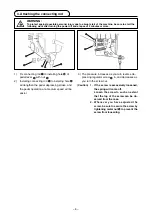
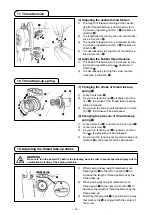
3. Installing the power switch
) Remove screw
1
on the sde face of the power
swtch cover to open the power swtch cover.
2) Pass AC nput cord
2
comng from the control box
through the rear face of the power swtch. Bundle
the cord wth cable clp band
3
to secure t.
(caution) Do not insert the power plug into the plug receptacle.
2
3
WarNING :
• to protect against personal injury resulting from abrupt start of the sewing machine, be sure to
turn the power OFF, unplug the machine and wait for five minutes or more before installing the
pedal sensor.
• to prevent damage of device caused by maloperation and wrong specifications, be sure to
connect all the corresponding connectors to the specified places. (If any of the connectors is
inserted into a wrong connector, not only the device corresponding to the connector can break
but also it can start abruptly, inviting the risk of personal injury.)
• to prevent personal injury caused by maloperation, be sure to lock the connector with lock.
• as for the details of handling respective devices, read carefully the Instruction Manuals supplied
with the devices before handling the devices.


