


– 3 –
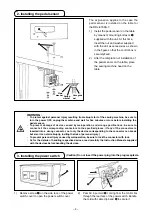
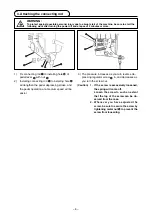
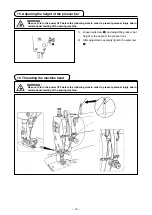
) Carry the sewng machne wth two persons as
shown in the figure above.
(caution) Do not hold the handwheel.
2) Do not put protrudng artcles such as the screw-
drver and the lke at the locaton where the sew-
ng machne s placed.
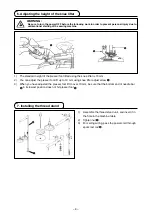
3) The under cover should rest on the four cor-
ners of the machne table groove. Mount rubber
hnge seat
8
on the table and fix it on the table
wth a nal.
4) Fx two rubber seats
1
on sde
a
(operator’s sde) usng nals
2
as llustrated above. Fx two cushon seats
3
on sde
B
(hnged sde) usng a rubber-based adhesve. Then place under cover
4
on the fixed seats.
@
. SEt-uP
1
1
3
3
8
1
2
4
3
a
B
1
2
4
3
a
B
Needle bar side
!0
7
8
7
6
9
!2
!1
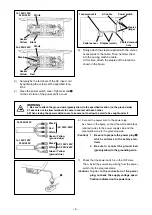
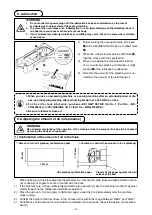
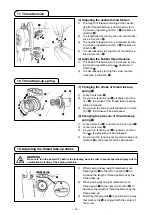
5) Ft knee lfter pressng rod
6
. Ft hnge
7
into the opening in the machine bed, and fit the machine head
to table rubber hnge
8
before placng the machne head on cushons
9
on the four corners.
6) Securely attach head support rod
!0
to the table untl t goes no further.
(caution) Be sure to install the machine head support bar supplied with the unit.
7) Draw out cable
!1
of the control box through cable draw-out hole
!2
to route t to the undersde of the
sewng machne table.
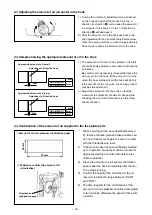
19.5mm
23mm
19.5mm
23.5mm
control box side
1. Installation


