
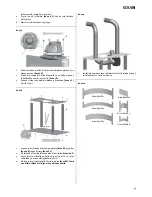

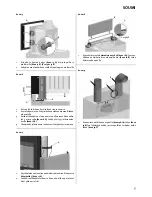
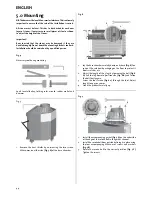


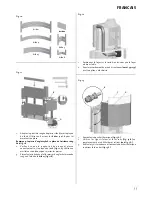


45
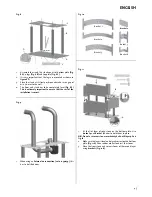
Fig. 8
1.
D
A
E
B
C
50 mm
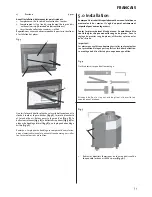
Assemble the stand. The stand consist of bottom plate
(Fig.
8 A)
, 4 legs
(Fig. 8 B)
and top plate
(Fig. 8 C)
.
2.
It is very important that the legs are mounted as shown in
figure 8 D
.
3.
Place the stand at its final position and make sure a gap of
min. 50 mm to the wall.
4. The floor and stand has to be completely level
(Fig. 8 E)
.
This is extremely important to ensure that the rest of the
installation is correct.
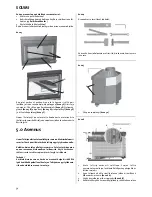
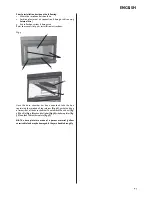
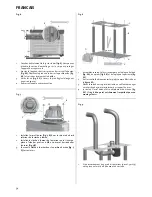
Fig. 9
1. When
using
an
External air connection (cat. no. 341279)
, this
has to be fitted now.
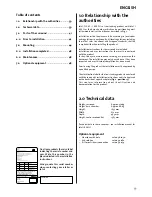
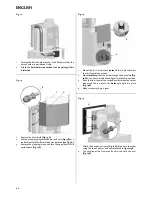
Fig. 10
Bracket 3
Bracket 6
Bracket 1
Bracket 5
Bracket 4
Bracket 2
Bracket 2
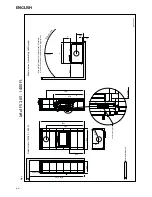
Fig. 11
A
B
3mm
1.
Fit the first layer of soap stone on the bottom plate. Use
bracket 4
and
bracket 6
under to hold them in place.
NB!: Do not use corner stones marked 223628 until layer 4. See
fig. 18.
2.
Make sure the layer is level and placed correct on the bottom
plate
(Fig. 11 A)
. Use a rubber mallet to adjust the stones.
3.
Place the front stone and corner stones of the second layer
using
bracket 1
(Fig. 11 B)
.
ENGLISH
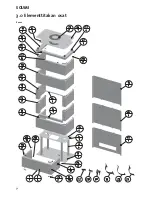
Summary of Contents for FS 165 - I 400 FL
Page 4: ...4 3 0 Omrammingens deler Fig 2 NORSK ...
Page 14: ...14 3 0 Omramningens dele Fig 2 DANSK ...
Page 23: ...23 3 0 Omramningens delar Bild 2 SVENSK ...
Page 32: ...32 3 0 Elementtitakan osat Kuva 2 SOUMI ...
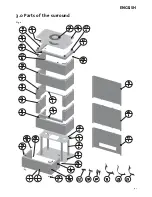
Page 41: ...41 3 0 Parts of the surround Fig 2 ENGLISH ...
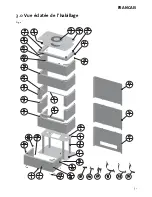
Page 51: ...51 3 0 Vue éclatée de l habillage Fig 2 FRANCAIS ...
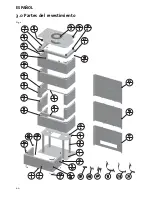
Page 60: ...60 3 0 Partes del revestimiento Fig 2 ESPAÑOL ...
Page 70: ...70 3 0 Componenti per il rivestimento Fig 2 ITALIANO ...
Page 80: ...80 3 0 Teile der Ummantelung Abb 2 DEUTSCH ...
Page 89: ...89 NEDERLANDS ...
Page 90: ...90 3 0 Onderdelen voor de mantel Fig 2 NEDERLANDS ...
Page 98: ...98 ...
Page 99: ...99 ...