background image

NO.26 CHING CHUAN ROAD, TAYA HSIANG, TAICHUNG HSIEN, TAIWAN, R.O.C.

TEL : 886-4-25667100

FAX : 886-4-25683456

E-MAIL : [email protected]

Website : www.johnsonfitness.com

OWNER'S MANUAL

JAR-5100

ROWER

To avoid possible

damage to this

Rower, please

follow the

instructions in this

manual.

To avoid possible

damage to this

Rower, please

follow the

instructions in this

manual.

ROWER

Summary of Contents for JAR-5100

Page 1: ... 886 4 25683456 E MAIL sales johnsonfitness com Website www johnsonfitness com OWNER S MANUAL JAR 5100 ROWER T o avoid possible damage to this Rower please follow the instructions in this manual T o avoid possible damage to this Rower please follow the instructions in this manual ROWER ...

Page 2: ...ient easy an fun way to achieve an enhanced level of fitness You can step your way t a slimmer and healthier body This Owner s Manual contains all the information you need to operate an enjoy your Johnson Rower Please read this Owner s manual in its entire before getting onto the Johnson Rower and working out So let s get starte Take your time and have fun Thank you for making the Johnson Rower a ...

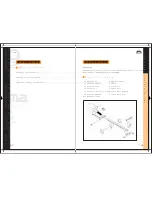
Page 3: ...play On 9 14 Important Safety Precautions 15 UNPACKING Unpack your rower on a level flat surface where you will be using it Veri that the following parts are included GEN ER AL GUIDELINES 1 Main Frame 1 Pedal Assembly 1 Seat Bracket 1 Front Foot 1 Rear Foot Position Plate 2 Seat Stop Bumper 1 Hardware Pack 1 Aluminum Rail 1 Seat 1 Console 1 Rear Foot 1 Seat Rail End Cap 1 Seat Rail Rod a c e g i k...

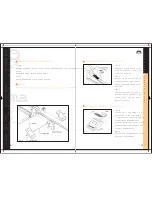
Page 4: ...d nylon nut FEDAL FIXED PLATE ASSEMBLY See Fig 2 Fig 1 Step A Turn over the rail fixed front carriage stop using screw washers provided Step B Slide the seat onto the beam rail be sure the notch of seat carriage is Backward Step C Fixed rear carriage stop Step D Place rubber caps on both ends Step E Insert fix screw through the hole of rear leg base and rail put on nut plate then fasten fix screw ...

Page 5: ...o bolts to secure CONSOLE ASSEMBLY See Fig 6 Fig 6 Step A Insert two size AA 1 5V batteries or two Size UM 3 1 5V batteries into the battery Compartment and make sure that the polarity or is positioned as indicated in the battery compartment Step B Install the two batteries in the battery compartment CONSOLE ASSEMBLY See Fig 7 Fig 7 Step A Insert the pedal bar into the tube of pedal bracket in eve...

Page 6: ...ng Assembly for 2 5 3 turns according to the arrow direction on labels to make the springs has a efficient spare power existed Then screw on the bolts Use the same way to assemble another side spring Then reassembled the side cover and console on Step D Step E The Tension Spring Assembly are consisted of left side and right side Please must identify clearly If you assemble the springs in wrong sid...

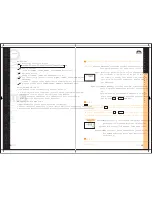
Page 7: ...MIN Electronically calculates and displays the strokes per minute in accordance with one rowing action Spec The min display is 6 and max is 99 per minute Operation The value will be varied whenever you exercise but TIMER function have to be simultaneously performing The E charactor will automatically show up if the value exceeds max 99 per minute NOTE TM TM 1 Open the battery cover at the back sid...

Page 8: ...The E charactor will automatically show up if the value exceeds max 99 per minute NOTE Automatically accumulates all workable strokes both count up and count down 0 9999 then returns to zero from 9999 If the value is zero by depressing RESET button there will be no one sound signal when COUNT function is counting NOTE Feature TOTAL Spec Operation 1 2 3 Lines down the indicator with TOTAL by pushin...

Page 9: ... PRECAUTIONS Before beginning any exercise program always consult your physician you experience chest pains nausea dizziness or shortness of breath s exercising and consult your physician before continuing WARNING Read all instructions in this manual before using this equipment Use this equipment only as described in this Owner s Manual Position the Rower on a level surface The electric monitor mu...

Reviews: