SECTION
4
- BOO
M
& PLATFOR
M
3121160
4-27
4.11 PLATFORM
Platform Sections Replacement
The platform is made up of five sections: floor, right side, left
side, back (console box mounting) and gate. The sections are
secured with huck magna grip fastener and collars. Replace
damaged platform sections as follows:
1.
Support the huck collar with a sledge hammer or other
suitable support.
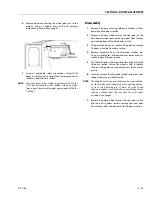
2.
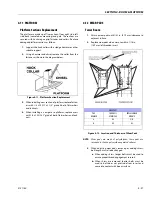
Using a hammer and chisel, remove the collar from the
fastener as shown in the diagram below.
3.
When installing new section of platform replace fasten-
ers with 1/4 x 20 NC x 2 1/4" grade 5 bolts, flatwashers
and locknuts.
4.
When installing a new gate to platform, replace rivets
with 1/4 x 20 NC x 2“ grade 5 bolts, flatwashers and lock-
nuts.
4.12 WEAR PADS
Tower Boom
1.
Shim up wear pads until 1/32 in. (0.79 mm) clearance to
adjacent surface.
2.
Replace wear pads when worn to within 1/16 in.
(1.59 mm) of threaded insert.
NOTE:
Wear pads are made of polyethylene; these pads are
intended to slide on polyurethane painted surfaces.
3.
When adjusting wear pads, removing or adding shims,
bolt length must also be changed.
a.
When adding shims, longer bolts must be used to
ensure proper thread engagement in insert.
b.
When shims are removed, shorter bolts must be
used so bolt does not protrude from insert and
come into contact with boom surface.
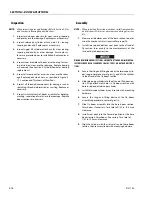
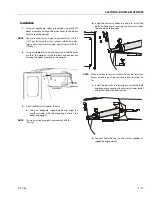
Figure 4-11. Platform Section Replacement
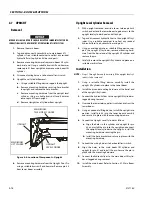
Figure 4-12. Location and Thickness of Wear Pads
WEAR PADS
PAD
NUMBER
THICKNESS
OF NEW PAD
REPLACE WHEN
WORN TO
A
5/8
9/16
B
3/4
5/8
Summary of Contents for 740AJ
Page 2: ......
Page 55: ...SECTION 3 CHASSIS TURNTABLE 3121160 3 3 This page left blank intentionally...
Page 116: ...SECTION 3 CHASSIS TURNTABLE 3 64 3121160 Figure 3 44 Swing Hub Prior to SN 0300074383...
Page 203: ...SECTION 3 CHASSIS TURNTABLE 3121160 3 151 Figure 3 77 EFI Component Location...
Page 206: ...SECTION 3 CHASSIS TURNTABLE 3 154 3121160 Figure 3 78 ECM EPM Identification ECM EPM...
Page 224: ...SECTION 3 CHASSIS TURNTABLE 3 172 3121160 Figure 3 83 Deutz EMR 2 Troubleshooting Flow Chart...
Page 228: ...SECTION 3 CHASSIS TURNTABLE 3 176 3121160 Figure 3 87 EMR 2 Engine Plug Pin Identification...
Page 229: ...SECTION 3 CHASSIS TURNTABLE 3121160 3 177 Figure 3 88 EMR 2 Vehicle Plug Pin Identification...
Page 230: ...SECTION 3 CHASSIS TURNTABLE 3 178 3121160 Figure 3 89 EMR2 Fault Codes Sheet 1 of 5...
Page 231: ...SECTION 3 CHASSIS TURNTABLE 3121160 3 179 Figure 3 90 EMR2 Fault Codes Sheet 2 of 5...
Page 232: ...SECTION 3 CHASSIS TURNTABLE 3 180 3121160 Figure 3 91 EMR2 Fault Codes Sheet 3 of 5...
Page 233: ...SECTION 3 CHASSIS TURNTABLE 3121160 3 181 Figure 3 92 EMR2 Fault Codes Sheet 4 of 5...
Page 234: ...SECTION 3 CHASSIS TURNTABLE 3 182 3121160 Figure 3 93 EMR2 Fault Codes Sheet 5 of 5...
Page 303: ...SECTION 4 BOOM PLATFORM 3121160 4 31 Figure 4 20 Rotator Assembly HELAC...
Page 460: ...SECTION 5 BASIC HYDRAULIC INFORMATION AND SCHEMATICS 5 116 3121160 NOTES...
Page 467: ...SECTION 6 JLG CONTROL SYSTEM 3121160 6 7 Figure 6 2 ADE Block Diagram...
Page 534: ...SECTION 6 JLG CONTROL SYSTEM 6 74 3121160 NOTES...
Page 580: ...SECTION 7 BASIC ELECTRICAL INFORMATION SCHEMATICS 7 46 3121160 NOTES...
Page 581: ......


