SECTION 5 - BASIC HYDRAULICS INFORMATION & SCHEMATICS
5-48
3121234
Initial Start-up Procedures
Follow this procedure when starting-up a new pump or when
the pump has been removed.
UNINTENDED MOVEMENT OF THE MACHINE OR MECHANISM MAY CAUSE
INJURY TO THE TECHNICIAN OR BYSTANDERS. TO PROTECT AGAINST UNIN-
TENDED MOVEMENT, SECURE THE MACHINE OR DISABLE /DISCONNECT THE
MECHANISM WHILE SERVICING.
Prior to installing the pump, inspect for damage incurred
during shipping. Make certain all system components (reser-
voir, hoses, valves, fittings, heat exchanger, etc.) are clean prior
to filling with fluid.
1.
Install the pump on the engine. Ensure the pump shaft is
properly aligned.
INCORRECT SHAFT ALIGNMENT MAY RESULT IN DAMAGE TO DRIVE SHAFT,
BEARINGS, OR SEAL WHICH CAN CAUSE EXTERNAL OIL LEAKAGE.
2.
Fill the reservoir with recommended hydraulic fluid.
Always filter fluid through a 10 micron filter pouring into
the reservoir. Never reuse hydraulic fluid.
3.
Fill the main pump housing with clean hydraulic fluid.
Pour filtered oil directly into the main most case drain
port.
4.
Fill the inlet line leading from the pump to the reservoir.
Check the inlet line for properly tightened fittings and
be certain it is free of restrictions and air leaks.
5.
To ensure the pump stays filled with oil, install the case
drain line in the main most case drain port.
6.
Install a gauge at port M2 to monitor system pressure
during start up.
7.
While watching the pressure gauge installed at M2, jog
the engine or run at the lowest possible speed until sys-
tem pressure builds to normal levels (minimum 160 psi
(11 bar)). Once system pressure is established, increase
to full operating speed. If system pressure is not main-
tained, shutdown the engine, determine cause, and take
corrective action. Refer to Troubleshooting.
8.
Operate the hydraulic system for at least fifteen minutes
under light load conditions.
9.
Check and adjust control settings as necessary after
installation. Refer to Adjustments.
10.
Shut down the engine and remove the pressure gauge.
Replace plug at port M2.
11.
Check the fluid level in the reservoir; add clean filtered
fluid if necessary. The pump is now ready for operation.
Fluid and Filter Maintenance
To ensure optimum life of products, perform regular mainte-
nance of the fluid and filter. Contaminated fluid is the main
cause of unit failure. Take care to maintain fluid cleanliness
while servicing.
Check the reservoir daily for proper fluid level, the presence of
water, and rancid fluid odor. Water in the fluid may be noted
by a cloudy or milky appearance or free water in the bottom of
the reservoir. Rancid odor indicated the fluid has been
exposed to excessive heat. Change the fluid immediately if
these conditions occur.
Change the fluid and filter as per the vehicle/machine manu-
facturer’s recommendations or at these intervals:
Change the fluid more frequently if it becomes contaminated
with foreign matter (dirt, water, grease, etc.) or if the fluid is
subjected to temperature levels greater than the recom-
mended maximum.
NOTE:
Dispose off used hydraulic fluid properly. Never reuse
hydraulic fluid.
Change filters whenever the fluid is changed or when the filter
indicator shows that it is necessary to change the filter.
Replace all fluid lost during filter change.
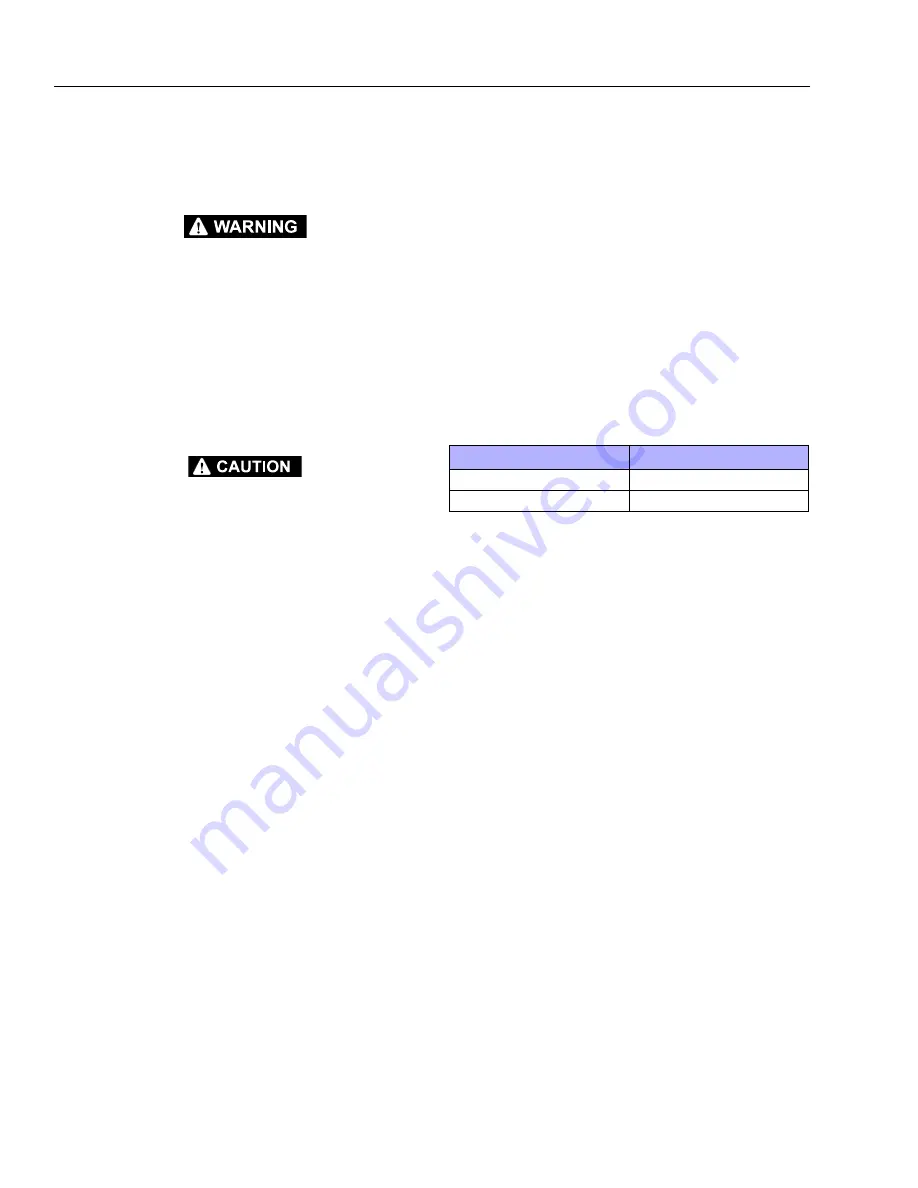
Table 5-7. Fluid and Filter Change Interval
Reservoir Type
Maximum Change Interval
Sealed
2000 Hours
Breather
500 Hours
Summary of Contents for 680S
Page 2: ......
Page 52: ...SECTION 2 GENERAL 2 14 3121234 NOTES...
Page 55: ...SECTION 3 CHASSIS TURNTABLE 3121234 3 3 This page left blank intentionally...
Page 89: ...SECTION 3 CHASSIS TURNTABLE 3121234 3 37 Figure 3 28 Assembly Tools Seal Pressing...
Page 139: ...SECTION 3 CHASSIS TURNTABLE 3121234 3 87 Figure 3 62 Swing Hub Prior to SN 0300134352...
Page 143: ...SECTION 3 CHASSIS TURNTABLE 3121234 3 91 Figure 3 64 Swing Brake...
Page 205: ...SECTION 3 CHASSIS TURNTABLE 3121234 3 153 This page left blank intentionally...
Page 208: ...SECTION 3 CHASSIS TURNTABLE 3 156 3121234 Figure 3 91 Generator Electrical Circuit Diagram...
Page 224: ...SECTION 3 CHASSIS TURNTABLE 3 172 3121234 Figure 3 103 EMR 2 Engine Side Equipment...
Page 225: ...SECTION 3 CHASSIS TURNTABLE 3121234 3 173 Figure 3 104 Deutz EMR 2 Troubleshooting Flow Chart...
Page 229: ...SECTION 3 CHASSIS TURNTABLE 3121234 3 177 Figure 3 108 EMR 2 Engine Plug Pin Identification...
Page 230: ...SECTION 3 CHASSIS TURNTABLE 3 178 3121234 Figure 3 109 EMR 2 Vehicle Plug Pin Identification...
Page 231: ...SECTION 3 CHASSIS TURNTABLE 3121234 3 179 Figure 3 110 EMR2 Fault Codes Sheet 1 of 5...
Page 232: ...SECTION 3 CHASSIS TURNTABLE 3 180 3121234 Figure 3 111 EMR2 Fault Codes Sheet 2 of 5...
Page 233: ...SECTION 3 CHASSIS TURNTABLE 3121234 3 181 Figure 3 112 EMR2 Fault Codes Sheet 3 of 5...
Page 234: ...SECTION 3 CHASSIS TURNTABLE 3 182 3121234 Figure 3 113 EMR2 Fault Codes Sheet 4 of 5...
Page 235: ...SECTION 3 CHASSIS TURNTABLE 3121234 3 183 Figure 3 114 EMR2 Fault Codes Sheet 5 of 5...
Page 264: ...SECTION 3 CHASSIS TURNTABLE 3 212 3121234 NOTES...
Page 285: ...SECTION 4 BOOM PLATFORM 3121234 4 21 This page left blank intentionally...
Page 333: ...SECTION 4 BOOM PLATFORM 3121234 4 69 Figure 4 25 Load Sensing Device...
Page 336: ...SECTION 4 BOOM PLATFORM 4 72 3121234 NOTES...
Page 416: ...SECTION 5 BASIC HYDRAULICS INFORMATION SCHEMATICS 5 80 3121234 NOTES...
Page 423: ...SECTION 6 JLG CONTROL SYSTEM 3121234 6 7 Figure 6 2 ADE Block Diagram...
Page 480: ...SECTION 6 JLG CONTROL SYSTEM 6 64 3121234 NOTES...
Page 528: ...SECTION 7 BASIC ELECTRICAL INFORMATION SCHEMATICS 7 48 3121234 NOTES...
Page 529: ......


