
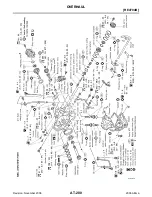
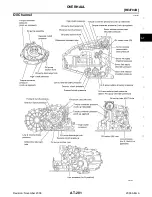


REMOVAL AND INSTALLATION
AT-277
[RE4F04B]
D
E
F
G
H
I
J
K
L
M
A
B
AT
Revision: November 2006
2006 Altima
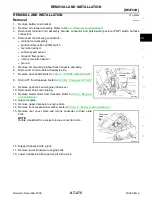
Installation
ECS009AW
CAUTION:
●
When replacing an engine or transmission you must make sure the dowels are installed correctly
during re-assembly.
●
Improper alignment caused by missing dowels may cause vibration, oil leaks or breakage of drive
train components.
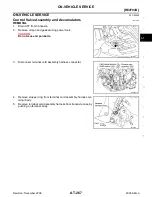
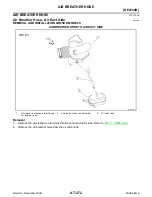
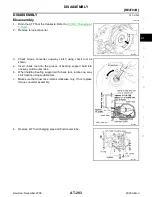
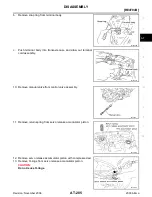
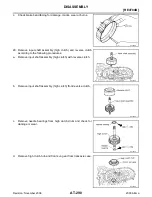
1.
When connecting torque converter to transaxle, measure dis-
tance “A” to be certain that they are correctly assembled.
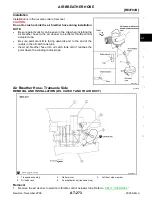
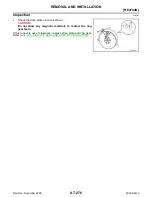
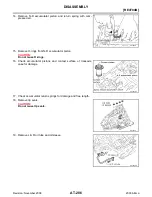
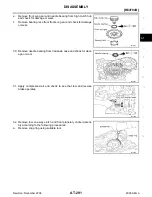
2.
Install torque converter bolts to drive plate.
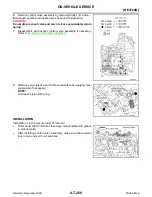
NOTE:
With converter installed, rotate crankshaft several turns to check
that transaxle rotates freely without binding.
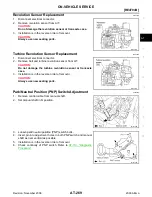
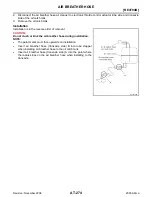
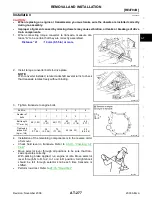
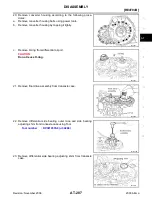
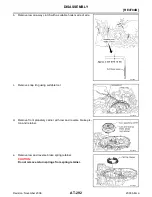
3.
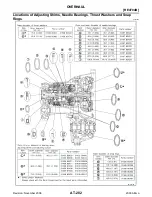
Tighten transaxle to engine bolts.
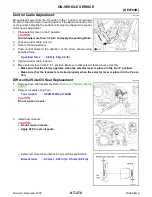
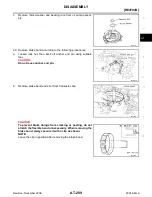
4.
Installation of the remaining components is in the reverse order
of removal.
●
Check fluid level in transaxle. Refer to
●
Move selector lever through all positions to be sure that tran-
saxle operates correctly.
With parking brake applied, run engine at idle. Move selector
lever through N to D, to 2, to 1 and to R position. A slight shock
should be felt through selector knob each time transaxle is
shifted.
●
Distance “A”
: 14 mm (0.55 in) or more
SAT044A
WCIA0070E
Bolt No.
1
2
3
4
5
6
Number of
bolts
4
1
1
2
2
1
Bolt length
″ ″
mm (in)
49 (1.93)
40
(1.57)
45 (1.77)
40
(1.57)
30
(1.18)
45
(1.77)
Tightening
torque N·m
(kg-m, ft-lb)
75
(7.7, 55)
35
(3.3, 26)
75
(7.7, 55)
43 (4.4, 32)
35
(3.6, 26)
SCIA4358E
SAT638A