31
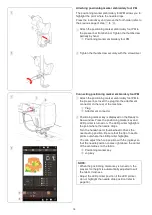
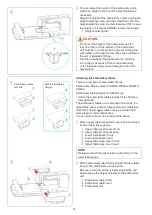
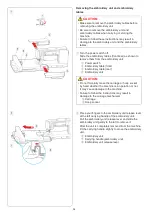
Attaching the embroidery unit
z
Turn the power switch off.
q
Power switch
EMBROIDERY MODE
Embroidery Unit
x
When attaching the embroidery unit to the machine,
hold the carrying handles of the embroidery unit with
both hands and place it to the left side of the machine.
w
Embroidery unit
e
Carrying handles (embroidery unit)
c
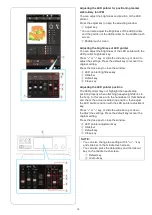
Hold the left carrying handle on the embroidery unit
and lift the unit slightly.
Slide the embroidery unit gently to the right as shown.
Push the embroidery unit against the end.
w
Embroidery unit
e
Carrying handle (embroidery unit)
NOTE:
•
Be sure to provide sufficient space around the
machine to allow the hoop to move freely.
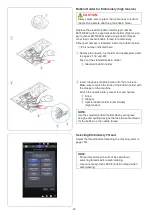
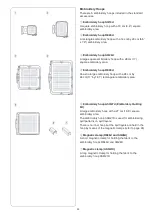
• Movable range for the embroidery unit with the
largest hoop RE46d attached is as shown.
• Do not place anything inside the area shown on the
left.
Embroidery
hoop RE46d
e
90 cm
(35.4˝)
35 cm
(13.8˝)
34 cm
(13.4˝)
q
z
x
c
w
w
e
y
CAUTION:
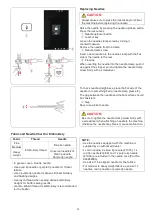
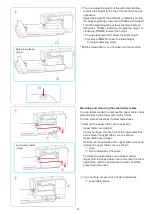
You can smoothly slide the embroidery unit by lifting
the unit and using two rollers on the bottom of the
unit. Lifting the unit too high may cause difficulty
in attaching the embroidery unit to the machine or
breakage of connectors.
y
Rollers
CAUTION:
• Do not forcefully move the carriage or hoop socket
by hand.
• Do not hold the carriage or hoop socket while it is
moving.
• Failure to follow these instructions may result in
damage to the carriage mechanism.
r
Carriage
t
Hoop Socket
r
t
CAUTION:
Do not attach the optic magnifier when sewing in
embroidery mode.


