GSM car alarm CA-1802A „Athos
1/2
MHF58502
Installation manual: CA-1802 “Athos”
Before installation
This is the basic version of the installation manual and programming sequences.
On the web site
in the download section you can find
a extended version of this manual or you can find it included in the installation kit on
CD / DVD.
If you have no experience with CA-1802 installation, we recommend
you to read the extended version of the manual to know all the parameters
well
.
The immobilizer relay contact of car alarm is connected only in disarmed
mode and if the ignition is on. Do not block circuits that are under voltage
while the ignition is off. It could cause a serious damage of the vehicle.
The car-alarm should only be installed by a professional installer. It is
suitable for cars with a dashboard voltage supply of 12V or 24V with a
negative ground connection. During the first power-up, the value of supply
voltage is read and the inputs are set to default settings. The alarm is
designed to be installed inside the car.
For cars with a voltage supply of 24V, the following restrictions apply to
car alarm installation
:
1. It is not possible to connect a hands-free set of type HF-03.
2. When used for acoustic signalling, the SIR output is switched to the power supply
voltage. Consequently, this output switches to 24V, so it is necessary to use a
siren of type SA-606-24V instead of the SA-530 which is supplied in the standard
package. In this case it is necessary to set the confirmation beeps to 100 ms.
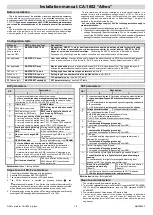
Configuration table
SIM entry*
SMS instruction Text
Description
RESET EN 1
(After which, the
entry is erased
from the SIM)
MASTER RESET EN 1
Mode setting. RESET 1 = alarm has its own remote control and provides signals for central locking.
RESET 2 = alarm is operated by an original remote controller for central locking.
RESET 3 = GSM
pager for cars with an installed car alarm.
Performing the RESET instruction is indicated by 4 beeps.
Consequently, all settings, enrolled remote controllers and wireless detectors will be erased.
Not applicable
MASTER UC xxxx
User code setting
– the code allows you to operate the alarm remotely via SMS from unauthorized phones.
uuuu is a new user code, 4 to 8 letters (A–Z & 0–9, case insensitive). Factory default user code is USER
Not applicable
MASTER MC xxxx
Master code setting
–xxxx is a new master code (A–Z & 0–9, case insensitive). The code allows you to
change the maintenance settings for the car alarm. Factory default master code is MASTER
TELn xx...x
MASTER TELn xx...x
Setting of phone numbers to report alarms to n = 1 to 4
DIALn xx...x
MASTER DIALn xx...x
Setting the phone numbers to dial using Hands free. n = A, B, 1, 2
DIP abcdefghij
MASTER DIP abcdefghij
DIP parameter entry
– see the DIP table
SET abcdefghij
MASTER SET abcdefghij
SET parameter entry
– see the SET table
DIP parameters
DIP
Description
0
1
A
0 = silent arming/disarming without siren chirps
1 = 10 ms siren chirps when arming/disarming (non backed-up siren)
2, 3, 4 ... 9 = siren chirps when arming/disarming (a siren of another
type) lasting 20, 30, 40, 50, 100, 200, 300 or 500 ms
B
Silent alarm
Audible alarm
C
SMS alarm report only
SMS alarm report and siren sound
phone call
D
SMS remote control not
confirmed by SMS reply
SMS remote control instructions
confirmed by SMS reply
E
0 = arming control by dialling-in disabled
1 = arming control by dialling from TEL1 enabled
2 = arming control by dialling from TEL1 and TEL2 enabled
3 = arming control by dialling from TEL1, TEL2 and TEL3 enabled
4 = arming control by dialling from all TEL1 to TEL4 enabled
F
Arming control by dialling
in is not confirmed by
SMS
Arming control by dialling in (see E)
is confirmed by SMS to the phone
which called the car alarm
G
User can not change SMS
Texts
User can change SMS texts by TXT
Sequence
H
REARM disabled
If the car is not entered within 1
minute after disarming, it will
REARM
I
0 = Immobilization by arming and by SMS instruction
1 = Immobilization by arming and automatically 5 minutes after
ignition is turned off (AUTOIMO) and also by SMS instruction
2 = Immobilization only by SMS instruction
3 = Immobilization and also by SMS instruction. If disarmed and
ignition is turned off for more than 60 minutes the SMS STATUS is
sent as an alert to possible forgotten arming.
J
Self-location disabled
The car’s location will be sent by
SMS after an IMO instruction has
been performed.
Bold marked
values = factory default
Steps to enroll RC-8x controllers:
1. The car alarm should be disarmed, with the ignition on.
2. Send the SMS instruction MASTER LEARN RC
3. The car alarm beeps 3 times and an LED starts to flash.
4. The RC-8x controller is enrolled by pressing buttons
and
simultaneously for approx. 3 sec. A siren chirp confirms the enrollment. By
enrolling the first remote control all other remote controls previously enrolled
will be erased (so enroll all the controllers intended for use, one by one).
5. Exit enrollment by turning the ignition off. The alarm confirms the enrollment by
sending an SMS message to authorized phones TEL1 to TEL4.
SET parameters
SET
Description
0
1
A
0 = open door signalling and INP activation while arming are both disabled
1 = open door signalling and INP activation while arming are both
enabled
2 = INP activation while arming enabled, open door signalling enabled with
a 10 second delay
3 = INP activation while arming enabled, open door signalling disabled
B
Voltage detector disabled
Voltage-drop detector enabled
C
lock / unlock signal duration (Reset 1)
0 = 0.5 / 0.5 sec
(suitable for electromagnetic locks)
1 = 4 / 4 sec (suitable for pneumatic locks)
2 = 60 / 0.5 sec (suitable for automatic window closing)
D
DOOR input logic:
1 = activated by falling edge (grounding)
2 = activated by rising edge (disconnecting from GND)
E
INP1 logic:
1 = activated by falling edge (grounding)
2 = activated by rising edge (disconnecting from GND)
F
INP2 logic:
0 = activated by falling edge (grounding), it triggers an alarm also if
disarmed (24 hour reaction)
1 = activated by falling edge (grounding)
2 = activated by rising edge (disconnecting from GND)
G
Central locking input logic: (Reset 2)
1 = activated by falling edge (grounding)
2 = activated by rising edge (disconnecting from GND)
H
0 =
confirmation by turn lights for disarming is needed
(Reset 2)
1 =
confirmation by turn lights for arming and disarming is
needed
2=
confirmation by turn lights for arming and disarming is not
needed so INP1 can be used as an alarm input
I
Do not turn off the GSM
module automatically.
(Reset3)
Turn the GSM module off after
30 minutes of inactivity.
(Reset3)
J
0 = AUX output is a bus for communication with CR-11A modules
1 = AUX output provides power for external sensors
Bold marked
values = factory default
Steps to enroll detectors:
1. The car alarm should be disarmed, ignition on.
2. To enroll the
internal
detectors, send the SMS command MASTER LEARN
INT (To enroll the
external
detectors, send the SMS command MASTER
LEARN EXT)
3. The car alarm beeps 3 times and an LED starts to flash.
4. You can enroll a new detector to the system by inserting its batteries.If
you enroll a first detector, you will erase all detectors from the
associated groups (enroll all of them, which will be used in the group in
sequence).


