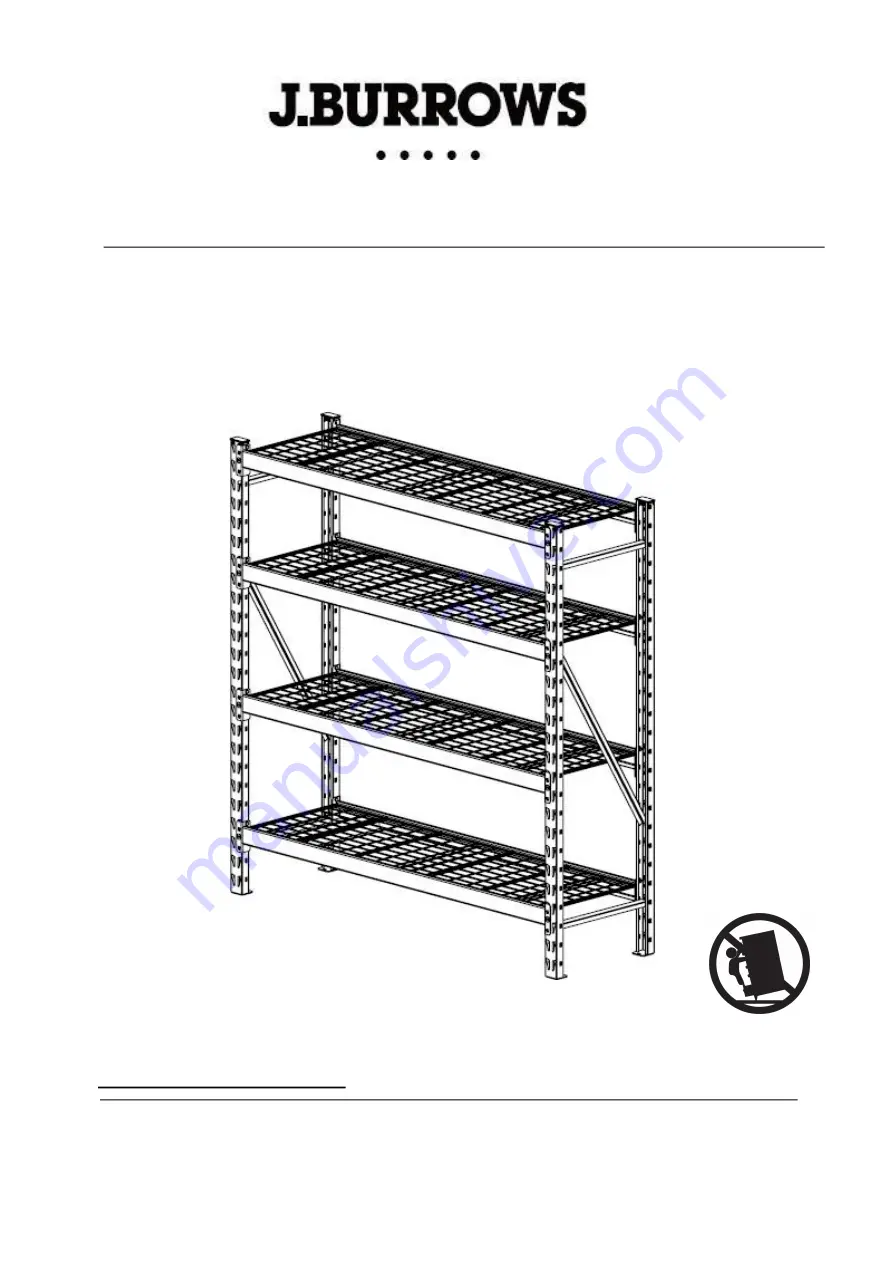
ASSEMBLY INSTRUCTIONS
4 SHELF INDUSTRIAL RACKING
JBIR41810B
This design and instruction booklet is subject to copyright.
www.officeworks.com.au
1 Carton
For spare parts or hardware call 1300 OFFICE
1 /
1
3
Page 1: ...SSEMBLY INSTRUCTIONS 4 SHELF INDUSTRIAL RACKING JBIR41810B This design and instruction booklet is subject to copyright www officeworks com au 1 Carton For spare parts or hardware call 1300 OFFICE 1 13...
Page 2: ...Estimated Assembly Time 30 minutes Customer Service Contact Details People Required General Advice 2 13 Spare Parts Hardware 1300 OFFICE...
Page 3: ...ty Please retain your receipt as proof of purchase to validate your warranty CAUTION Do not use this product unless all couplers and post caps are firmly secured Check that all couplers and post caps...
Page 4: ...Shelf x4 Corner Protection x4 A M6X12 Screw x 24 B C M8X16 Screw x 16 D M8 Nut x 16 E Washer x 16 M6 Nut x 24 4 13 Part Number HWENDCAPIR Included Hardware Part HWIR41410B Furniture Assembly Instructi...
Page 5: ...Furniture Assembly Instructions Style Guide Assembly E Step 1 Step 2 x1 1 C X4 D X4 X4 2 X1 NOTE Make sure all Screws C Nut D Washer E are locked D E C 2 Beam End Clip Tabs 1 5 13...
Page 6: ...Furniture Assembly Instructions Style Guide Step 4 Step 3 Step 5 B X6 A X6 A B 4 2 x1 3 X1 NOTE Make sure all Screw A Nut B are locked 2 Beam End Clip Tabs 1 6 13...
Page 7: ...ure Assembly Instructions Style Guide E Step 6 Step 7 Step 8 C X4 D X4 X4 A B B X6 A X6 4 3 X1 X1 NOTE Make sure all Screws C Nut D Washer E are locked NOTE Make sure all Screw A Nut B are locked D E...
Page 8: ...Furniture Assembly Instructions Style Guide E Step 9 Step 10 2 C X4 D X4 X4 x1 X1 NOTE Make sure all Screws C Nut D Washer E are locked D E C 2 Beam End Clip Tabs 1 8 13...
Page 9: ...Furniture Assembly Instructions Style Guide Step 11 Step 13 A B 3 B X6 A X6 Step 12 4 2 x1 X1 NOTE Make sure all Screw A Nut B are locked 2 Beam End Clip Tabs 1 9 13...
Page 10: ...niture Assembly Instructions Style Guide E Step 14 Step 15 C X4 D X4 X4 B X6 A X6 A B 3 X1 X1 NOTE Make sure all Screw C Nut D Washer E are locked NOTE Make sure all Screw A Nut B are locked D E C 10...
Page 11: ...e tip over To prevent this item from tipping over it must be permanently fixed to a wall An anchor kit suitable for plaster walls is included with this item Different wall materials may require a diff...
Page 12: ...y Place equipment onto shelves evenly and ensure items do not overhang at sides as that can affect the stability of the unit CAUTION The shelving unit is designed to carry up to 1000kg per shelf The p...
Page 13: ...be excluded under the Australian Consumer Law You are entitled to a replacement or refund for a major failure and compensation for any other reasomably foreseeable loss or damage You are also entitled...