MANUAL
– Subject to alteration! Version: August 2022
ipf electronic gmbh
│
Rosmarter Allee 14
-
58762 Altena
-
Germany │ Tel +49 2351 9365
-
0
-
info@ipf-
electronic.com
25
6.5.3
Set up network parameters
On the
Ethernet
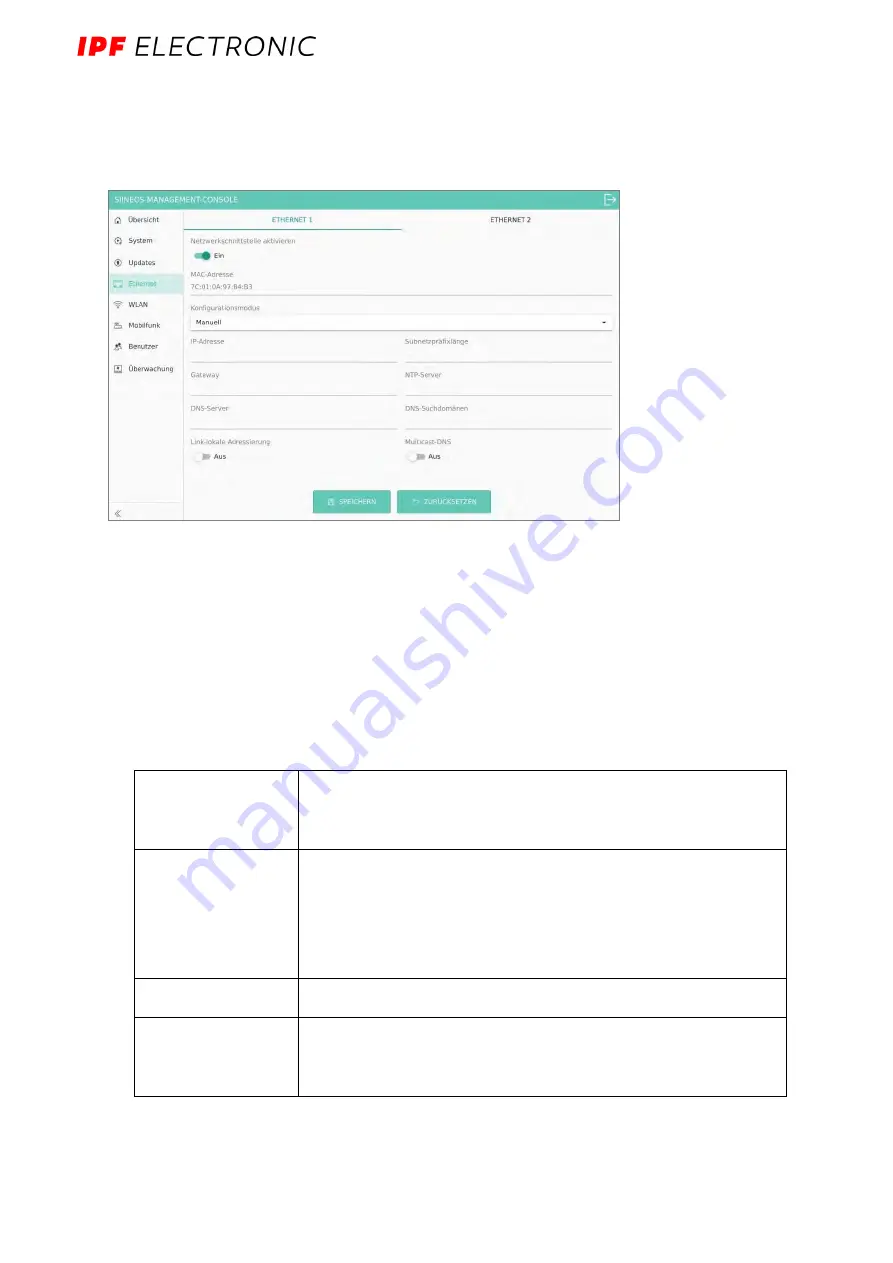
page you can activate/deactivate the network interfaces Ethernet 1 and
Ethernet 2 of your device and enter the respective network parameters.
Fig. 14: "Ethernet" page (UI shown serves only as an example)
1.
First select the Ethernet interface you want to configure via the two tab cards.
2.
To enable the interface, set the
Network interface
slider to
to
On
.
The MAC address printed on the housing of the IoT gateway is displayed.
3.
In the
Configuration Mode
drop-down list, select either
Manual
or
Automatic (DHCP)
,
depending on whether you want to enter the network settings manually or obtain
them automatically via a DHCP server.
4.
If you selected
Manual
, fill in the input fields as follows:
IP address
Enter the desired IPv4 or IPv6 address of the device to be
assigned to the Ethernet 1 or Ethernet 2 interface,
respectively.
Subnet prefix length
Enter the subnet prefix length of the IPv4 or IPv6 address.
For IPv4 addresses, the value
24 is
typically entered here for
networks with subnet mask
255.255.255.0
or the value
16
for
networks with subnet mask
255.255.0.0.
Gateway
Enter the IP address of the gateway.
NTP server (optional)
Enter the IP address or computer name of the time server from
which the device is to obtain its system time.


