Page 4 of 11
5.
Charge the microscope’s battery
The microscope is powered by a lithium ion battery which needs to be charged.
Connect the charger and lead supplied to the micro USB socket on the back of the microscope.
The green light indicates that the microscope is charging. It goes out when the microscope is
charged.
Other micro USB chargers (such as those used with mobile phones) may be used with the
microscope. However, you may find that the microscope charges more quickly with the ioLight
charger and lead.
USB ports on computers are not usually designed to charge devices and may not charge the
microscope properly, even if the green light illuminates. Some computers have special USB charging
ports with a battery label. These are more likely to charge the microscope successfully.
6.
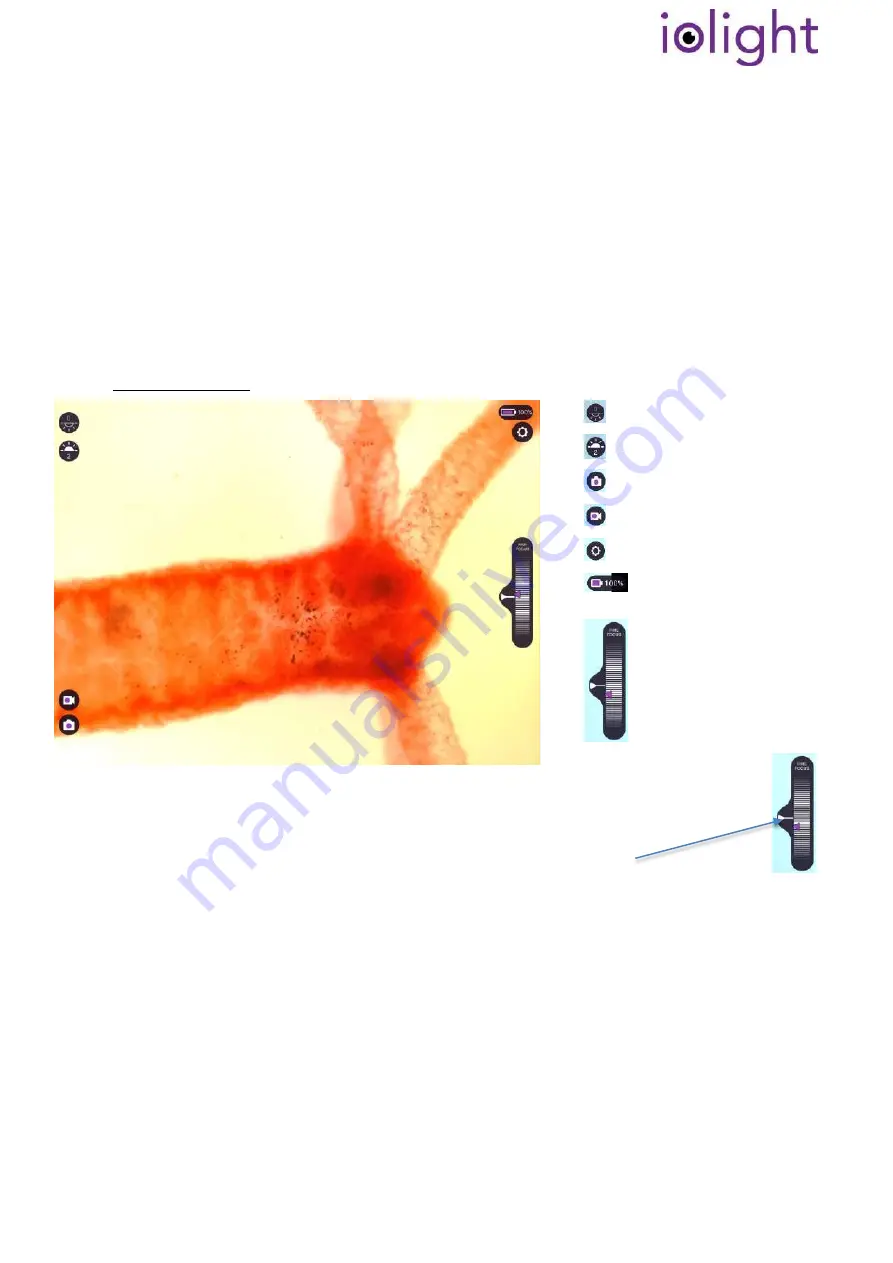
The on-screen controls
6.1.
iPad or iPhone app
The Settings menu:
The Settings menu allows you to:
Go directly to the Photos App to view saved images
Switch on the Scale Grid
Switch off the microscope
You can zoom in on the live image by pinching two fingers together on the screen then moving them apart.
Use HD mode to give fine detail when you are zooming in, see below
(not available on iOS less than 12.4)
.
Resolution:
Saved images are always full resolution (5MP = 2592 x 1944 pixels).
The live video resolution is lower. To see the best quality image and to zoom in, save an image, then
look at the saved image in the Apple Photos App.
The resolution of both the live video and the saved video is the same. For high resolution, press the
Home button on your iPad or iPhone to leave the ioLight App, then open Apple’s
Settings App
(normally located on your home screen). Scroll down to the bottom of the settings menu and tap on
the
ioLight App
settings to switch on High Resolution Mode.
When should I use High Resolution Mode?
Illumination from above sample
Illumination from below sample
Save image
Record video
Settings menu
Microscope battery charge level
(not available on iOS less than 12.4)
Fine focus.
Tap here to centre fine focus


