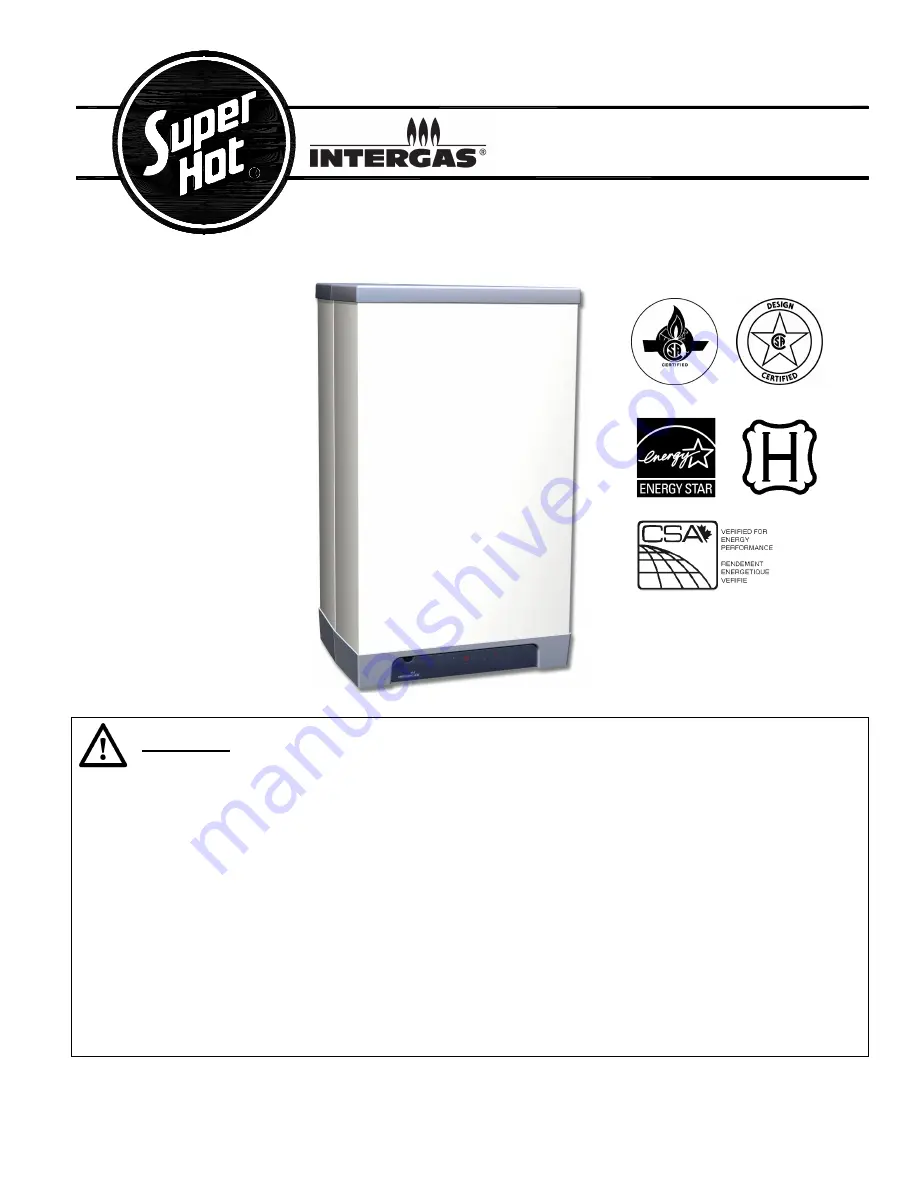
Intergas HSE-125-N Installation And Service Manual Download Page 1


PN7331833 

Model: HSE – 125 – N/P 
Gas-fired Condensing Boiler and 
Instantaneous Water Heater


INSTALLATION AND SERVICE MANUAL


Allied Engineering Company


Division of E-Z-Rect Manufacturing Ltd. 

Manufacturers of Gas and Electric Boilers, Stainless Steel Tanks, Heat Exchangers and Electric Boosters. 

94 Riverside Drive, North Vancouver, BC V7H 2M6 

 Tel: (604) 929-1214 

  www.alliedboilers.com 


WARNING 

If  the  information  in  this  manual  is  not  followed  exactly,  a  fire  or  explosion  may  result  causing 
property damage, personal injury or loss of life.


Do not store or use gasoline or other flammable vapors and liquids in the vicinity of this or any 
other appliance. 


WHAT TO DO IF YOU SMELL GAS 

-  Do not try to light any appliance. 
-  Do not touch any electrical switch; do not use any phone in your building. 
-  Immediately call your gas supplier from a neighbor’s phone.  Follow the gas supplier’s 

instructions. 

-  If you cannot reach your gas supplier, call the fire department. 


Installation  and  service  must  be  performed  by  a  qualified  installer,  service  agency  or  the  gas 
supplier.


Improper, installation, adjustment, alteration, service or maintenance can cause property damage, 
personal injury or loss of life. Read all instructions before installation or service.  


Save this manual for future reference. 

EEV 

246473 

Summary of Contents for HSE-125-N

Page 1: ...store or use gasoline or other flammable vapors and liquids in the vicinity of this or any other appliance WHAT TO DO IF YOU SMELL GAS Do not try to light any appliance Do not touch any electrical swi...

Page 2: ...ves 15 1 4 1 4 Expansion Tank and Make Up Water 15 1 4 1 5 System Bypass and Pressure Head Losses 15 1 4 1 6 Corrosion Prevention Internal 16 1 4 2 DHW Piping System Water Heater 16 1 4 2 1 DHW Piping...

Page 3: ...3 1 CH System Operating Requirements 41 3 2 Pre Startup 41 3 2 1 CH System 41 3 2 2 DHW System 42 3 2 3 Gas Supply 42 3 3 Startup 42 3 3 1 Lighting Instructions 43 3 3 2 Startup Instructions 44 3 3 3...

Page 4: ...Handling Procedure 56 Section 5 Replacement Parts 57 Section 6 Troubleshooting Guide 58 6 1 Possible Problems and Solutions 58 6 2 Burner Fails to Ignite 59 6 3 Burner Ignites with Noise 60 6 4 Burner...

Page 5: ...r and water heater Appliance Central heating CH Domestic hot water DHW also HW Appliance with piping for central heating boiler CH system Appliance with piping for domestic hot water heating DHW syste...

Page 6: ...e USGPM l min 3 6 13 7 Maximum DHW temperature F C 150 65 Electrical data Mains voltage frequency Vac Hz 120 60 Consumed power full load W 110 Consumed power standby W 10 Overall dimensions and weight...

Page 7: ...cover fixing screw J CH manual air vent V High limit not shown K Sight glass and mirror for checking flame W Flue sensor not shown L Air supply Additional Components supplied with appliance 1 Compress...

Page 8: ...5mm 2 6 65mm 2 6 65mm 2 6 65mm 2 6 65mm 3 2 80mm A CH supply 22mm diameter pipe fitting is 22mm to 3 4 NPT male B CH return 22mm diameter pipe fitting is 22mm to 3 4 NPT male C Gas NPT male D Cold wat...

Page 9: ...lely for hot water or solely for heating with the unused system not connected Also the DHW circuit can be connected to a storage hot water tank but cannot be connected to a closed system e g the coil...

Page 10: ...nsulted before installations are made In Canada the installation must conform to the requirements of the authority having jurisdiction or in the absence of such requirements to the Natural Gas and Pro...

Page 11: ...ent etc Structure through which venting will pass must be free and clear for opening i e no hidden conduit telephone cables or other obstructions 1 3 2 MINIMUM SERVICE CLEARANCES Minimum clearances fr...

Page 12: ...nside of an external wall through which sidewall venting passes wall mounting frame B is recommended to provide sufficient clearance for venting elbows Option One Wall mounting strip A Only Refer to F...

Page 13: ...n of the neutralization unit The amount of neutralizer needed will depend on the operation of the appliance To determine the required refill amount check granulate level several times throughout the y...

Page 14: ...is recommended with A make up water loop in the system below the appliance as shown in figure 8 A drain tap at the lowest point of the system An expansion tank Follow section 1 4 1 4 A check valve whe...

Page 15: ...alve and should be no smaller than the outlet of the valve The end of the discharge pipe should not be concealed or threaded and should be protected from freezing Extensive runs traps or bends could r...

Page 16: ...e water heater shall be suitable for use with potable water 2 Flush the hot and cold water system thoroughly to clean out metal powder sand and dirt before connecting it 3 Use compression fittings sup...

Page 17: ...or nearby equipment The discharge pipe must pitch down from the valve and should be no smaller than the outlet of the valve The end of the discharge pipe should not be concealed or threaded and should...

Page 18: ...on by using a soap and water solution Also check for gas leaks at the gas valve outlet when the appliance is on DO NOT USE AN OPEN FLAME INSTALLER MUST IDENTIFY EMERGENCY SHUT OFF DEVICES 1 6 ELECTRIC...

Page 19: ...A 24V and or Frost thermostat 6 7 9 Power supply clock thermostat 6 positive 7 switched live 9 negative 24V max 3VA 8 9 Outdoor sensor 12kOhm 25 C 9 10 Sensor for indirect hot water tank 12kOhm 25 C I...

Page 20: ...oval of an Existing Boiler When an existing appliance is removed from a common venting system the common venting system is likely to be too large for proper venting of the appliances connected to it A...

Page 21: ...nty is void when failure is due to corrosion 1 7 2 AIR INTAKE SYSTEM For a direct vent system DWV drains waste vents PVC CPVC ABS galvanized steel tube and flex aluminum tube can be used for the air i...

Page 22: ...of nearby obstacles In all cases installation shall be in accordance with applicable code s For proper operation the vent terminal must be kept free of snow leaf dropping and other debris at all times...

Page 23: ...s within 3 feet 0 9 m horizontally of the vertical center line of the regulator to a vertical distance of 15 feet 4 6 m The bottom of the vent terminal and the air intake shall be located at least 12...

Page 24: ...6 inches 15 cm for appliances 10 000 Btuh 3 kW 12 inches 30 cm for appliances 10 000 Btuh 3 kW and 100 000 Btuh 30 kW 36 inches 91 cm for appliances 100 000 Btuh 30 kW 6 inches 15 cm for appliances 1...

Page 25: ...nd the flue collar on the top of the appliance The built in sealing rings provide airtight connections The joints of air supply tubes should be sealed by silicone or other means The flue tubes should...

Page 26: ...diameter 80mm horizontal runs 3 5 diameter 80mm 125mm vertical runs 3 5 diameter 80mm 125mm horizontal runs MODEL Min Max Min Max Min Max Min Max AIR TUBE 5 ft 1 52 m 85 ft 26 m 5 ft 1 52 m 85 ft 26 m...

Page 27: ...water to form a liquid filled trap This trap allows condensate to drain while preventing exhaust gases from escaping The condensate should be discharged as per section 1 3 7 3 Always select the venti...

Page 28: ...is to ensure that any condensate in the venting flows back towards the appliance so that the condensate can be disposed of through the condensate trap system installed on the bottom of appliance or at...

Page 29: ...determined based on the applicable code before installing the terminals Keep the end opening of air terminal at least 12 inches 300 mm above the normal snow accumulation that can be expected on the ro...

Page 30: ...rminals Total Concentric Horizontal or Vertical Connection Figure 24 and 27 Figures 24 and 27 are typical installations for the total concentric horizontal and vertical venting systems with a combined...

Page 31: ...Pipe to Concentric Figure 27 Vertical Concentric Venting Figure 26 Vertical Twin Pipe to Concentric Venting Concentric Pipe Adapter Figure 24 Horizontal Concentric Venting 4 7 120mm see note 4 3 110m...

Page 32: ...eed based on both the difference between supply and return temperatures and the set point temperature The amount of gas induced into the blower will depend on the blower speed that has been designed t...

Page 33: ...indicates the following operating condition Off The appliance is not operating but the power supply is connected to the appliance There is no response to any demand for DHW or CH however the frost pro...

Page 34: ...set CH supply temperature In the case of on off thermostat the CH supply temperature is set at the operating panel and remains fixed In the case of an outdoor sensor the CH supply temperature will au...

Page 35: ...input and 1x h Set burner on with maximum DHW input and 2x H Switch off test program and or automatically off after 10 minutes Current operating condition 2 3 2 FROST PROTECTION The appliance has prov...

Page 36: ...ed after a period of 30 seconds the parameter change menu is closed automatically with any changed settings stored Note If an outdoor reset sensor is connected the displayed CH temperature is not a se...

Page 37: ...d as follows to activate the program memory 1 Switch off the appliance by using the On Off button on the service display 2 Simultaneously press the Service and Reset buttons until a 0 appears on the s...

Page 38: ...eset curve 25 C 77 F Setting range 15 C to 30 C 59 F to 86 F Outdoor temperature reset control 8 CH pump off delay time after CH operation 1 Setting range 0 15 minutes 9 CH pump off delay time after e...

Page 39: ...mperature difference between the CH supply and return of the appliance to ensure that it is about 36 F 20 C The table 10 shows an example of the minimum water flow rate required with 36 F 20 C tempera...

Page 40: ...usts the CH supply temperature based on the outdoor air temperature following the reset ratio curve The reset ratio is determined from entering the following parameters in the operating panel 1 CH sup...

Page 41: ...the heating system for cleaning flushing etc The HSE is a condensing appliance with forced air combustion and therefore avoids the typical corrosion and draft problems associated with operating at a l...

Page 42: ...propane is used convert the appliance using the propane conversion kit and following the conversion instructions in section 3 5 2 De aerate the gas pipe at the inlet pressure measuring nipple which i...

Page 43: ...lified service technician to inspect the appliance and to replace any part of the control system and any gas control which has been under water OPERATING INSTRUCTIONS 1 STOP Read the safety informatio...

Page 44: ...k the input rate and adjust the inlet gas pressure to match with rating plate as described in Table 11 of section 3 6 10 Adjust gas air ratio if necessary as described in section 3 6 1 11 Check for pr...

Page 45: ...ner system to become plugged cracked eroded and or dislodged resulting in unsafe operation Check for lifting Flames should not lift excessively from the burner The flames may lift slightly during igni...

Page 46: ...nections for tightness and leaks after appliance is on 10 Change parameter h to the value for propane listed in Table 11 11 Check the gas air ratio and change gas inlet pressure as per section 3 6 1 1...

Page 47: ...0 the CO2 level at low fire setting is 8 9 9 0 For example propane setting The CO2 level at high fire setting is 10 5 the CO2 level at low fire setting is 9 9 10 2 The CO2 level at high fire setting i...

Page 48: ...e 11 Please contact the manufacturer 17 To exit the test mode simultaneously press the and buttons on the operating panel 18 Switch off the appliance using the On Off button on service display 19 Turn...

Page 49: ...ces turned off including their pilot flames Use the following formula INPUT Btu h Seconds in Time Clocked Timed Feet Cubic of Volume x Btu cu ft in Gas of Value Heating High 3600 To ensure accuracy cl...

Page 50: ...rating plate or specified for high altitude Clocked BTU H Input Rate _______________ 3 8 Perform check of temperature controls high limit aquastat and thermostat 3 9 Test any other controls as specifi...

Page 51: ...klist at the beginning of each heating season and in mid heating season In addition the owner or user should have the appliance inspected and cleaned if necessary by qualified service technician or ga...

Page 52: ...ected to a suitable place of disposal to avoid a potential scald hazard 2 Make sure that the discharge pipes of relief valves are full size without any restriction and installed to permit complete dra...

Page 53: ...densate discharge at the bottom of the flue discharge behind the heat exchanger 11 After cleaning fill the condensation trap with water 12 Check the silicone gasket of the front cover for damage crack...

Page 54: ...ubes to appliance case for leaks 3 Verify the input rating following section 3 8 4 Check the CH and hot water supply systems for normal operations 4 2 10 REVIEW THE SERVICE WITH OWNER 1 Review the use...

Page 55: ...nd gas piping connections Gas leaks can also be checked for using a soap solution do not use an open flame to check for leaks Note Propane is heavier than air and pools in low areas in the event of a...

Page 56: ...ce increased levels of nuisance dust and poses increased carcinogenic risk Follow the precautionary measures below before attempting service or access PRECAUTIONARY MEASURES Avoid breathing fibers and...

Page 57: ...ned for replacement under standard company warranties must be properly tagged with Return Goods Authorization Form R G A completely filled in with the appliance serial number etc and shipped to the Co...

Page 58: ...orrect wiring for S1 and S2 Check the cable harness Correct the connections of S1 or S2 3 Flue gas temperature too high Check setting of gas valve Replace sensor S8 4 No flame signal after 4 ignition...

Page 59: ...eplace the gas valve 1 Check the wiring 2 Check the fuse 3 Replace the blower if necessary 1 Clean the blower 1 Purge the gas supply line No No No No No No No No Manual gas shutoff valve is not open P...

Page 60: ...e gas valve 3 Adjust the spark probe gap Weak spark Yes Gas air ratio not adjusted properly Yes No Yes No 1 Replace the spark probe 2 Adjust the spark probe gap Incorrect spark probe gap Yes No Possib...

Page 61: ...ay 1 or 2 1 See section 6 2 burner fails to ignite Burner does not ignite Yes No CH sensor S1 or S2 faulty Yes Pump is not operating Yes No Yes 1 Check the wiring according to the diagram 2 Check the...

Page 62: ...boiler input rating is not set properly Yes No No No water circulation in the system Yes Pump speed not correct or faulty Yes No No Yes 1 Correct the temperature setting see section 2 4 1 item 2 a 2...

Page 63: ...167 1994 0 32 36130 40 104 6653 80 176 1707 5 41 28600 45 113 5522 85 185 1467 10 50 22800 50 122 4609 90 194 1266 15 59 18300 55 131 3863 95 203 1096 20 68 14770 60 140 3253 100 212 952 1 Adjust wate...

Page 64: ...HSE Installation and Service Manual 64 Notes...

Reviews: