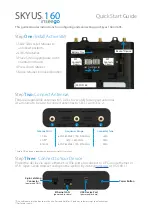
Quick Start Guide
This guide provides instructions for configuring and connecting your Skyus 160 or160S.
Step
One:
Install Active SIM
1. Slide SIM socket retainer to
unlocked position.
2. Lift SIM retainer
3. Place SIM in appropriate slot in
orientation shown.
4. Press down retainer
5. Move retainer to locked position
Torque all applicable antennas to 5 in-lbs to securely fasten your antennas.
At a minimum, be sure to connect antennas to CELL 1 and CELL 2.
Step
Two:
Connect Antennas
* Ensure GPS antenna is located with clear access to GNSS satellites.
Power the device via 4-pin, ethernet, or USB port and connect to a PC using ethernet or
USB. Open a web browser and open the web UI by visiting
my.skyus/
or 192.168.1.1.
Step
Three:
Connect to Your Device
Ethernet LAN
(power and/or data)
Power Button
USB Device Port
(power and/or data)
4-pin Latching
Connector
(power and GPIO)
*Press and release reset button to reset device. Press and hold for 15 seconds to factory reset to default values.
** For future release.
Antenna Ports
Frequency Range
Connector Type
1. CELL 1
690–960 MHz; 1700–2700 MHz
SMA
2. GPS*
1570 - 1580 MHz
SMA
3. CELL 2
690–960 MHz; 1700–2700 MHz
SMA
SKYUS
160
1
2
3
4FF
Contacts
Down
Back of Device
Battery Tray
SIM 1 IN SIM 2 IN
4FF
Contacts
Down
SKYUS 160


