Capacitive Touchscreen
User Manual H12 / SCAMAX® 8x1 - Version 2019.12
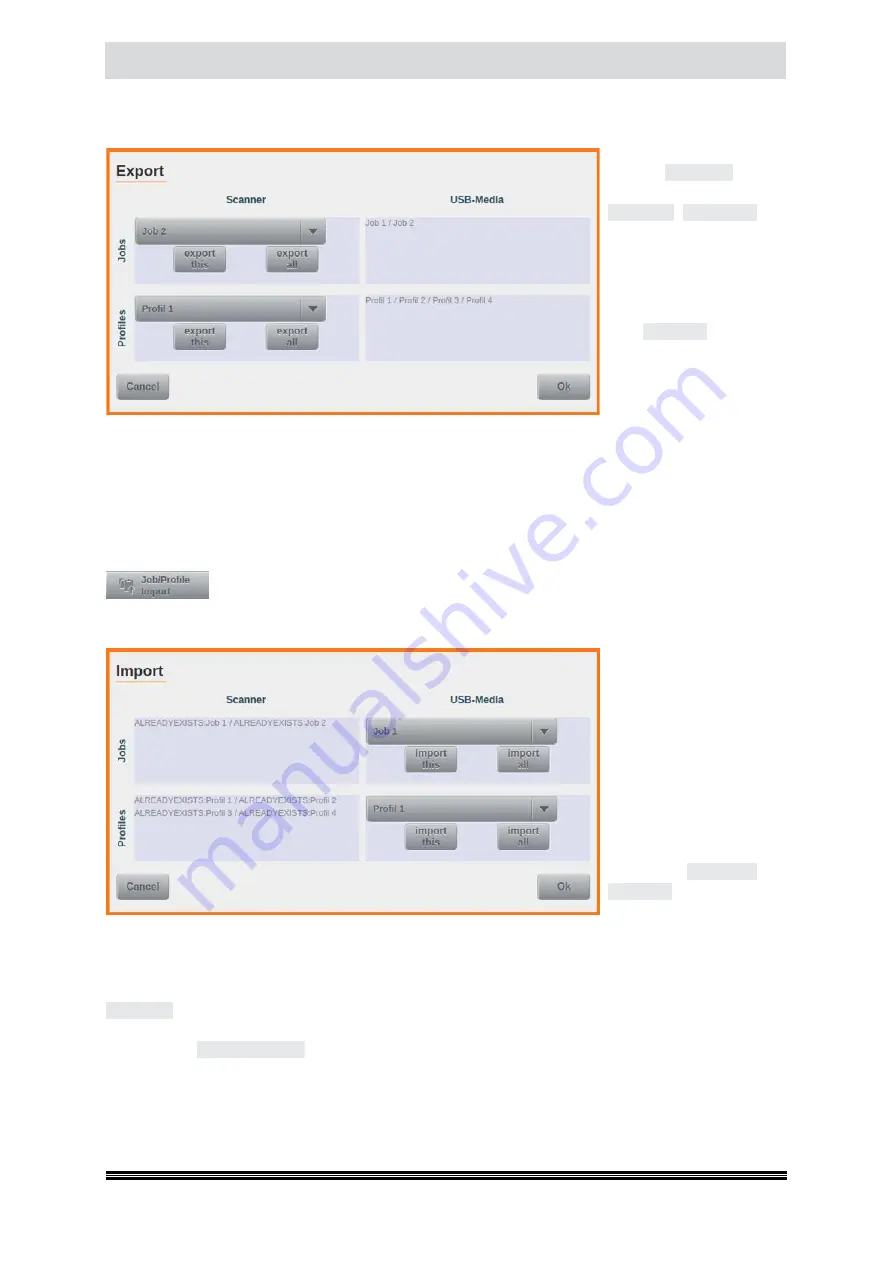
Tapping the button will open a screen, which on the left side (
in column:
Scanner
) offers two drop-
down lists with all Jobs and Profiles available on this scanner. Below each drop-down list there are
two more buttons, one is
labelled
export this
and the
other one is labelled
export all
.
export this
will
register the currently
selected list entry for ex-
port and add its name to
the respective list on the
right (
in column:
USB-Me-
dia
).
export all
will do the
same, but for all the jobs or
profiles in each list. In the
example shown,
Job 1
and
Job 2
were individually
selected, whereas all profiles were collectively earmarked for export. Provided a suitable USB flash
drive is connected to one of the USB2 ports on the scanner, pressing OK will now proceed with export
and create a file labelled j p export.ino, on the USB drive. If no flash drive is present or if it cannot be
written to, a corresponding error message will be created (
see chapter
) and displayed on the
screen.
4.7.6.2. Job/Profile Import
As the counterpart to the export function discussed above, this button will import
previously exported job- and profile settings, from a USB flash drive, into the scanner.
Before proceeding, a USB flash drive containing a
j-p-export.ino
file needs to be inserted into one of
the available USB2 ports. If this file is missing or corrupted, or if the configuration profiles contained
in the file are incompatible
with the firmware on this
scanner, an appropriate er-
ror message will be raised
(
see chapter
If all is well, a screen will
be displayed which is si-
milar to the screen for
the export function (
see
above
). However, the two
drop-down lists and the
buttons for
import this
and
import all
are now located
in the right hand column,
labelled
USB-Media
.The items in the drop-down lists correspond to the job and profile configura-
tions which are contained in the export file on the flash drive. The left hand column of this screen,
labelled
Scanner
, lists the jobs and profiles which have been selected for import. Again, the proce-
dures for selecting jobs and profiles are the same as discussed for export. In the example shown, the
import all
button has been used, for both jobs and profiles. Since here, the exported items are being
re-imported on the same unit, the original jobs and profiles are still present and they are therefore
marked with
ALREADY EXISTS
, on the import screen. If an import is attempted in spite of these war-
nings, an error is thrown (
see chapter
) and displayed on the screen. Provided no jobs or profiles
with identical names are present on the scanner, the import will proceed without error and all newly
imported configurations may be utilized.


