


52
SETTINGS
Retailer Selection
2.
To specify the current date:
n
Tap the date format field.
━
The Set Date dialog displays.
n
Scroll the “month,” “day,” and “year” fields to set the current calendar date, then click
DONE.
━
Click
CANCEL
to close the Set Date dialog and retain the previous date.
3.
To specify the current time:
n
Tap the time format field.
━
The Set Time dialog displays.
n
Scroll the “hour,” “minute,” and “am/pm” fields to set the current time, then click
DONE.
━
Click
CANCEL
to close the Set Time dialog and retain the previous time.
4.
Tap
Set Date and Time
to save your changes.
n
A confirmation message displays. Tap
Close
to close the message.
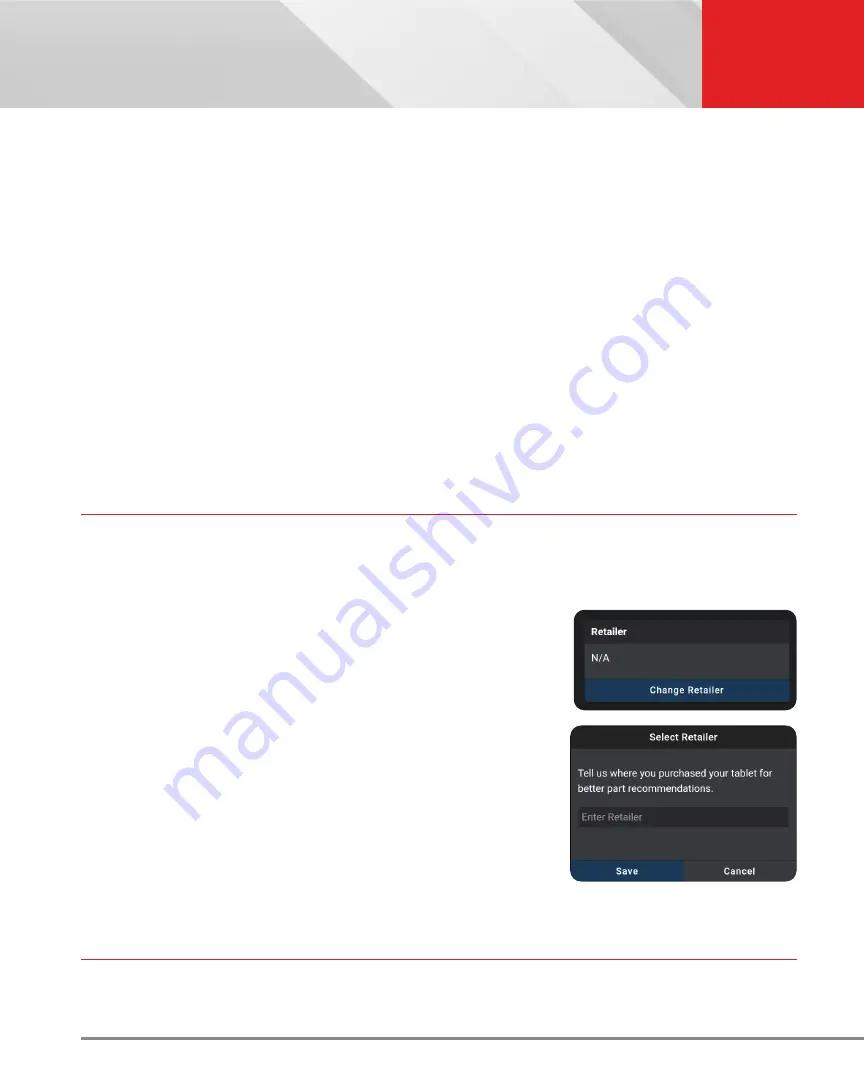
RETAILER SELECTION
To get the best possible parts recommendations, provide the name of the retailer where you purchased your INNOVA
Smart Diagnostic System tablet.
Specifying the Retailer
1.
Scroll the Settings page to the
Retailer
field
.
n
If you previously specified a retailer, the name of the retailer is
shown in the upper left corner of the
Retailer
field
.
2.
Tap
Change Retailer
.
n
The Select Retailer dialog displays.
3.
Tap the
Enter Retailer
text box, then enter the name of the location
from which you purchased your tablet (or another local retailer, as
desired) using the keyboard.
4.
When the desired retailer has been entered, tap the
Save
button to
save your changes and return to the Retailer field.
n
To cancel changes and retain the current retailer, tap
Cancel
to return to the Retailer field.
WI-FI SETTINGS
To access all the features provided in your diagnostic tablet, a local WI-FI network connection is necessary.


