


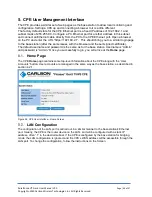


RuralConnect® Gen3 User Manual V1.0
Page | 47 of 57
Copyright
©
2020 Carlson Wireless Technologies, Inc. All Rights Reserved.
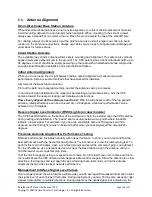
Weatherproofing RF Connections
Once you have mounted and secured your antenna, we recommend completing the installation by
properly weatherproofing the RF connector. The connector must be waterproof, durable, and easy to
remove/service. You will need:
•
Vinyl/electrical tape
•
Rubber (butyl)
tape, a thick, sticky sealing tape, commonly known as “vapor wrap.” We
recommend 3M 3339 tape.
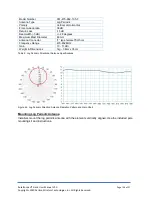
Step 1: Connect Cable Assembly to Antenna or Enclosure
Attach the RF cable F-type male connector to the F-type female connector of the antenna or
enclosure. Ensure connections are clean and dry, then hand-tighten the connector firmly.
Step 2: Seal the Connector Assembly
Tightly wrap the connectors with one layer of electrical tape and
extend 15mm beyond the F-Type male connector. This step is
highly recommended, as it will make removal of the
weatherproofing faster, easier and cleaner.
Tightly wrap the connectors with two layers of butyl tape. Note:
The butyl tape should seal entire connection and extend 40mm
beyond the F-Type male connector (25mm beyond electrical
tape). It is important to cover all of the underlying electrical tape,
or water could creep in underneath the vapor wrap.
Step 3: Cover Rubber Tape with Electrical Tape
Tightly wrap the rubber tape with two layers of electrical tape to
protect the vapor wrap. The electrical tape should extend 25mm
beyond the vapor wrap to ensure full coverage. You can easily
remove the weatherproofing by cutting down one side of the
wrap and peeling it away.
F-Type Female
Connector
F-Type Male
Connector
75-Ohm Coax
Electrical Tape
Figure 45: Step 1: Securing RF Cable to Radio or Antenna
Figure 47: Step 3. Covering Rubber
Tape with Electrical Tape
Figure 46:Step 2: Seal the Connector
Assembly