


RuralConnect® Gen3 User Manual V1.0
Page | 26 of 57
Copyright
©
2020 Carlson Wireless Technologies, Inc. All Rights Reserved.
Connecting to the Base Station
To begin the login process, start by plugging the base unit into your Ethernet network.
You will use a web browser to connect to the web-
based Graphical User Interface, or “GUI”. From a
computer on your LAN, open a web browser and browse to “http://{ip address}”. If you do not know
the IP address, or for more information, see Section 3.4.1: Finding the Base Station.
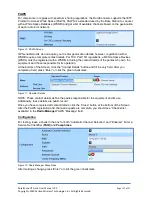
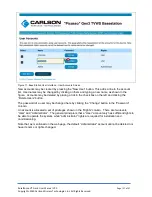
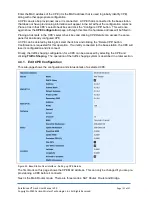
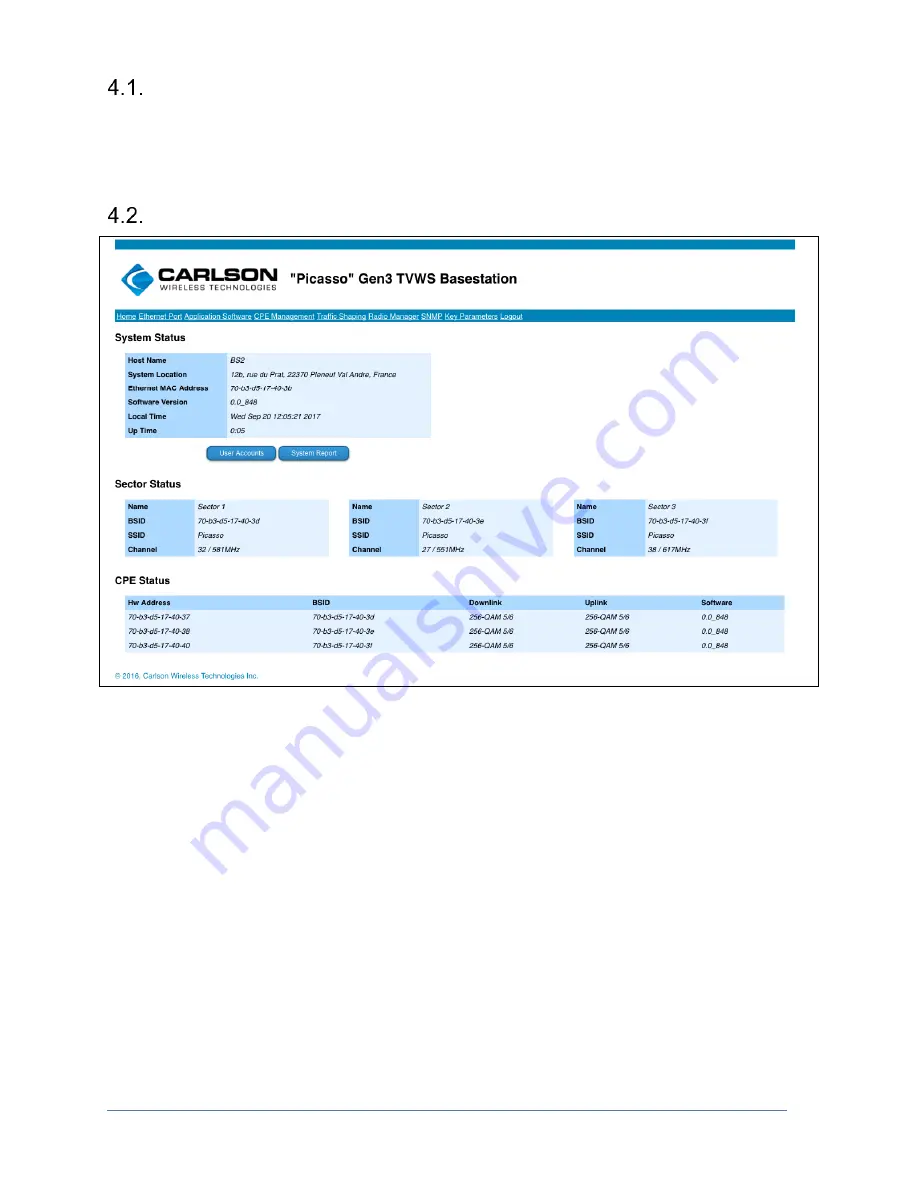
Home
Figure 16: Base Station User Interface - Home Screen
The first page shown after login is the
Home
page. Its primary purpose is to display summary
system, sector and link status information and allow access to the other status and configuration
pages. There are three sections:
At the top is a block containing system information. The host name and system location may be
changed by clicking on them and typing new values. There is also a button that allows an
administrator to manage the device’s accounts.
In the middle is a summary of the state of the radio sectors. There will be an entry for each radio
card installed in the system, the figure shows a base station fully populated with three. The sector
names may be changed here, but everything else is configured through the
Radio Manager
top
level page (accessed through the menu bar at the top).
At the bottom is a list showing the Customer Premise Equipment, o
r “CPEs”. that are currently
connected to this base station through the radio. More information and access to CPE configuration
is available on the CPE Management top level page (from the Menu Bar).
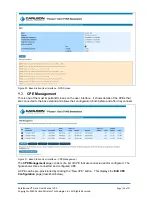
4.2.1. User Accounts
Clicking the
Home
screen
’s “User Accounts” button will display this page (see below):