Cheetah Pregius Camera with GigE Vision
®
Interface – User Manual
August 27, 2019
Page
98
of
123
Rev 1.0
4.8 Capture Panel
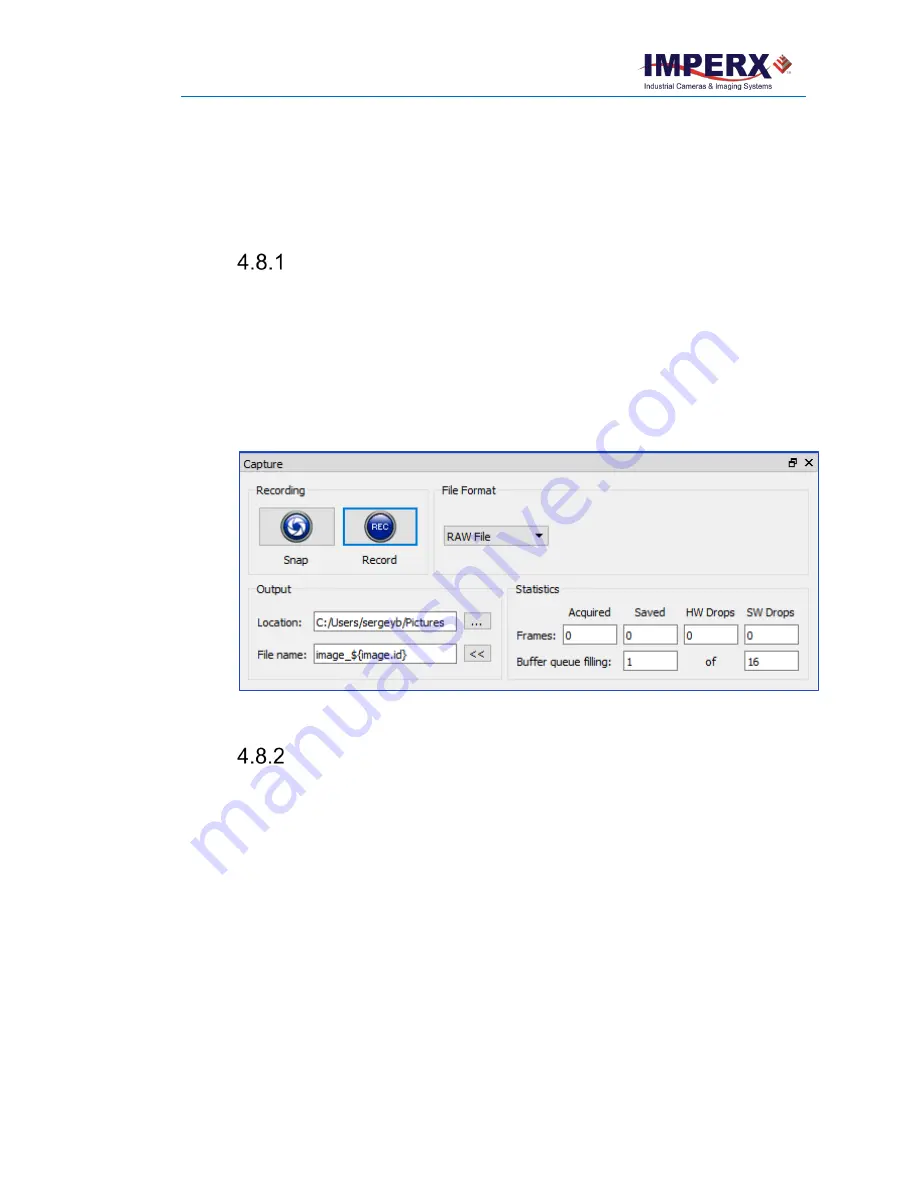
The Capture panel provides options for recording images and video and saving them to the
computer hard drive. Click the Capture tab at the bottom of the IpxPlayer screen to access the
panel.
Recording Acquired Images
Use the Recording section of the Capture screen to record snapped images or video images.
The screen displays real-time capture information during recording.
•
Snap
. Saves the current image to the hard drive.
•
Record
. Starts or stops saving video to the hard drive.
•
Statistics
. Shows the number of frames acquired, saved, and dropped during the
current capture session. Dropped frames are frames received from the camera but
not transferred due to a lack of host buffers.
•
Buffer Queue Filling
. Shows the current filling status of the capture frames queue.
Figure 64:
The Capture panel saves images and video
Saving Image Output
The Output section of the Capture screen lets you configure the location and format of
saved images in the computer.
•
Output Location
. You determine where to save files on the computer.
•
File Name
. Defines the file name template.
•
File Format
. Allows you to specify the output file format from a drop-down list.
-
RAW File. This is an unprocessed file format.
-
BMP Image. (8bpp BMP for grayscale, 24bpp for Color images)
-
JPG Image. You can adjust the image quality. Default is 85%.
-
TIFF Image. Normalized option affects pixel intensity values.
-
AVI Movie. Options are – you can set the frames per second or get the current
frames per second from the camera


