13
1-12
1-13
1
3
4
5
6
7
8
2
C33
C33
1.15 CONCENTRIC VERTICAL KIT
INSTALLATION.
Type C configuration, sealed chamber and
fan assisted.
Concentric vertical intake and exhaust kit. This
vertical terminal is connected directly to the out-
side of the building for air intake and flue exhaust.
N.B.:
the vertical kit with aluminium tile en-
ables installation on terraces and roofs with a
maximum slope of 45% (approx. 25°) and the
height between the terminal cap and half-shell
(260 mm) must always be observed.
Vertical kit with aluminium tile Ø 80/125.
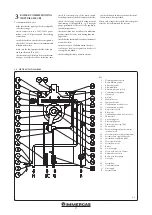
Kit assembly (Fig. 1-13): install the 80/125 Ø
adapter (1) on the central hole of the boiler fully
home. Slide the gasket (2) along the adapter (1)
up to the relevant groove, Fix it to the lid using
the previously-disassembled sheet steel plate (3)
Installation of the fake aluminium tile: replace
the tiles with the aluminium sheet (5), shaping
it to ensure that rainwater runs off. Position the
fixed half-shell (6) on the aluminium tile and
insert the intake-exhaust pipe (7). Fit the 80/125
Ø concentric terminal pipe with the male end
(6) (smooth) to the female end of the adapter
(1) (with lip gasket) up to the stop; making sure
that the wall sealing plate (4) has been fitted, this
will ensure sealing and joining of the elements
making up the kit.
• Maximum length (MAX L) (Fig. 1-13). The kit
with this configuration can be extended up to
a
max. measurement of 11.5 m with Victrix Pro
35 2ErP and 18.0 m with Victrix Pro 55 2ErP
,
including the terminal.
The kit includes:
N° 1 - Adaptor Ø 80/125 (1)
N° 1 - Gasket (2)
N° 1 - Ring (4)
N° 1 - Aluminium tile (5)
N° 1 - Fixed half-shell (6)
N° 1 - Int./exhaust concentric
terminal Ø 80/125 (7)
N° 1 - Mobile half-shell (8)
Summary of Contents for VICTRIX PRO 35 2ErP
Page 1: ...IE Instruction and warning book VICTRIX PRO 35 55 2 ErP 1 041662ENG...
Page 2: ......
Page 38: ...38 3 15 1 6 8 9 9 12 12 10 11 13 13 13 13 A A Rif A 7 7 Ref A...
Page 49: ...49...
Page 50: ...50...
Page 51: ...51...


