ILVE ILD60B Instruction Manual Download Page 4

SAFETY 

Precautions before using 

x

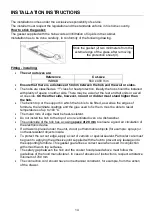
  Unpack all the materials. 

x

  The installation and connection of the appliance must be done by approved and qualified 

specialists. The manufacturer cannot be responsible for damage caused by installation or 
connection errors. 

x

  When used, the appliance must be correctly installed in a kitchen unit and an adapted and 

approved work surface. 

x

  This domestic appliance is exclusively for the cooking of food, to the exclusion of any other 

domestic, commercial or industrial use.  

x

  Remove all labels and self-adhesives from the ceramic glass. 

x

  Do not change or alter the appliance. 

x

  The cooking plate cannot be used as freestanding unit or as a working surface.  

x

  The appliance must be grounded and connected in compliance with local standards. 

x

  Do not use any extension cable to connect the hob. 

x

  The appliance cannot be used above a dishwasher or a tumble-dryer: steam may damage 

the electronic appliances. 

x

  This appliance is not intended to be operated by means of external timer or separate 

remote control system 

Using the appliance 

x

  Switch the heating zones off after use. 

x

  Keep an eye on the hob when cooking with grease or oils as they may quickly ignite.  

x

  Be careful not to burn yourself during or after using the appliance. 

x

  Make sure no cable of any fixed or moving appliance makes contact with the glass or the 

hot saucepan.  

x

  Magnetic objects (credit cards, floppy disks, calculators) should not be placed near the 

appliance when in use.  

x

  Metallic objects such as knives, forks, spoons and lids should not be placed on the hob 

surface as they can get hot. 

x

  In general, do not place any metallic object except heating containers on the glass 

surface. In case of untimely activation or residual heat, they may heat, melt or even burn.  

x

  Never cover the appliance with a cloth or a protection sheet. This may become very hot 

and catch fire.  

x

  This appliance is not intended for use by persons (including children) with reduced 

physical, sensory or mental capabilities, or lack of experience and knowledge, unless they 
have been given supervision or instruction concerning use of the appliance by a person 
responsible for their safety. 

x

  Children should be supervised to ensure that they do not play with the appliance. 

x

  This appliance is not intended to be operated by means of an external timer or separate 

remote-control system. 

Summary of Contents for ILD60B

Page 1: ...INSTRUCTION MANUAL FOR INDUCTION HOB MODEL ILD60B ...

Page 2: ...OPEN 24 7 ILVE ACCESSORIES ONLINE SHOP VY H PKL YHUNL VM JVɈLL THJOPULZ WVKZ HUK V OLY 03 HJJLZZVYPLZ H OL JSPJR VM H I VU ZOVW PS L JVT H ...

Page 3: ...OTECTIONS 5 DESCRIPTION OF THE APPLIANCE 5 TECHNICAL CHARACTERISTICS 6 CONTROL PANEL 6 USE OF THE APPLIANCE 7 SENSITIVE TOUCH 7 DISPLAY 7 VENTILATION 7 STARTING UP AND APPLIANCE MANAGEMENT 7 BEFORE THE FIRST USE 7 INDUCTION PRINCIPLE 7 STARTING UP 8 PAN DETECTION 8 RESIDUAL HEAT INDICATION 8 BOOSTER FUNCTION 8 TIMER 9 CONTROL PANEL LOCKING 9 COOKING ADVICE 10 PAN QUALITY 10 PAN DIMENSION 11 EXAMPL...

Page 4: ...e heating zones off after use x Keep an eye on the hob when cooking with grease or oils as they may quickly ignite x Be careful not to burn yourself during or after using the appliance x Make sure no cable of any fixed or moving appliance makes contact with the glass or the hot saucepan x Magnetic objects credit cards floppy disks calculators should not be placed near the appliance when in use x M...

Page 5: ...rrect ventilation x Never put flammable objects ex sprays into the drawer under the vitroceramic hob Cutlery drawers must be resistant to heat Precautions in case of appliance failure x If a defect is noticed switch off the appliance and turn off the electrical supply x If the ceramic glass is cracked or fissured you must unplug the appliance and contact after sales service x Servicing must be don...

Page 6: ...mal pan detection INB64B 7100 W Front left Rear left Rear right Front right 190 mm 170 mm 220 mm 155 mm 1400 W 1400 W 2300 W 1400 W 2000 W 3000 W 90 mm 90 mm 100 mm 90 mm The given power may change according to the dimensions and material of the pan Control panel key Selection key Timer keys key Power display On off key Timer and Power display ...

Page 7: ...reduces his speed and stops automatically when the electronic circuit is cooled enough STARTING UP AND APPLIANCE MANAGEMENT Before the first use Clean your hob with a damp cloth and then dry the surface thoroughly Do not use detergent which risks causing blue tinted colour on the glass surface Induction principle An induction coil is located under each heating zone When it is engaged it produces a...

Page 8: ...off of a heating zone or the complete stop of the hob the heating zones are still hot and indicates H on the display The symbol H disappears when the heating zones may be touched without danger As far as the residual heat indicators are on light don t touch the heating zones and don t put any heat sensitive object on them There are risks of burn and fire Booster function The booster function P gra...

Page 9: ...eat the process x Automatic stop at the end of the cooking time As soon as the selected cooking time is finished the timer displays blinking 00 and a sound rings To stop the sound and the blinking it is enough to press any key x Egg timer function Action Control panel Display Activate the hob Press key 0 or H Select Timer Press simultaneously and Timer 00 min Decrease the time Press key 00 wents t...

Page 10: ...ed materials aluminium and stainless steel without ferromagnetic bottom copper brass glass ceramic porcelain The manufacturers specify if their products are compatible induction To check if pans are compatible x Put a little water in a pan placed on an induction heating zone set at level 9 This water must heat in a few seconds x A magnet sticks on the bottom of the pan Certain pans can make noise ...

Page 11: ...ng Boiling water Steaks omelettes fried dishes Water P Frying roosting Boiling water scallops steaks Boiling significant quantities of water MAINTENANCE AND CLEANING Switch off the appliance before cleaning Do not clean the hob if the glass is too hot because there is a risk of burn x Remove light marks with a damp cloth with washing up liquid diluted in a little water Then rinse with cold water a...

Page 12: ...ed in C The existing setup has been cancelled Note For induction hobs with 3 cooking zones The rear right zone b doesn t exist so push 2 times on the front right zone a that means a a c d III Second step new setup 1 Take a ferromagnetical pot with a minimum diameter of 16 cm 2 Select a cooking zone by pushing on the corresponding O key 3 Place the pot on the area to be set 4 Wait until the C displ...

Page 13: ... hob is overheated let it cool and then turn it on again The control panel displays E3 ou E7 x The pan is not adapted change the pan The control panel displays E6 x Defective network Control the frequency and voltage of the electrical network The control panel displays E8 x The air inlet of the ventilator is obstructed release it The control panel displays E C x Configuration error Set the table a...

Page 14: ... glue used to fix them must be able to resist temperatures of up to 100 C x The mural rods of edge must be heat resistant x Do not install the hob to the top of a non ventilated oven or a dishwasher x The underside of the hob has a casing space of 20 mm to ensure a good air circulation of the electronic device x If a drawer is placed under the unit do not put flammable objects for example sprays o...

Page 15: ... the earth wire Respect the connection diagram The connection box is located underneath at the back of the hob casing To open the cover use a medium screwdriver Place it in the slits and open the cover CONNECTION OF THE HOB FOR INB885B calculated with the simultaneous factor following the standard EN 60 335 2 6 1990 Setting up the configurations For the various kinds of connection use the brass br...

Page 16: ...J PS L JVT H PUJS KPUN I UV SPTP LK V H KHTHNL OYV NO TPZ ZL PUJS KPUN MHPS YL V THPU HPU ZLY PJL VY ZL P O WYVWLY JHYL ULNSLJ HJJPKLU VY VYKPUHY LHY HUK LHY PUJS KPUN KL LYPVYH PVU VM WHY Z HUK HJJLZZVYPLZ HUK NSHZZ IYLHRHNL I ZL MVY W YWVZL MVY OPJO OL 03 WYVK J HZ UV ZVSK VY KLZPNULK J ZL VY PUZ HSSH PVU OPJO PZ UV PU HJJVYKHUJL P O HU ZWLJPÄLK PUZ Y J PVUZ MVY ZL VY PUZ HSSH PVU K ZL VY VWLYH ...

Page 17: ... OL VW PVU VM 03 V P YLWSHJPUN VY YLWHPYPUN OL KLMLJ P L WHY VM OL 03 WYVK J PP WH PUN OL JVZ VM YLWSHJPUN VY YLWHPYPUN OL KLMLJ P L WHY VM OL 03 WYVK J PPP YLWSHJPUN OL 03 WYVK J VY P WH PUN OL JVZ VM YLWSHJPUN OL 03 WYVK J L 6 Y NVVKZ JVTL P O N HYHU LLZ OH JHUUV IL L_JS KLK UKLY OL Z YHSPHU VUZ TLY 3H V HYL LU P SLK V H YLWSHJLTLU VY YLM UK MVY H THQVY MHPS YL HUK MVY JVTWLUZH PVU MVY HU V OLY ...

Page 18: ...SLWOVUL 5 TILY 03 ZOV YVVTZ HYL VWLU KHPS MYVT HT WT HUK H YKH Z HT WT I HWWVPU TLU VUS VU H YKH Z PS L JVT H 5 LHK 6ɉJL 4VVYL YLL 3LPJOOHYK 0 VVYHR 9VHK HTILY LSS 83 H LUKPZO 9VHK VVYWHYVV 5 UP V L YLL 6ZIVYUL 7HYR 5L ALHSHUK 76 V_ VJRI YU OYPZ JO YJO ...

Reviews: