background image

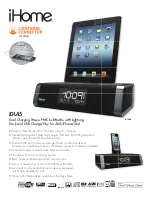
Summary of Contents for IC609

Page 1: ...LI SETTM 6 SETTING 11IE CLOCK MANUALLY 6 SETTING ruE ALARM 7 USING ruE DAYLIGHT SAVINGS TIME FEATURE 7 DOCKING AN IPOD TO THE UNIT 8 PLAYING ADOCKED IPOD 8 TUNING 11IE AMJFM RADIO 9 SAVING AN AM OR FM...

Page 2: ...ctions 8 Do not install near any heat sources such as radiators heat registers stoves or other apparatus includihg amplifiers that produce heat 9 Do not defeat the safety purpose ofthe polarized or gr...

Page 3: ...Connect the correct docking bracket onto the 1 Press the Power Button to turn the unit Dock for iPod and dock the iPod on 2 Press the Source Button to select AM or FM radio modes 3 Press the Thne or...

Page 4: ...nd found to comply with the limits for a Class B digital device pursuant to Part 15 of the FCC Rules These limits are designed to provide reasonable protection against harmful interference in a reside...

Page 5: ..._ _ DC Power Backup Battery Requires 1 CR2025 battery pre installed The backup battery is for saving the time during brief power outages The unit cannot prefonn any of its normal functions when powere...

Page 6: ...Press and hold the Clock Adjust Button AlOFF POWER ClK ADJ PRESET 00 SOURCE All Use the map below to find your time zone While holding the ClockAdjust Button press the Time Zone Button to adjust the...

Page 7: ...Button to finish setting the alarm To cancel the alarm press and hold the Alarm 1 or Alarm 2 Button and press the Source Button repeatedly until the alarm source icon on the display disappears PRESET...

Page 8: ...tor inside the dock TVhen the unit is plugged in it will charge the docked iPod I PLAYING A DOCKED IPOD Follow the directions for Docking an iPod to the Unit 1 Press the Source Button to switch the un...

Page 9: ...AM or FM radio modes 3 Press the Tune or Thne Buttons to tune the AM or FM radio Extend the FM wire antenna to improve FM reception An AM antenna is built into the unit Adjust the position of the uni...

Page 10: ...UNIT CONTROLS FEATURES 01 02 03 06 07 08 09 10 POWER SNOOZE 11 12 I J TIME ZONE DIMMER 10...

Page 11: ...9 minutes after it sounds Ll lIT CONTROL GLOSSARY 08 Rewind Tune Button Fast Forward Tune Button Press the Rewindffune Button or Fast Forwardffune Button to skip from one track to the next on a docke...

Page 12: ...REMOTE CONTROLS FEATURES 17 18 POWER 19 E3 M 20 21 22 23 e M 24 25 CHAPTER ALBUM PLAYLIST VOL BASS TREBLE 26 27 12...

Page 13: ...ems on a docked iPod Press the M M Button to cycle through preset AM and FM radio stations 22 Select Button Press the Select Button to make selections in the menus of a docked iPod 23 ShufOe Button Pr...

Page 14: ...REMOTE CONTROLS FEATURES 29 30 28 E 31 32 33 34 M ST MO 35 CHAPTER ALBUM PLAYLIST VOL 36 BASS TREBLE 14...

Page 15: ...of the unit 28 Source Button Press the Source Button to switch between iPod Aux AM and FM modes 29 Menu Button Press the Menu Button to move to the previous menu on a docked iPod 30 Sleep Snooze Butt...

Page 16: ...ly replace plastic with recyclable paper Recycled fiber board in place of the polyfoam in packing boxes Recycled plastics in place of the virgin material in product construction I INTERNATIONAL SUPPOR...

Page 17: ...0GB 30GB iPod e 4th generation color display 40GB 60GB iPod shuffle 1st generation 512MB 1GB iPod nanG e 0 1st generation 1GB 2GB 4GB iPod e 5th generation video 30GB iPod e 5th generation video 60GB...

Page 18: ...uleur 20Go 30Go I iPod e o 4eme generation couleur 40Go 60Go iPod shuffle 1ere generation 512Mo lGo iPodnano e 0 1ere generation lGo 2Go 4Go i iPod e o 5eme generation video 30Go i iPod e o 5eme gener...

Page 19: ...lNFORMACIONES AL RESPECTO Garantie Limitee 90 Jours Lc construcleur garanlll ce prodUlI al acheleur initial contre lout de aut de materiel ct de fabrication en conditions nonnates pour une pCTlode de...

Page 20: ...t of the product including the antenna Damage to external media such as DVD CD LP tape and or memory devices are not covered nor is the cost incurred in shipping the unit for warranty repair Under no...

Reviews: