INTRODUCTION
Thank you for purchasing the ikan V8000 LCD Monitor. We know you will be satisfied with our “V” series monitors.
Please visit www.ikancorp.com for more information on our current and future products including our award-winning
fluorescent studio lights and light accessories.
PACKAGE INCLUDES
V8000 LCD Monitor
AC Power Adapter
A/V Cable
VGA Cable
Remote Control
GETTING STARTED
1. Getting power to the monitor.
a) Plug the AC adapter into the power jack on the bottom left of the rear of the monitor.
2. Connecting the A/V (audio/Video)
a) Plugging up the A/V cable to the bottom of the monitor gives you many modes for video input.
(You can switch from these modes by pressing the “PC/AV” button on the monitor)
Checked by
MENU
AV/PC
Q
UICK
S
TART
G
UIDE /
V8000 8”LCD Monitor
3903 Stoney Brook Dr. Houston TX 77063 | +1.713.272.8822 | www.ikancorp.com | [email protected] | © 2009 ikan Corporation. All right reserved.
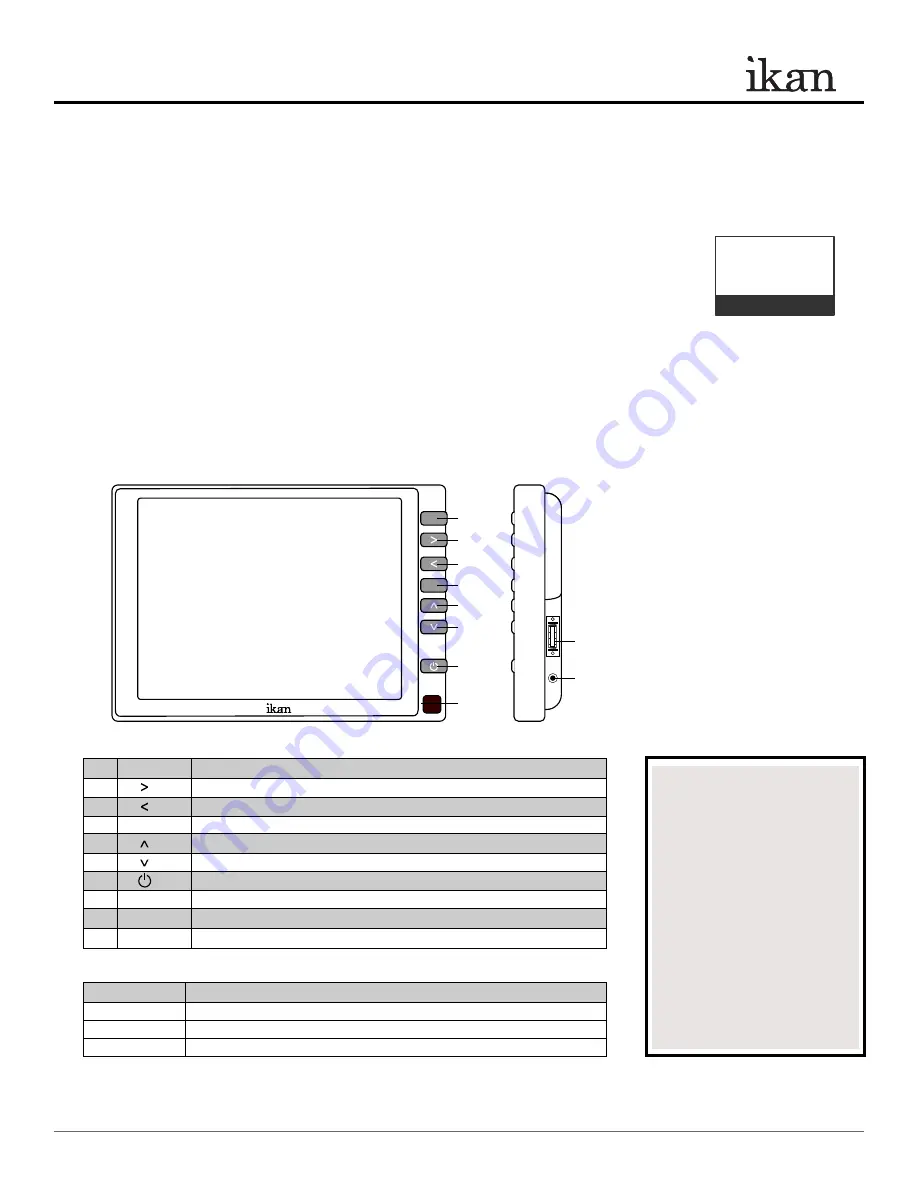
1. AV/PC
Switch between AV or PC modes.
2.
Volume up; adjust the value of setting function.
3.
Volume down; adjust the value of setting function.
4. MENU
Access to all monitor settings: Color, Function, OSD and etc.
5.
Selection key; adjust the value of setting function.
6.
Selection key; adjust the value of setting function.
7.
Power on/off.
8.
Infrared receiving window.
9.
AV input jack
10.
DC 12V input jack
Video Modes
Description
Video-1
The yellow AV cable is your Video-1
Video-2
The red AV cable is your Video-2
VGA-Mode
Using the VGA cable enables you to use you computer as a video source.
1
2
3
4
5
6
7
8
9
10
NOTE:
Image Flip Instruction
► Go to FUNCTION under MENU
setting
■ Reset
Back to original setting
■ LR Rotation
Flip image horizontally
■ UD Rotation
Flip image vertically


