background image

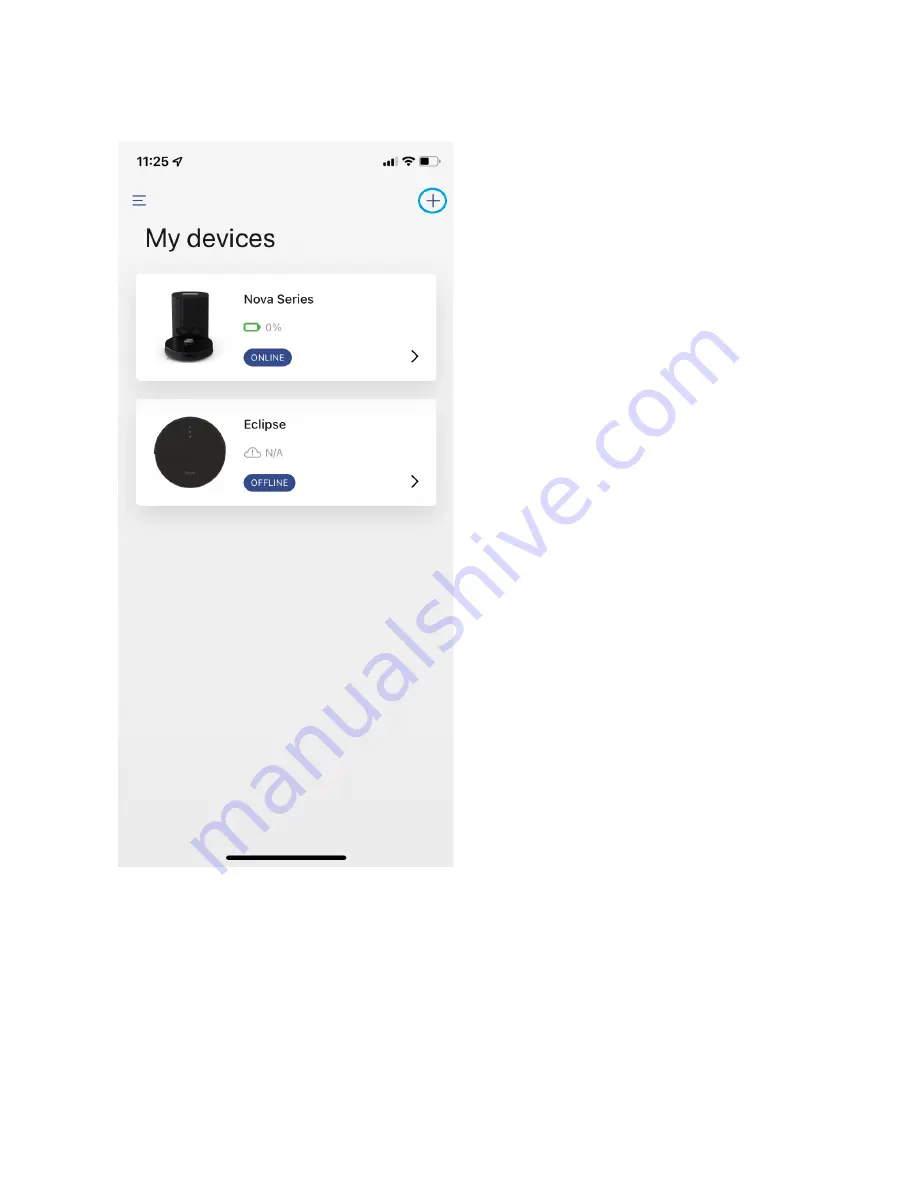
Step 1:

 Select “Add New Device” or the 

“+”.

Some additional tips for the best 
connection process:

*

Fully charge your AUTOVAC before 

connecting.

*

Make sure you have your phone and 

AUTOVAC near your Wi-Fi router.

*

If you have two Wi-Fi networks and 

one network name includes “5G”, go 
into your phone's Wi-Fi settings and 
select the “i” for that network and 
choose “Forget Network”.

Summary of Contents for AUTOVAC NOVA

Page 1: ...on process Fully charge your AUTOVAC before connecting Make sure you have your phone and AUTOVAC near your Wi Fi router If you have two Wi Fi networks and one network name includes 5G go into your phone s Wi Fi settings and select the i for that network and choose Forget Network ...

Page 2: ...Step 2 Select your AUTOVAC model ...

Page 3: ...sure your phone is connected to your 2 4 GHz network If your phone is NOT connected to your 2 4 GHz network completely close the app and connect to the 2 4 GHz network in your phones Wi Fi settings You will want to make sure you also have the correct password to your 2 4 GHz network ...

Page 4: ... not turn your AUTOVAC on in the last step proceed by holding the Power button on your AUTOVAC for 5 seconds to turn on your AUTOVAC If your AUTOVAC is already on select My AUTOVAC is powered on and go to the next step ...

Page 5: ... ensure Nova s Wi Fi is being projected press and hold both the Power and Home buttons simultaneously until Nova says Wi Fi has been reset Eclipse Juno Make sure the unit is turned on and then press and hold the Home button on the unit until you hear a beep The Wi Fi light should then start flashing ...

Page 6: ...d and Connect If your 2 4 GHz WI Fi did not auto fill on this step you will need to completely close the app and open your phone s Wi Fi settings Turn your phone s Wi Fi off for 3 seconds and then turn it back on Make sure that your phone reconnects to your 2 4 GHz WI FI network Then reopen the app and follow steps 1 6 ...

Page 7: ...Step 7 Select Go to Settings to be taken to your phone s Wi Fi settings ...

Page 8: ...ere are the steps for each model Nova Halo To ensure Nova s Wi Fi is being projected press and hold both the Power and Home buttons simultaneously until Nova says Wi Fi has been reset Eclipse Juno Make sure the unit is turned on and then press and hold the Home button on the unit until you hear a beep The Wi Fi light should then start flashing ...

Page 9: ...e iHome Clean option shown in the top left circled to go back to the app When connected to the AUTOVAC network you may see under the network No Internet Connection or Unsecured Network This is because it is a temporary network You will want to stay connected to the AUTOVAC network ...

Page 10: ...Step 10 After connecting to the AUTOVAC network and going back to the app you should be taken to this screen Leave the app open to allow your AUTOVAC to connect to the app This can take a few moments ...

Page 11: ......

Reviews: