background image


24


iGage

 iG8 User Manual

Setting up a iG8 UHF Base Rover Pair 

The iG8 system includes internal Satel Transmit / Receive radios in all Base and Rover receivers.  

‘Base’ and ‘Rover’ receivers are identical and are labeled for setup convenience.  

They can be interchanged at any time. 

Configuring the iG8 UHF Base 

Choose a Great Location for the Base 

The location of your base greatly impacts the success of your survey. There are two primary concerns: 

1.


Minimizing multipath and obstructions between the base and the sky 

2.


Maximizing the effective range of the UHF radio which is broadcasting corrections to the rover 

The base does not need to be located at a control point or parcel corner. You can locate the Base at an optimum location 
for tracking GNSS signals and broadcasting corrections, then perform a single (or multiple) point Rover localization. It is 
better to localize your rover than to use a base that is under canopy or in a deep canyon. 

Any multipath or obstructions at your base will affect every single shot at your rover, just as if the multipath existed at 
the rover. Your primary concern should be finding an open location for the base that minimizes canopy and multipath. 

A clear view of the sky above a 10 degree mask is very important. Partially obstructed/masked satellites (through tree 
branches) will increase the range of elevation measurements that the rover observes.  

When using a UHF radio, your ability to place the UHF antenna in a high location with the minimum of obstructions to 
your working area is also important however the best location for your base is the spot that provides the clearest view of 
the sky. 

Base Radio Battery 

iGage does not provide an external battery for use with the Base as they are difficult to safely ship and you can easily 
procured a suitable battery locally or online. 

Two internal batteries will run the iG8 Base for approximately 6 to 8 hours depending on the configured UHF output 
power.  

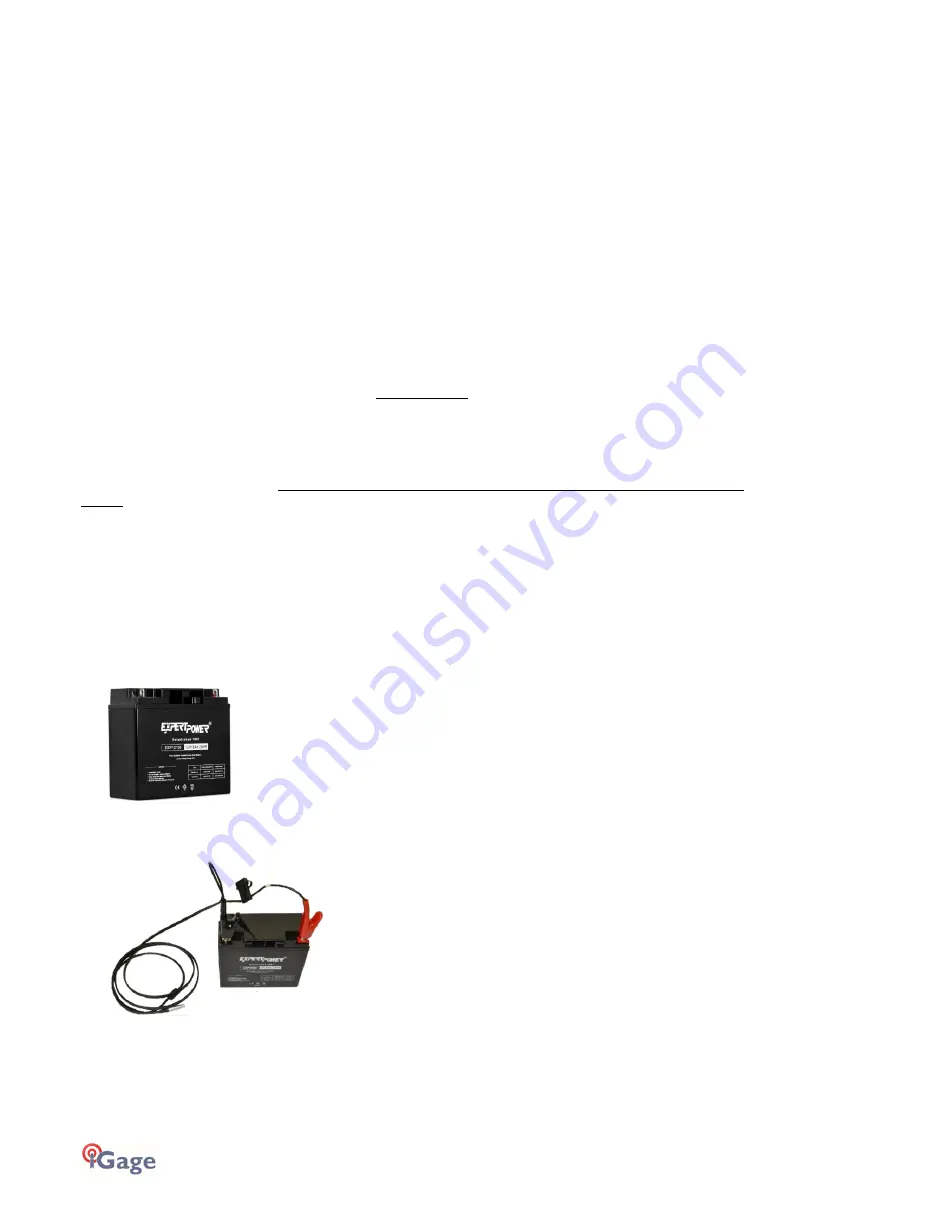
For extended operation use an external 12-Volt battery. We recommend the ‘ExpertPower EXP12180 12 Volt 18 Ah 
Rechargeable Battery’ which is available from Amazon for under $40. 


Figure 4 12V, 18 amp hour sealed lead acid battery with nut/bolt connections 

You can use the supplied dedicated Heavy Duty External Power Cable to provide extended power to the Base: 


Figure 5 Included Heavy Duty External Power Cable attached to external battery 

You may also use the wall transformer supplied with the battery charger and plug it directly into the included serial cable 
to power the iG8 base from wall power. 

Or, you can use the Serial cable supplied with the iG8, combined with the optional battery clip cable to provide external 
power. 

Summary of Contents for iG8

Page 1: ...y iGage Mapping Corporation Receivers purchased from other sources that appear to be similar will not match devices provisioned by iGage The iGx Download Tool supplied with iG receivers and available for download via the internet only works with receivers purchased from iGage This tool is not sold separately 23 January 2020 iG8_UserManual_RevJ_215 docx ...

Page 2: ...e for nor warrants the viability of the space segment portion of the GNSS system The user is cautioned that they alone are responsible for determining the application of the iG8 to their task at hand Any of the GNSS system components can fail at any time Be prepared for down time and failures Do not us the iG8 receiver for any critical navigation purpose Export Controlled Device The iG8 device sho...

Page 3: ...put Power Setting 31 Minimize CSMA 31 Bad Antennas 31 External Antenna Extension Top of Pole Extension 32 Loose TNC Antenna Connections 32 Configuring an iG8 UHF Rover 33 Troubleshooting a UHF Base Rover Pair 36 Base Too Close to UHF Rover 36 Verify that the Base is Transmitting 36 Debugging Rover FLOAT DGPS DGPS AUTO 37 Status FIXED 37 Status FLOAT 37 Status AUTONOMOUS WAAS or DGPS 38 Mission Pla...

Page 4: ...Project Folder 96 Archive All Projects 96 GPS Mounts on Drive 96 Minimum File Size to Transfer 96 Show UTC Time 96 Default HI 96 Default Agency 97 Default Operator 97 Decimate OPUS Submission to 97 Your Email 97 Show Advanced Settings 97 PPP Service 97 Export 8 3 Filename 97 Format Extended 97 Utilities 98 1 Undelete Occupations 98 2 HcRINEX Convertor 98 3 Mark One File Unread 98 4 Mark All GPS Fi...

Page 5: ...ill listen to your suggestions Software updates and news are available from www iG8g com Click on Tools for firmware FAQs and other iG8 information Don t hesitate to call iGage for assistance updating your device Remote assistance is available Training Videos If you are not familiar with these subjects US Survey Feet vs International Feet Video 1 Grid vs Ground Distance Measurements Video 2 Ellips...

Page 6: ...e com T18 bin latestnotes T18_No tes pdf https www handheldgroup com han dheld rugged mobile computers rugged handhelds nautiz x8 manuals https junipersys com support all egro 2 documentation Please note that iGage preloads all software activates SurvCE and bonds the data collector to the Rover and Base If you purchased a data collector with the receiver package then it should be ready to use out ...

Page 7: ...ctor Front Panel The Front Panel has a bright LCD screen two indicator LED s and two pushbuttons Satellite LED Indicates the number of satellites that the receiver is tracking When the receiver is searching and not tracking and satellites it blinks once every 5 seconds When the receiver is tracking and has a position the left LED blinks once for each tracked satellite Correction LED Blinks when co...

Page 8: ...32 communication and external power 12 to 36 VDC input USB Standard Mini USB connection to computer When connected to a computer using Mini USB cable the iG8 will mount as an external disk drive on the attached computer no drivers required What s in the Box iG8 receivers are available in three standard configurations Base Rover Pair Kit complete Base Rover pair Network Rover Kit complete Network R...

Page 9: ...er can be used for the battery charger or as an external power source for iG8 base with the serial cable Included with Rover Lithium Ion Batteries High Capacity 3 400 mAH 7 4 V Lithium Ion Included with Base and Rover External Heavy Duty Power Cable 2 5 Meters long connects to the Serial connector on the bottom of the receiver Provides extended power to an RTK base Included with Base SERIAL IO and...

Page 10: ...he base at a fixed height and to calibrate the bubble on the pole Included with Base Sim Card Adapters These adapters allow you to convert a Nano Sim to a Micro Sim for use with the iG8 internal GSM modem Included with Base and Rover SIM CARD We include an unactivated GSM SIM card with most iG8 receivers If you are using the iG8 as a Network Rover you can activate your own cellular data service or...

Page 11: ... are Lithium Ion type cells WARNING Do not damage the rechargeable Lithium ion battery A damaged battery can cause an explosion or fire and can result in personal injury and property damage To prevent injury or damage Do not use or charge the battery if it appears to be discolored warped the case is bulging or leaking battery fluid Do not expose the battery to fire high temperature or direct sunli...

Page 12: ...G7311 EA 802 11 b g n BT4 0 3 75G WCDMA module RI7HE910 Telit HE910 D Satel TR Radio MRBSATEL TA13G Satel SATELLINE M3 TR3 Figure 3 FCC ID s for iG8 receiver s internal radios Bluetooth Radio Radiated output power from the internal Bluetooth radio is far below FCC radio frequency exposure limits The Bluetooth radio operates within guidelines for radio frequency safety standards and recommendations...

Page 13: ...nstructions FCC Licensing Information The iG8 includes transmit receive UHF radios and require FCC licensure for transmit operation in the United States It is illegal to operate the iG8 device in Transmit mode as a UHF Base without a valid FCC license This article describes the pitfalls of broadcasting without a license http www amerisurv com PDF TheAmericanSurveyor_Silver PirateSurveyors_Jan2014 ...

Page 14: ...wer WiFi 3G Base Info From the Main Menu highlight the top line with the Next button SV 16 Auto 100 SV 16 SV Satellite Vehicle Number of currently used satellites Auto Autonomous GPS solution SDGPS Differential GPS WAAS Differential GPS Float The GNSS engine has achieved a Float solution Fixed The GNSS engine has a Fixed solution Click Enter 16 G09 R02 C01 S00 E03 Pwr A 100 B 100 WiFi Status On Wi...

Page 15: ...stance is the 2 D length of the vector from the base to the rover Click Next to highlight Cancel and click Enter to return to the previous menu Receiver Mode From the Main Menu click Next to highlight Mode SV 14 Auto 100 Mode Rover UHF Static Off Not Recording Receiver Info Click Enter and a list of receiver modes will be shown Base Cable Base Int UHF Base APIS Base APIS Cable Rover APIS Rover Ntr...

Page 16: ...Mv3 2 sCMRx with the Enter key Highlight Protocol to toggle through 3AS Satel PC4FSK Pacific Crest Transparent FST Transparent PCC TT450s TrimTalk 450s TrimmarkII with the Enter key Highlight Air Baud to toggle through 4800 9600 19200 the options depend on the Highlighted Protocol with the Enter key After choosing your settings you must highlight OK and click Enter to active them When you OK the c...

Page 17: ...t Base SN IP 210 14 66 58 Port 9902 OK Cancel Current Base SN is the full serial number of the base you want to connect to The IP address of the APIS server must match the IP address Highlighted on the base The Port of the APIS server must match the IP address Highlighted on the base Highlighting Current Base SN Then clicking Enter allows you to enter the Base SN Base SN Setting OK Cancel Use the ...

Page 18: ...u must Highlight OK and click Highlight to active them Highlight Cancel and click Enter to return to the Mode menu without making any changes Note the iG8 receiver will automatically detect the correction format CMR CMR RTCM2 RTCM3 RTCM3 2 sCMRx and no protocol selection is required for an iG8 rover Static Recording The Main Menu displays the static recording mode on the third line Static On Recor...

Page 19: ...to toggle through HCN default HRC and Off HCN must be selected to use the iGage iGx Downlaod tool to automatically submit jobs to OPUS Highlight the RINEX Format and click Enter to toggle through 2 11 3 02 and Off Off is the default and recommended setting Highlight OK and click Enter to save your settings and make them current Highlight Cancel and click Enter to discard any changes Receiver Info ...

Page 20: ...are typically sold with Carlson SurvCE field data collection software running on a stand alone data collector or SurvPC running on a stand alone tablet computer The iG8 will work with SurvCE Version 5 08 or higher We recommend SurvCE SurvPC Version 6 05 04 or higher Throughout this manual it is assumed that you have a SurvCE job open on your data collector when you begin setting up Base and Rover ...

Page 21: ...iptions can be up to 255 characters in length 5 Choose the correct projection for your job Choose Distance units from Metric US Survey Feet or International Feet The projection drop box displays a list of often used projections If the projection you need is not listed in the drop down list click on Edit Projection List Then click on Add Predefined Select the correct projection for your location fr...

Page 22: ...ry job like a mine site you will want to have Prompt for Units checked and Use Last Job Localization and Use Last Control File unchecked as shown 9 While not required these four settings on the Options tab Check Time Stamp Each Point Check Store GPS Accuracy in Raw File Check Store GPS Vectors in Raw File Check Write MO Units Record to RW5 File Each of these settings makes debugging errant jobs si...

Page 23: ... Geoid File ContinentalUS_NGS2012B is listed to the right of the Geoid File button If it is not click on the Geoid File button then select the ContenentalUS_NGS2012B file which covers the entire USA IMPORTANT NOTE If you choose to use G18 make sure that the name is Continental_US_NGS2018 gsb and NOT ContinentalUS_NGS2018 gsb The version without the extra _ is an errant model 15 Finally click the g...

Page 24: ...very important Partially obstructed masked satellites through tree branches will increase the range of elevation measurements that the rover observes When using a UHF radio your ability to place the UHF antenna in a high location with the minimum of obstructions to your working area is also important however the best location for your base is the spot that provides the clearest view of the sky Bas...

Page 25: ...Attach the receiver to a tripod or pole as appropriate d Rotate the receiver so the buttons face to the North e Connect the UHF radio antenna to the bottom of the receiver If you are going to be working more than mile from the base use the included TNC extension cable to move the UHF antenna to the top of a mast placed to the North of the receiver The higher the UHF antenna the better Make sure th...

Page 26: ... Bluetooth 2 Set the BT Type to Windows Mobile then 3 click the Configuration button the hammer wrench icon to the right of the BT Type 7 If your Base receiver is not listed in the BT Device grid click the Find Device button Wait up to 30 seconds while the data collector searches and identifies Bluetooth devices 8 A list of nearby devices will be shown 1 Click the correct Base device to select it ...

Page 27: ...e vertical distance from the Ground Mark to the bottom of the antenna as shown in blue above If the Base receiver is mounted on a tripod and you can t make a direct vertical measurement select Slant and enter the slanted tape distance from the ground mark to the bottom of the blue band that separates the white top from the gray bottom as shown in red above Set the Position Rate at 1 Hz Uncheck the...

Page 28: ...allows you to move around the job without a loss of radio corrections Select 1 Watt for maximum range NOTE 1 Watt is the highest power You can use a handheld UHF radio to check the selected Channel frequency for other users Voice or Data It is best to use frequencies with no other users You must have a FCC license to transmit on the selected frequency Always set the Sensitivity to Low on the Base ...

Page 29: ...for the base Choose Number of Epochs and enter 10 samples Click the green check mark 18 SurvCE will begin averaging GPS readings 19 After 10 seconds the average position will be shown Set the Broadcast ID to a unique integer number In most scenarios this RTK Broadcast ID ends up being a point ID in your job file 20 Always click on the Store in Point List button A Point ID of 1 and a Description of...

Page 30: ...wn then the receiver is NOT storing observation data You can turn data recording on from the front panel instructions are on Page 18 Best Practices for Extending UHF Radio Range The UHF radios in the iG8 have excellent range However range is greatly reduced by other users on the same frequency damaged antennas damaged cables and configuration issues The most common range issues are listed below If...

Page 31: ... and rover to an alternate frequency The radio frequency is set on the Rover is under Equip GPS Rover RTK tab Internal UHF Radio Settings Base Output Power Setting You probably will want the radio in your base to output as much power as possible The setting for the base output power is under Equip GPS Base RTK tab Internal UHF Radio Settings If 1 watt is not sufficient then we recommend purchasing...

Page 32: ...use of External Antenna Extension Wire failure is the termination on the pole side adapter due to excessive wind whipping The second most common failure is closing the extension wire in the hinge of the carry case which smashes the cable Loose TNC Antenna Connections The antenna connector can become intermittent and not make a solid connection If antenna is over tightened then the connection point...

Page 33: ...ollector to the range pole 2 If you have not already started a new job or opened an existing job refer to the section Starting a New SurvCE Job on Page 20 to start and configure a new SurvCE job 3 From the main SurvCE menu click on the Equip tab Then click on 3 GPS Rover 4 Choose the correct Manufacturer iGage and Model iG8 5 Select the Comms tab Choose Type Bluetooth BT Type Windows Mobile then c...

Page 34: ...e listed 8 Highlight 1 your Rover Then 2 click on the green checkmark 9 Click on the Bluetooth Connect button just to the left of the red X SurvCE will return to the Comms tab Verify that the correct Rover device is selected Then click on the Receiver tab 10 The Receiver configuration tab is shown Check to insure that the correct antenna IGAIG8 is selected ...

Page 35: ... Rate is good for stakeout Check Use IMU if you want to use the internal electronic bubble If you enable IMU operation the position update rate is forced to 5Hz 11 Click on the RTK tab Select Device Internal UHF The Message Type should match the selection made at the base If you don t know the base setting don t worry about it the rover will automatically figure it out Leave Use Any Base ID Checke...

Page 36: ... UHF antenna from rover to reduce the received signal strength Don t forget to reattach the UHF antenna to the Rover when you move away from the base Never remove the UHF antenna from a transmitting Base Verify that the Base is Transmitting Check to insure that the orange LED above the display on the right side is flashing once each second on the Base Check to insure that the Base front panel disp...

Page 37: ...n 3 seconds Your Base and Rover are properly configured and you are ready to survey Status FLOAT If the Rover reports Float then the connection to the Base UHF radio or Network connection is properly configured and working This is great news Corrections are being received however the GNSS engine cannot resolve ambiguities to fix the solution 1 If the Rover is FLOATing but never fixes the programme...

Page 38: ... for a better satellite constellation may help See the Mission Planning section below 4 If the Rover is FLOATing but never fixes there could be high multipath or canopy at the base Remember that ANY canopy obstructions at the base affect EVERY rover location and every measurement 5 Is the Latency less than 4 seconds If the Latency builds up to values larger than 4 seconds there may be someone else...

Page 39: ...hing check these items a UHF Do the frequencies match on the base and rover The frequencies must match not just the channel numbers b UHF Does the radio protocol match Typically SATEL on both Base and Rover c UHF Is the Rover s Base ID set to Use Any Base ID d UHF Is there someone else using the same frequency Both Voice and Data in use by others on the same frequency will block your Rover from re...

Page 40: ...ased mission planning tools For this example https www gnssplanningonline com is used First configure the settings pay attention to the Time Zone and approximate job height Set the Elevation Cutoff to a high value like 25 degrees to simulate heavy canopy Check GPS GLONASS and Galileo leaving BeiDou unchecked as it probably will have minimal contribution Click Apply Click on Charts and roll down to...

Page 41: ...iGage iG8 User Manual 41 The Mission Planning tool is also available in a mobile version ...

Page 42: ... your smartphone or a dedicated Mi Fi and your data collector brokers the connection to the Server and passes correction via Bluetooth to the iG8 head DCI Method Data Collector Internet Another connection method is to use the GSM cellular modem Internal GSM built into the iG8 head to connect to the network This is a great connection method because the data collector does not have to broker the cor...

Page 43: ... a browser the admin account name and password can be obtained from one of the display screens Find the Security drop down It will be set to WPA2 Change it to WPA WPA2 None works great too but Click on Save Changes Item 2 Make sure the SSID is simple An SSID like Mark s JetPack 01 is not OK Keep the SSID really simple like MARKJP using all upper case letters and numbers with no punctuation marks B...

Page 44: ...eless Manager Make sure that Wi Fi is enabled Click on Menu Wi Fi Settings Then click on the access point you want to connect to IGAGE_F in this example Click on Next Enter the network key this is the secret passcode for your access point The passcode is case sensitive and must be correct Click on Next Finally click on Finish ...

Page 45: ...lorer on the data collector Continue the Network Rover setup at Network NTRIP and DIP Rover Configuration on Page 49 Nautix X8 Wi Fi Setup NOTE Disconnect the USB cable from your PC to the X8 before setting up Wi Fi Wi Fi will not coexist with a USB connection When you plug the USB connection into your computer the Wi Fi connection is turned off On the main menu of the device click on the Wireless...

Page 46: ...the spinning balls to go away Now 1 click to highlight the correct access point then 2 click the SETTING button in upper right hand corner You may or may not see the next screen This menu is asking is Your Access Point has a WPS button if you want to use it click on YES If you know the passcode for your hotspot click on NO You will not see this item if your access point does not have a WPS button ...

Page 47: ...r a few seconds you will see Completed in the status Click on OK Finally start the internet explorer and browse to the igage web site By typing in igage then clicking on www igage com If you see the iGage website Then your data collector is connected to the internet and you are ready to setup a Network Rover Continue to the Network Rover setup at Network NTRIP and DIP Rover Configuration on Page 4...

Page 48: ...e sim into the slot until it clicks fully in 4 With the iG8 head battery door swung UP looking into the battery compartment figure 4 above the SIM card is inserted with the gold connectors facing UP and the cut corner is inserted into the hole first as shown in figure 3 Push the card into the slot all of the way and it will click into position Warning it is difficult to manipulate the small card i...

Page 49: ...e the Cellular modem with SurvCE when setting the iG8 as a network rover as described in the next section Network NTRIP and DIP Rover Configuration 1 Setup the Rover a Attach the receiver to the range pole b Attach the UHF antenna to the receiver head c Put one or two charged batteries into the head d Turn on the Rover receiver e Attach the Data Collector to the range pole 2 If you have not alread...

Page 50: ...or nearby devices After short wait all of the Bluetooth devices in range of the data collector are listed 8 Highlight 1 your Rover Then 2 click on the green checkmark 9 Click on the Bluetooth Connect button just to the left of the red X SurvCE will return to the Comms tab Verify that the correct Rover device is selected Then click on the Receiver tab ...

Page 51: ...to an appropriate elevation for the horizon mask conditions at the Rover typically 10 degrees is appropriate 1 2 or 5 Hz Position Rate is good for stakeout Check Use IMU if you want to use the internal electronic bubble If you enable IMU operation the position update rate is forced to 5Hz 11 Click on the RTK tab The previous RTK device will be shown Choose Internet Data Source You can connect to t...

Page 52: ...a collector Wi Fi or internal modem s data connection 1 Set the Device to Internal GSM then 2 click the Settings hammer wrench button to the right of the Device The most common provider settings are AT T Broadband APM broadband iGage DAC USER APM dac com attz 1 Select the Provider then 2 click the Settings hammer wrench button ...

Page 53: ...ou have an Address IP Port User Name and Password then the connection is probably NTRIP If you only have an Address and IP Port then the connection is probably DIP NTRIP Server DIP Direct IP Server Device should already be Data Collector Internet or Internal GSM from previous step 1 The Network should be NTRIP 2 Click on the Network Settings button hammer wrench button to 1 Set the Network to TCP ...

Page 54: ...he process may fail as the network conducts background security authorizations If provisioning fails cancel and cycle the head power to reset the GSM Cellular Modem The network typically will work on the second try After a moment you should see a list of Mount Points for the RTK Network Choose the best mount point for Set the Name IP Address Port and RTK Message Type to match the DIP base you are ...

Page 55: ...constellations as possible with the RTCM 3 2 MSM RTCM 3 or CMR mount points After selecting the correct base click the green checkmark to return to the RTK tab If shown DO NOT check the Use server transformations check box This selection is available ONLY if the correction source is RTCM3 and should VERY rarely be used Click the green check mark to return back to the RTK tab ...

Page 56: ...tup is complete you will return to the Equip menu 13 You can check your configuration using Equip 7 Monitor Skyplot The receiver status will be FIXED if the connection was made you are in the open If the status is FLOAT wait a minute to see if the Hsdv drops and the status changes to FIXED Otherwise refer to the section Debugging Rover FLOAT DGPS DGPS AUTO on page 37 for troubleshooting assistance...

Page 57: ...Enter Grid System Coordinates Read From File If you have previously setup on the job and you stored a REF file use Read From File But the correct method is It depends The Real Word Guide Setting a base is covered in the Carlson SurvCE User Manual on Page 147 in section 5 4 GPS Base The Bottom Line When you configure the Base the goal is to tell the GNSS base receiver what the actual coordinates fo...

Page 58: ...iver s actual measured position Configure the base up to the point where you are prompted for a base position First click Read From GPS Do a 5 point average then record the Base Configuration Lat Long EHeight results in your field book If you don t carry a field book just take a picture of the screen with your smartphone Now click on No and SurvCE will return to the From New Known Position screen ...

Page 59: ...l Coordinates Okay I understand that I MUST set my base to a geodetic location that is within 200 feet of my base s TRUE geodetic location X Y and Z But I still want to set the base at a known position 1000 1000 0 I swear I can do this in other field software packages You can do it in SurvCE Do the standard base configuration steps Equip GPS Base then configure the Current COMS Receiver and RTK ta...

Page 60: ... same location again Click on the green check mark to complete the Base configuration Next go to Equip 6 Localization GPS tab If you are going to use a system like 1000 1000 0 then you probably want to 1 set One Point Azimuth to Geodetic That way the basis of bearings will be True North at the Base Point Next 2 check the Grid to Ground checkbox SurvCE will automatically read the base and set an ap...

Page 61: ... be scaled to ground You are ready to survey but let s spend a few extra moments and address two things what is going on in the background how do I setup on this same base point the following day What is happening in the Background SurvCE has done a Read GPS and used the autonomous location to initialize the base The base does not think that it is at 1000 1000 0 the base thinks it is at the measur...

Page 62: ...e the REF file to insure that the base is initialized with the exact same geodetic position that was used on the first day When you return the second day setup the base over the EXACT same X Y location as the first day The HI does not need to match Start the Base Equip tab GPS Base then enter the correct HI on the Receiver tab When you click on the green check mark you will go to Base Configuratio...

Page 63: ...ile location and then display the position read from the file Click on Yes The base is reconfigured exactly as it was the first day The effective Ground Mark elevation under the receiver is identical to the previous survey Since you are still using the original job file the correct localization is automatically used ...

Page 64: ... bottom of blue band SHMP 0 2753 0 0839 m Slant Height Measurement Point distance from ARP at bottom of receiver to the slant measurement point R 0 2218 0 0676 m radius of receiver at the SHMP ARP 4296 7135 1309 6409 m EllipGM HI Antenna Reference Point bottom of receiver GM 4290 1518 1307 6409 m EllipGround Mark the point on the ground under the receiver 4344 9974 1324 3579 m Ortho GEOID 16 717 m...

Page 65: ...the antenna L1 Phase Center PC in meters This is the raw data for the base point This GS line is the grid coordinates and Orthometric Height of the Ground Mark in sFeet 4344 9974 The point list entry File Points looks like this This point matches the GS line in the raw file Note that the elevation is the orthometric height of the Ground Mark After the base begins transmitting the Base Info screen ...

Page 66: ...to ARP height entered by the user LS is the HI L1 6 9357 6 5617 0 3740 in the Distance units SFeet The following two lines were stored by pressing Store in Point List GPS The base position in DD MMSSsssssss the height is the ellipsoid height of the PC in meters GS The grid coordinates and Orthometric Height of the Ground Mark in SFeet 4316 4974 4261 6129 54 8818 Ortho Ellipsoid Geoid The red secti...

Page 67: ... the previous section Two points the South West Corner Pt 101 and West Quarter of Section 12 Pt 102 have been stored The Static Occupation file from the Base has been downloaded and submitted it to OPUS using the tools and procedures described in the Downloading Processing and Archiving Static Data section found on page 93 NGS s OPUS has returned an OPUS report which is shown below REF FRAME NAD_8...

Page 68: ...ame for the Easting and Orthometric elevation don t forget to enter a m after each metric value Go to the COGO tab and click on the 8 Calculator button then select the Conversion tab and click the LLH Grid button Click the Apply Localization and Apply Geoid checkboxes Enter the NAD83 Latitude Longitude and Ellipsoid Height on the left side highlighted in Cyan above Be sure to put an m after the me...

Page 69: ... Save button Enter a description click the green check mark If you return to the File Points list you can view the differences from the OPUS result to the autonomous base Click the red back button to return to the main menu Go to the COGO 7 Transformation tool from the main menu Enter the Original Point ID as 1 and the Destination Point ID as 2 ...

Page 70: ...point 2 that we just hand entered no need to translate it then click the green check mark SurveCE will verify the transformation Click Yes The adjustment will be completed and the job coordinates will be modified to match the OPUS solution You can verify that it was successful by returning to the File Points list Points 1 and 2 are now identical and points 101 and 102 have been adjusted ...

Page 71: ...s 18 G08 R05 C00 Pwr A 90 B 90 WiFi Status Off WiFi Mode Hotspot 3G Status Online If the WiFi Status is Off then click on Enter Open WiFi Cancel OK Then click on Enter again to Open turn on Wi Fi Once Wi Fi is enabled you can connect with a PC or smartphone 1 To connect the iG8 on your PC Click on the Network icon in the System Tray 2 Find the iG8 receiver which will be named GNSS followed by the ...

Page 72: ...r by direct connection to a serial port You can download the latest version of HcConfig from this Tools link on the iG8 website www iG8g com Download the latest build the version with the highest ending number Build 1196 or higher is required for the iG8 HcConfig by Serial Port Connect your computer s serial port to the 9 pin serial cable connected to the serial port on the iG8 1 Run HcConfig 2 Cl...

Page 73: ...iGage iG8 User Manual 73 3 Click the Connect button 4 Many of the receiver settings can be configured from the Main Menu ...

Page 74: ...u can save a CFG file for uploading to the iG8 receiver You must login to the GPS receiver using the instructions Connecting the iG8 to a PC with Wi Fi found on Page 71 Use a browser and go to this address http 192 168 1 1 set_en html 1 Click on Choose File and browse to the settings file then 2 click on Upload radio channel list and the new radio table list will be installed in the head To set th...

Page 75: ...curacy and suitability for any purpose is not warranted The internal electronic bubble is suitable for field use Calibrating the Tilt Sensor Before using the IMU you need to calibrate the tilt sensor Since you are only going to use the IMU on the Rover you do not need to calibrate the Base 1 When configuring the iG8 as a rover check the Use IMU checkbox 2 Place the receiver on a calibrated tribrac...

Page 76: ...results of the calibration 11 Click the red back button to return to the GPS Utilities menu 12 You can enable the internal tilt sensor electronic bubble in the Survey Store and Stake point routines by clicking on C 13 Select the Configure IMU tab Check the View GNSS Level checkbox then click on the green check mark 14 The store and stake screens will now include concentric level circles ...

Page 77: ... base or raise the elevation mask to limit the message length to under 450 characters per second Please read the FAQ iG_Provisioning 20ADLVantage35Repeater_V5_xxx found in the web folder https ig8g com out faq index htm for additional information Repeater Radio Battery The duty cycle of the radio in normal operation is about 50 and the radio draws about 8 amps at full output power So a 9 hour day ...

Page 78: ...olts when under heavy load Typically this means the battery need to be less than three years old Setting up the Repeater Place the repeater and antenna on a tripod or other suitable mount If the base is nearby set the UHF radio antenna to the North of the GNSS receiver so that the UHF antenna does not block the GNSS receiver s view of the southern sky This picture shows the antenna mounted on an e...

Page 79: ...power to burn you DO NOT place the UHF antenna to the South of the receiver The UHF antenna will block the GNSS antenna s view of satellites to the South Place the UHF antenna to the North of the GNSS base There are very few SV s to the North of your GNSS receiver so the impact is minimized 3 Connect the power connector to the radio 4 The radio will turn on when power is applied IMPORTANT Before y...

Page 80: ...adio Link Rate is the over the air baud rate The correct value is 9600 12 Set the Repeater Mode to ON 13 Set the RX Sensitivity for the base to High This allows the repeater to easily hear the base transmissions 14 Set the Transmit Power to the lowest power that will cover your job Use the up and down arrow keys to select press enter when the proper selection is made 15 Set RX LED to Signal Receiv...

Page 81: ... Choose the appropriate language 24 Leave Antenna Detect set to Disabled If you have concerns about your antenna or antenna cable set Antenna Detect to Enabled This will allow the radio to detect the antenna and cable efficiency and automatically reduce the output power to 2 watts when issues are found There is a slight chance that a good antenna will be detected as bad which will result in inadve...

Page 82: ...f the transmitter is enabled and what the output power is On hot days it is possible that the radio power setting is higher than the enabled value Power will also be reduced if Antenna Detect is enabled and a fault is detected 32 This is the internal temperature of the receiver Automatic power management becomes active when this temperature is higher than 85 C 33 15 seconds after you switch to the...

Page 83: ...83 iGage iG8 User Manual ...

Page 84: ...nsmitted every 15 minutes So put your call sign in the appropriate box Radio Link tab Initially Allow Uncommon Modes may not be checked You may need to program the radio by clicking Program and then re connect by clicking Connect and re read the radio configuration after checking Allow Uncommon Modes Select SATEL EC Off FEC Off which is the default Satel 3AS mode used for iGage iG and CHC receiver...

Page 85: ...for operation in the USA You may need to make this change and then return to the Radio Link tab to get the baud rate to register correctly It is illegal to program a radio with unlicensed frequencies It is illegal to program a radio to 25 KHz unless your FCC license allows 25 Khz operation In addition to simplex channels the Rx and Tx frequencies are the same you may want to program some cross cha...

Page 86: ...ollector has a SD or micro SD card installed These usually are placed in the battery compartment When you start a new job put it in the main memory The default location in SurvCE is Device Program Files SurvCE Data After you start a job from the main menu go to Equip 6 Data Transfer The Data Transfer dialog is shown Click on the Set Storage button navigate to the SD card often called Storage Card ...

Page 87: ...e Never Standby The best solution to this problem is to NOT ALLOW the data collector to enter standby Turning off the backlight is okay but you should configure the data collector to NEVER enter standby Here is how 1 On the Data Collector click on Start 2 Click on Settings 3 Select the System tab then drag down and click on Power 4 Uncheck both boxes Then click ok in the upper right corner Manuall...

Page 88: ...r Manual SurvCE will re initialize the Bluetooth communication link between the data collector and the RTK head If the Reconnect selection fails to reestablish the connection reconfigure the rover from Equip GPS Rover ...

Page 89: ...ady connected to your own Wi Fi hotspot the data collector by default continuously suggest that you connect to new ones as you pass them Not only is it annoying but it can interfere with a network correction source and result in needless receiver loss of FIX Luckily there is a simple solution 1 From the main screen click on the Wireless Manger icon on the top line 2 Next click on the Wireless Mana...

Page 90: ...ync But it is also easy to connect to your data collector with Bluetooth Here are the instructions for configuring a Bluetooth connection 1 On the mobile device first click on the connectivity icon 1 on the top bar then click on Wireless Manager 2 2 The Wireless Manger is shown if Bluetooth is off click on the big blue Bluetooth bar to toggle Bluetooth on 3 Click on menu bottom right corner then B...

Page 91: ...n the device and then click on the Pair button 7 On the mobile device you will be prompted to pair Click on Yes 8 Your PC will display a secret passcode 9 Quickly enter this number on your mobile device and then click Next 10 Start Windows Mobile Device Center You will be Not Connected 11 On the mobile device navigate to the Bluetooth Settings dialog Click and hold on your computer name my compute...

Page 92: ...up dialog will be shown Click on Connect 13 Now on your PC you will see connecting After 30 seconds your device will be active synced to your PC The connection is fast and it will be remembered so it will be easy to setup in the future ...

Page 93: ...ers to be downloaded installed The drivers are built into Windows XP Windows Vista Windows 7 Windows 8 and Windows 10 The drivers are not distributed with the GNSS receiver If your receiver does not mount or an error message is displayed you can usually unplug the receiver wait a moment and plug it back in If you continue to have problems check the Troubleshooting the iG8 Receiver section on page ...

Page 94: ... a ZIP file If the Show Advanced Settings is set to Simple then the program will skip directly to the Verify Filename to Upload screen shown below If Show Advanced Settings is set to Normal Support OPUS Projects or Advanced then this RINEX Solution helper screen is shown The program will suggest which service OPUS Static or OPUS RS and list the time since the end of the occupation You can click th...

Page 95: ...rocess Trim 6 minutes from the end of the file Clicking the button to the right of the trim dialog displays usage instructions Note the trimmed length is not reflected in subsequent screens or on the occupation grid Only the submitted file is trimmed all of the original data remains in the occupation The trim settings must be reloaded after each submission Performing Quality Control Checks Hidden ...

Page 96: ...elete every single file and folder from the GPS receiver the program won t be able to automatically find the receiver until after the GPS has recorded at least one file Update GPS Model Shown only when Advanced selected The GPS Model is written into the receiver at the factory If you delete ALL of the files on the receiver or format the receiver it is a standard flash drive it is possible that it ...

Page 97: ...rovide your Email address so the OPUS processor can return a solution to you The email address that you enter here will be used for all automatic submissions Show Advanced Settings This setting determines the complexity of the X9x Download program Simple the Default setting Hides archive functions Minimum File size Receiver Model Antenna Name Decimate setting QC function Export to RINEX button OPU...

Page 98: ...unread the next download action will re download and convert the file 4 Mark All GPS Files Unread This function marks EVERY observation file on the receiver as unread The next download will read every single file on the receiver This will take quite a bit of time if your receiver had hundreds of files GPS Settings Hidden when Simple To modify the GPS Settings or view the log select the Configurati...

Page 99: ...s in an area with very few CORS stations and one CORS station was offline waiting will not help OPUS Static is the solution for locations where OPUS RS is not dependable CORS stations can report observations hourly or daily In some areas typically UNAVCO PBO sites most of the sites report once at the end of each day GMT So data that is needed to process your job is not available until 4 00 am GMT ...

Page 100: ...nsider FGDC Standards http www fgdc gov standards projects FGD C standards projects accuracy B Are there passive marks available for control a Will CORS passive or a combination control the survey b Are local passive marks recoverable undisturbed sufficient quality stable and GPS friendly c Where are the nearby NGS CORS active marks This will determine Rapid Static or Static availability C OPUS Ra...

Page 101: ...ou are contributing occupations to a registered OPUS Project note that NGS Training and authorization is required to use OPUS Projects the Download tool can assist you when uploading files 1 Turn ON OPUS Projects support On the Configuration tab set Show Advanced Settings to Support OPUS Projects 2 Add the NGS registered OPUS Projects Project Identifier supplied by your project administrator Click...

Page 102: ...ount as a Disk Drive 1 Before plugging GPS cable into your PC did you wait for the power LED to blink 3 times 2 Unplug wait 15 seconds try again 3 Try another USB port 4 Use an external USB Hub this fixes intermittent disk mounts 5 Try other computers 6 Try turning off your PC wait a minute and then turn on again Reinsert the USB cable 7 Get the DevView tool from http www nirsoft net utils usb_dev...

Page 103: ...PPS Pulse Output 5 Not Used 6 VIN 7 RS232 RX Input Figure 14 iG8 7 Pin Serial IO Lemo Connection Information USB Port Definition The iG8 has a standard USB Mini connector Pin Name Wire color Description 1 VBUS Red 5 V 2 D White Data 3 D Green Data 4 ID No wire A plug host connected to GND B plug device not connected 5 GND Black Signal ground ...

Page 104: ...r 3 Connect the thumbdrive to the receiver through USB port using the OTG cable 4 Restart the receiver by pressing the power button for three seconds After 15 seconds the LCD screen will prompt to upgrade the firmware 5 Press left hand pages button to upgrade the firmware 6 When the firmware upgrade is complete the receiver will be restarted and the LCD screen will again prompt to upgrade the firm...

Page 105: ...n page 71 From the Main Menu Click on Receiver Configuration Receiver Reset You can reboot the entire receiver clear the satellite ephemeris data and reset the iG8 head back to factory defaults or turn off the receiver Front Panel Reset To reset the system from the Front Panel From the main menu Push and hold the pages key then quickly click press release the power key five times Watch the display...

Page 106: ... Radius 67 7 mm SHMP 83 9 mm ARP Bottom of Antenna Mount BAM North Reference Turn Display to North The antenna designator is IGAIG8 NONE 12345678901234567890 A summary of the atx file G01 START OF FREQUENCY 0 76 0 28 114 00 NORTH EAST UP G02 START OF FREQUENCY 2 50 0 48 91 07 NORTH EAST UP Filename igaig8 gra Antenna reference points and dimensions IGAIG8 0 1166 0 0839 Bottom of band _______ __ __...

Page 107: ...107 Slant Height to Vertical Height Manually Converting Heights Receiver Radius r meters SHMP h meters iG8 0 0677 0 0839 𝑣 s2 r2 h Examples Measured Slant s feet Slant s m iG8 Vertical v 6 965 2 123 2 0380 5 148 1 569 1 4837 ...

Page 108: ...ssumes the entire risk of using the software Exclusions The following are excluded from the warranty coverage Periodic maintenance and repair or replacement of parts due to normal wear and tear Display windows Product Finishes Batteries exposed to heat cold or batteries opened or physically damaged Installations or defects resulting from installation Any damage caused by i shipping misuse abuse ne...

Page 109: ...ny losses or damage to the product incurred while the product is in transit or is being shipped for repair Insurance is recommended IMC suggests using a traceable shipping method such as UPS FedEx or USPS with signature tracking when returning a product for service Do NOT send batteries with equipment for repair If you do they will not be returned as we are unable to ship used batteries The Purcha...

Reviews: