AFL2-W15A-N270 Panel PC
Page 32
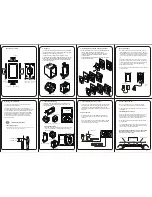
Figure 2-20: Tighten the Panel Mounting Clamp Screws
2.8.3 Stand Mounting
To mount the AFL2-W15A-N270 using the stand mounting kit, please follow the steps
below.
Step 1:
Locate the screw holes on the rear of the AFL2-W15A-N270. This is where the
bracket will be attached.
Step 2:
Align the bracket with the screw holes.
Step 3:
To secure the bracket to the AFL2-W15A-N270 insert the retention screws into
the screw holes and tighten them.
Summary of Contents for AFL2-W15A-N270
Page 13: ...AFL2 W15A N270 Panel PC Page 1 Chapter 1 1 Introduction...
Page 22: ...AFL2 W15A N270 Panel PC Page 10 Chapter 2 2 Installation...
Page 53: ...AFL2 W15A N270 Panel PC Page 41 Chapter 3 3 BIOS Setup...
Page 91: ...AFL2 W15A N270 Panel PC Page 79 Chapter 4 4 System Maintenance...
Page 93: ...AFL2 W15A N270 Panel PC Page 81 Appendix A A Safety Precautions...
Page 98: ...AFL2 W15A N270 Panel PC Page 86 Appendix B B One Key Recovery...
Page 126: ...AFL2 W15A N270 Panel PC Page 114 Appendix C C BIOS Options...
Page 129: ...AFL2 W15A N270 Panel PC Page 117 Appendix D D Terminology...
Page 133: ...AFL2 W15A N270 Panel PC Page 121 Appendix E E Watchdog Timer...
Page 136: ...AFL2 W15A N270 Panel PC Page 124 Appendix F F Hazardous Materials Disclosure...
Page 140: ...AFL2 W15A N270 Panel PC Page 128 Appendix G G International Standards Compliance...


