ClearMark™
Installation, Operation & User Manual
–
Page 26
V 1.S.10 January 2021
V-1.S.1
Loading and Replacing the Ink Cartridge
IMPORTANT
: To insert or remove an ink cartridge to/from the printer, the printer must be
stopped or by following the procedure below (also included in section 'Basic Operations > LEDs
and Buttons'):
Power to the print cartridge must be stopped before inserting or removing a cartridge to prevent
possible damage.
a.
Press Button 1 (Start / Stop Print) for 5 seconds. When you release, it
disconnects power to the cartridge and the printer is in pause.
b.
Insert or remove the cartridge.
c.
Press the button again for 5 seconds to reconnect power to the print cartridge.
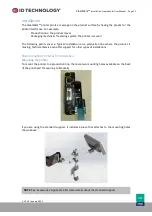
Loading the Cartridge
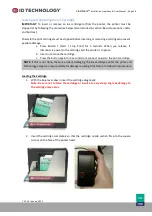
1.
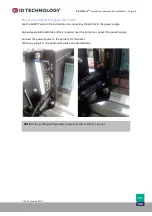
With the blue lever down, insert the cartridge diagonally.
Note: Be sure not to force the cartridge or insert at a very steep angle as damage to
the cartridge may occur.
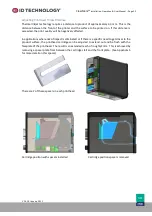
2.
Insert the cartridge completely so that the cartridge nozzle section fits into the square
cut out on the face of the printer head.
NOTE
: If this is not done, there is a risk of damaging the ink cartridge and/or the printer. ID
Technology accepts no responsibility for damage resulting from failure to follow this procedure.


