


6
MENU SCREEN
6-2
Menu screen description
D
Using the Menu screen
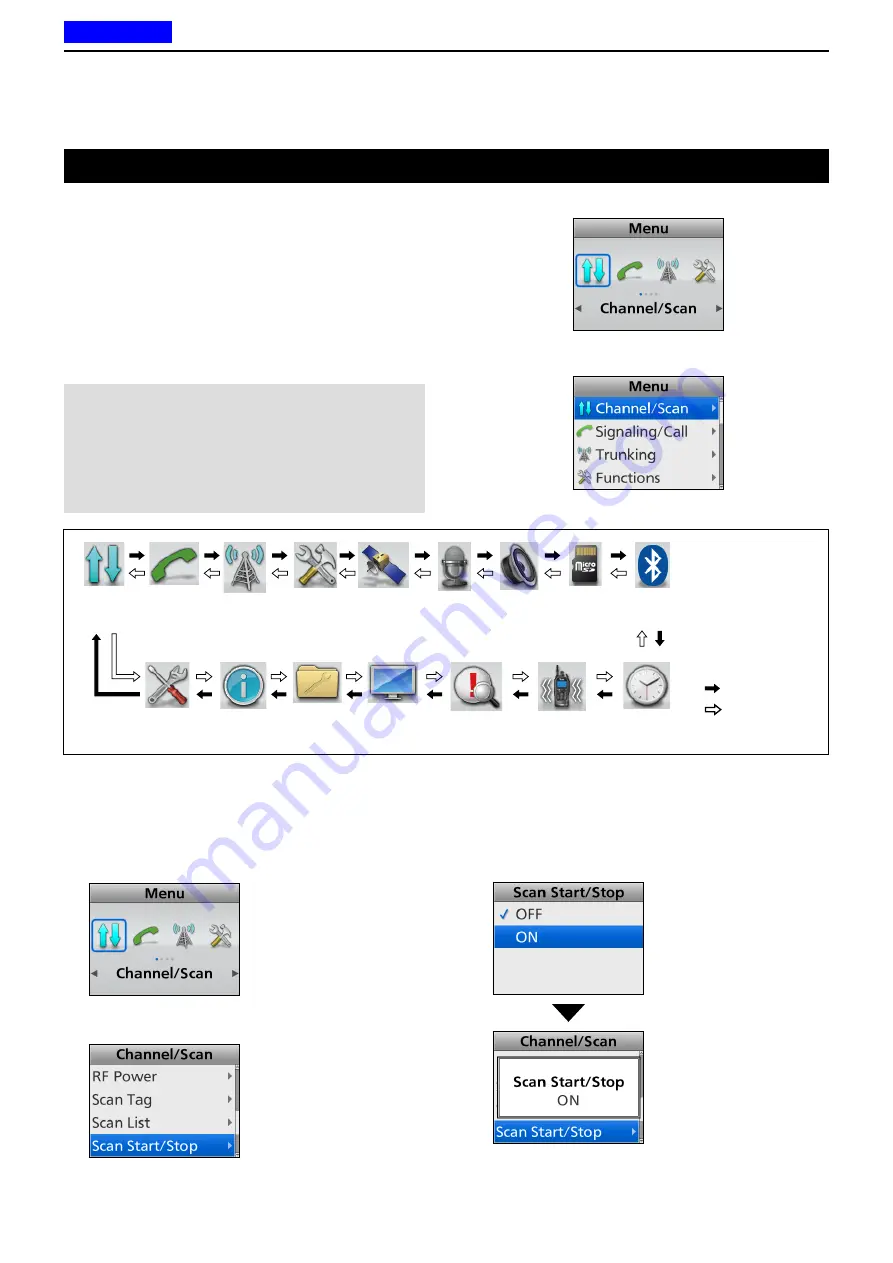
Example: Starting a Scan
1. Push [Menu] to display the Menu screen.
2. Push [Left] or [Right] to select “Channel/Scan,”
then push [OK].
3. Push [Up] or [Down] to select “Scan Start/Stop,”
then push [OK].
4. Push [Up] or [Down] to select “ON,” then push
[OK].
•
The Scan starts.
5. Hold down [Back] for 1 second to return to the
standby screen.
Bluetooth
Functions
SD Card
Audio
Setting
Voice Rec
GPS
Channel
/Scan
Trunking
Signaling
/Call
Display
Clock
Vibration
Sensor
Utility
Control
Head
Information
z
Categories
: Push [Right]
: Push [Left]
For only the Portable Ten-key type, Portable Simple
key type, or Mobile LCD type transceivers, the user
can open the “Menu” screen using the [Menu] key.
In the “Menu” screen, the items are categorized.
Depending on the presetting, the user can select
various functions and set the transceiver settings in
the “Menu” screen.
L
The “Menu” screen has 2 display types: Icon type
and List type. In this operating guide, the Icon type
is used for the main illustration.
NOTE:
The language displayed on the “Menu”
screen is set to English by default, but a dealer
can change it to another language using the
programming software.
In this case, the item names are displayed on the
screen in the language set by the dealer, instead of
English.
“Menu” screen
Icon type
List type
Previous view


