


9
MENU SCREEN
9-2
You can use the MENU screen to set infrequently
changed values or function settings.
In addition to this page, see pages 9-3 through 9-15
for details of each item’s options and their default
value.
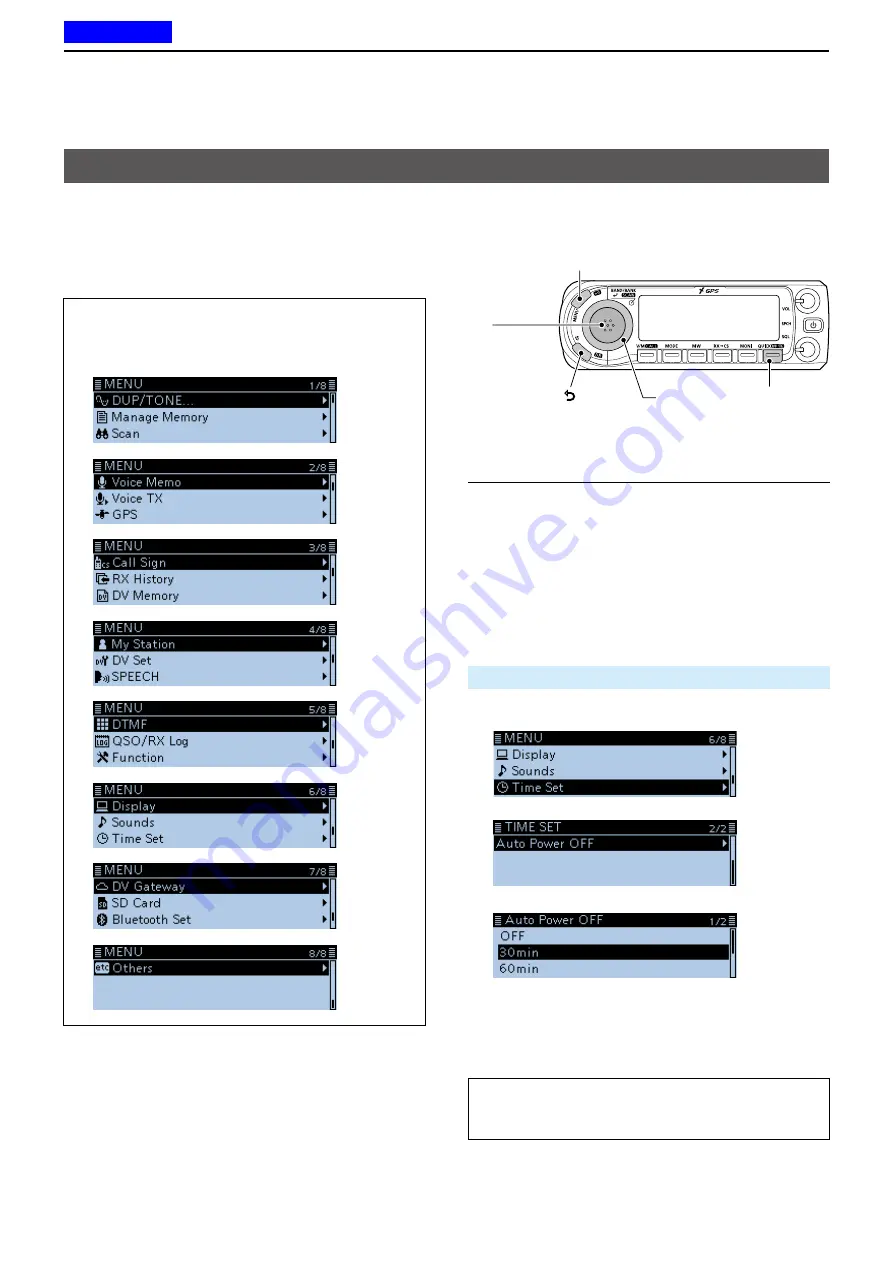
Selecting a Menu item
TIP:
The MENU screen is constructed in a tree
structure. You may go to the next tree level, or go
back a level, depending on the selected item.
D
MENU screen operation
[MENU]
Switches between the MENU
screen and the standby screen.
[DIAL]
Selects an
item or option.
[QUICK]
Returns to
the default
setting.
[
]
Goes back
tree levels.
[
ï
]
• Sets an
option.
• Goes to the
next tree
level.
Simplified description—‘Select’ operation
In this manual, user’s ‘Select’ operation is simplified,
as shown below.
Simplified description:
Select “30min.”
Operation:
Rotate [DIAL] to select “30min.”
Example: Set the “Auto Power OFF” item to “30 min.”
Time Set >
Auto Power OFF
1. Push [MENU].
2. Rotate [DIAL] to select “Time Set,” then push [
ï
].
3. Select “Auto Power OFF,” then push [
ï
].
4. Select “30min,” then push [
ï
].
• Sets the option, then goes back a tree level.
(TIME SET screen is displayed.)
5. Push [MENU].
•Returns to the standby screen.
TIP: To return to the default setting:
1. Push [QUICK] in step 4.
2. Select “Default,” then push [
ï
].
Previous view


