background image

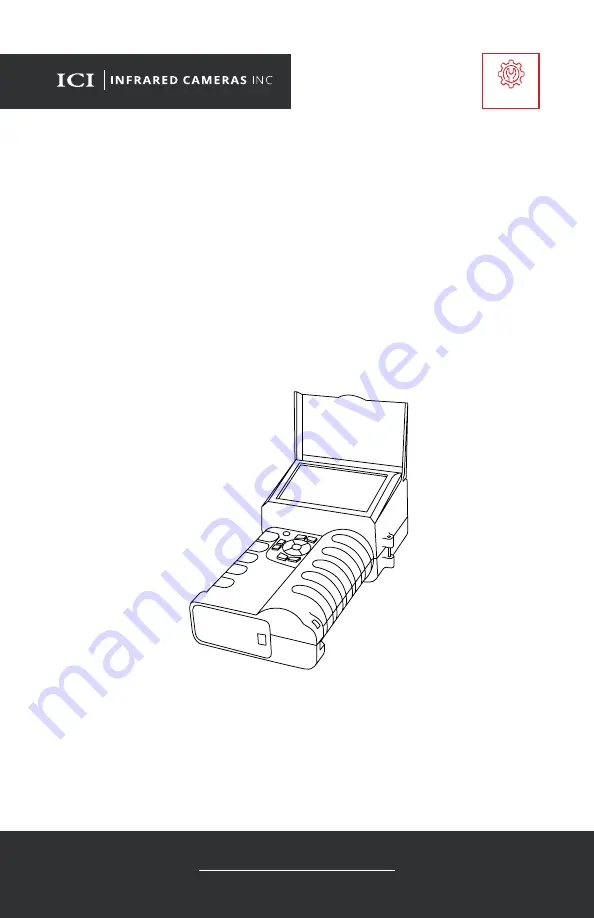
CORONA CAMERA

USER MANUAL

PLEASE READ THIS MANUAL BEFORE SWITCHING THE UNIT ON.

IMPORTANT SAFETY INFORMATION INSIDE.

2105 W. Cardinal Dr. Beaumont, TX 77705

ICI cameras fall under US Federal Law and Export Control.

For more information, contact us: (409) 861-0788 | [email protected] | www.cameras.com

Edit Text

Outlines

Industry

Industry

Revision: 07.2023-001

Summary of Contents for CORONA CAMERA

Page 1: ...HE UNIT ON IMPORTANT SAFETY INFORMATION INSIDE 2105 W Cardinal Dr Beaumont TX 77705 ICI cameras fall under US Federal Law and Export Control For more information contact us 409 861 0788 sales cameras...

Page 2: ...CORONA CAMERA USER MANUAL 2 Revision History 07 2023 001 Document created...

Page 3: ...2 Structure 14 5 1 Appearance and Definitions of Housing Interface 14 Package Includes 16 Quick Start Instructions 17 7 1 Tripod Setup 17 7 2 Battery Installation 19 7 3 Memory Card Installation 20 7...

Page 4: ...4 8 9 5 UV Overlay Transparency 35 8 9 6 Photon Counting Box 35 8 10 GPS 36 8 11 System Settings 37 8 11 1 Date and Time Settings 37 8 11 1 1 Change the Date 37 8 11 1 2 Change the Time 37 8 11 2 Lang...

Page 5: ...nce 45 10 4 Storage 45 Troubleshooting 46 11 1 The imager does not power on 46 11 2 The imager shuts off unexpectedly 46 11 3 No UV image 46 11 4 Unclear or dark visible images 46 11 5 UV readings are...

Page 6: ...permission of Infrared Cameras Inc The documentation must not in whole or part be copied photocopied reproduced translated or transmitted to any electronic medium or machine readable form without prio...

Page 7: ...he crossed out wheeled bin symbol indicates that waste electrical and electronic equipment should not be discarded together with unseparated household waste but must be collected separately All local...

Page 8: ...uments flash arc corona and arcing partial discharge Environment of use overhead transmission lines high voltage substations electrical utilities research institute electrical inspections service prov...

Page 9: ...CORONA CAMERA USER MANUAL 9 2 9 Training To read about training visit https traininginstitute com...

Page 10: ...t attach the batteries directly to a car s cigarette lighter socket Using the incorrect equipment can cause the battery to become hot or cause an explosion Only use the correct equipment to discharge...

Page 11: ...if one or more of these problems occurs Clean the case with a damp cloth and a weak soap solution Do not use abrasives isopropyl alcohol or solvents to clean the case or lens screen Be careful when c...

Page 12: ...Humidity 90 non condensing Pixel Operability 99 Dimensions without lens 290 mm x 136 mm x 86 mm L x W x D 0 5 mm 11 41 x 5 35 x 3 39 L x W x H 0 02 Weight 1 38 kg 3 04 lbs Battery Li ion rechargeable...

Page 13: ...reen 5 LCD screen 800 x 480 IP Rating IP54 CE IEC 010 1 Visible Camera Detector Array custom Pixel Resolution 640 x 480 Minimum Visible Light Sensitivity 0 1 Lux Focus automatic manual Focus Range 1 5...

Page 14: ...LCD Screen 3 Battery Bay 4 Lens Cover 5 Battery 6 Power LED 7 Charge Port 8 Power 9 Capture 10 Focus In Zoom In 11 Focus Out Zoom Out 12 Gain 13 Mode 14 Record 15 Gain 16 OK Menu 17 Navigation up down...

Page 15: ...CORONA CAMERA USER MANUAL 15 20 19 22 21 23 24 25 19 Lens Cover 20 Lens 21 Interface 22 AV Slot 23 Headphone Microphone Slot 24 SD Card Slot 25 Micro USB...

Page 16: ...NUAL 16 ENSURE ALL SYSTEM EQUIPMENT AND COMPONENT ITEMS ARE PRESENT BEFORE BEGINNING INSTALLATION Corona Camera USB to Type C Cable Micro USB to USB Battery Charger Power Adapter Battery x2 Memory Car...

Page 17: ...cated on the back of the device handle The Corona Camera can be used as a handheld device A MAKE SURE TRIPODS DO NOT BLOCK THE DIRECT PATH OF PERSON S TO BE IMAGED TO ENSURE THE EQUIPMENT WILL NOT BE...

Page 18: ...NDS PRESS AND HOLD THE POWER BUTTON FOR MORE THAN 5 SECONDS TO SHUT DOWN THE CAMERA THE IMAGER NEEDS SUFFICIENT WARM UP TIME FOR THE MOST ACCURATE TEMPERATURE MEASUREMENTS AND BEST IMAGE QUALITY THIS...

Page 19: ...place a battery held in the battery bay push the battery buckle Battery will be ejected Close lid MAKE SURE TO HOLD THE CAMERA FIRMLY IN BOTH HANDS WHEN REMOVING OR REPLACING BATTERY OR ATTACHING OR R...

Page 20: ...ona Camera device until a clicking sound is heard DO NOT FORCE MEMORY CARD INTO THE SLOT THE SIDE OF THE CARD WITH CONTACT PINS MUST BE INSERTED FIRST IF THERE IS RESISTANCE FLIP THE CARD AROUND AND T...

Page 21: ...EVICE WHILE IT IS ON A TRIPOD LAY DEVICE FACE DOWN ON A FLAT AND STABLE DESK OR TABLE WHILE CHARGING ENSURE THE IMAGER IS NEAR ROOM TEMPERATURE BEFORE CHARGING THE DEVICE DO NOT CHARGE IN EXTREMELY HO...

Page 22: ...r adapter into a 110 120V electrical outlet REMOVETHEBATTERIESFROMTHEDEVICETOFOLLOWCHARGINGMETHOD WHEN THE BATTERY IS NOT PLACED IN THE CHARGER THE INDICATOR LIGHT DOES NOT FLASH THE LIGHT TURNS RED W...

Page 23: ...dapter into the Corona Camera 2 Plug the power adapter into a 110v 120V electrical outlet ENSURE THE IMAGER IS NEAR ROOM TEMPERATURE BEFORE CHARGING THE DEVICE DO NOT CHARGE IN EXTREMELY HOT OR COLD A...

Page 24: ...Press the Back button to exit the Main Menu 8 5 Zoom Press the button to zoom in on a target Press the button to zoom out 1 Main Menu 2 Submenu 3 Date and Time 4 UV Count 5 Gain Value 6 Video Gallery...

Page 25: ...ge is captured it will be stored to the memory card Image files are also named and sorted by the recording time Media can be viewed at any time as follows 1 Press OK to access the Main Menu 2 Use the...

Page 26: ...Navigation buttons to select OK to confirm deletion or select Cancel to cancel deletion then press OK to confirm selection 11 Press the Back button repeatedly to exit the gallery 8 6 5 Image Informati...

Page 27: ...de Video auto plays Press OK to pause or play the video Use the right and left Navigation buttons to scroll through the timeline 8 Press the Back button repeatedly to exit the gallery 8 6 7 Delete Vid...

Page 28: ...s the SD card while it is still in the device through an attached USB cable Transfer files using USB Mode as follows 1 Connect to the device to a computer using the USB cable 2 Press OK to access the...

Page 29: ...uttons to select Video 11 Press OK to confirm selection Press Back to Cancel selection 12 Press the Back button repeatedly to exit the menu THE USER MAY NEED TO RESTART THE DEVICE AFTER CHANGING BETWE...

Page 30: ...Mode Menu 1 Press OK to access the Main Menu 2 Use the Navigation buttons to select Image Settings 3 Press OK to open the submenu 4 Use the Navigation buttons to select Image Mode 5 Press OK to open t...

Page 31: ...on buttons to select System Settings 5 Press OK to open the submenu 6 Use the Navigation buttons to select UV Alarm 7 Press OK to open the drop down menu 8 Use the Navigation buttons to select the pre...

Page 32: ...to select System Settings 5 Press OK to open the submenu 6 Use the Navigation buttons to select Photon Threshold 7 Press OK to open the rotary menu 8 Use the Navigation buttons to select the preferre...

Page 33: ...of the detector by adjusting the gain The value ranges from 0 to 100 Increase the gain slowly to detect minimum levels of discharge A high gain can enhance interference signals which are usually rando...

Page 34: ...econds 7 Press OK to confirm selection Press Back to Cancel selection 8 Press the Back button repeatedly to exit the menu 8 9 4 Integral Duration Adjust the integral duration as follows 1 Press OK to...

Page 35: ...detection area of the image display window The large window option is full screen and allows every pixel to be used for detection analysis Medium and small windows take up narrower areas to help user...

Page 36: ...ation buttons to select System Settings 3 Press OK to open the submenu 4 Use the Navigation buttons to select System Settings 5 Press OK to open the submenu 6 Use the Navigation buttons to select GPS...

Page 37: ...ess OK to confirm selection Press Back to Cancel selection 10 Press the Back button repeatedly to exit the menu 8 11 1 2 Change the Time The time format is HH MM Change the date settings as follows 1...

Page 38: ...menu 8 11 3 Display Brightness Settings Brightness settings cannot be changed however users can use the sun cover to help see in bright areas Users may also switch to Black White mode to help with vis...

Page 39: ...he automatic shutdown 9 Press OK to confirm selection Press Back to Cancel selection 10 Press the Back button repeatedly to exit the menu 8 11 4 2 Sleep Mode To save power users can change the sleep m...

Page 40: ...buttons to select preferred value 9 Press OK to confirm selection Press Back to Cancel selection 10 Press the Back button repeatedly to exit the menu 8 11 6 Video Format Change the video format as fo...

Page 41: ...to access the Main Menu 2 Use the Navigation buttons to select System Settings 3 Press OK to open the submenu 4 Use the Navigation buttons to select Format 5 Press OK to open the dialog box 6 Use the...

Page 42: ...on buttons to select SD Card Info 5 Press OK to open the dialog box 6 Press the Back button repeatedly to exit the menu 8 11 10 System Information Users can view device information as follows 1 Press...

Page 43: ...ehind corona discharges and their effects is essential for the maintenance and longevity of power systems The ability to detect and monitor UV radiation emissions as achieved with ICI s Corona Camera...

Page 44: ...ontrast inspections with corona cameras can be conducted during the day thanks to solar filters that block naturally occurring solar energy preventing solar loading and ensuring accurate reliable resu...

Page 45: ...0 2 Disinfecting the Camera Surface Do not use corrosive cleaning solutions on the optical glass components It is recommended to disinfect the camera surface regularly with a non corrosive sanitizing...

Page 46: ...unexpectedly Replace old battery Charge battery 11 3 No UV image Open the lens cap If lens is foggy use professional equipment to clean the lens 11 4 Unclear or dark visible images Turn on lights in...

Page 47: ...CORONA CAMERA USER MANUAL 47 11 8 Alarm not sounding Turn off the device then turn it back on Enable alarms Adjust alarm threshold...

Page 48: ...eers scientists inspectors and operators in space power companies medical pulp and paper food industry research and development and various process industries You can see our products and services use...

Reviews: