background image

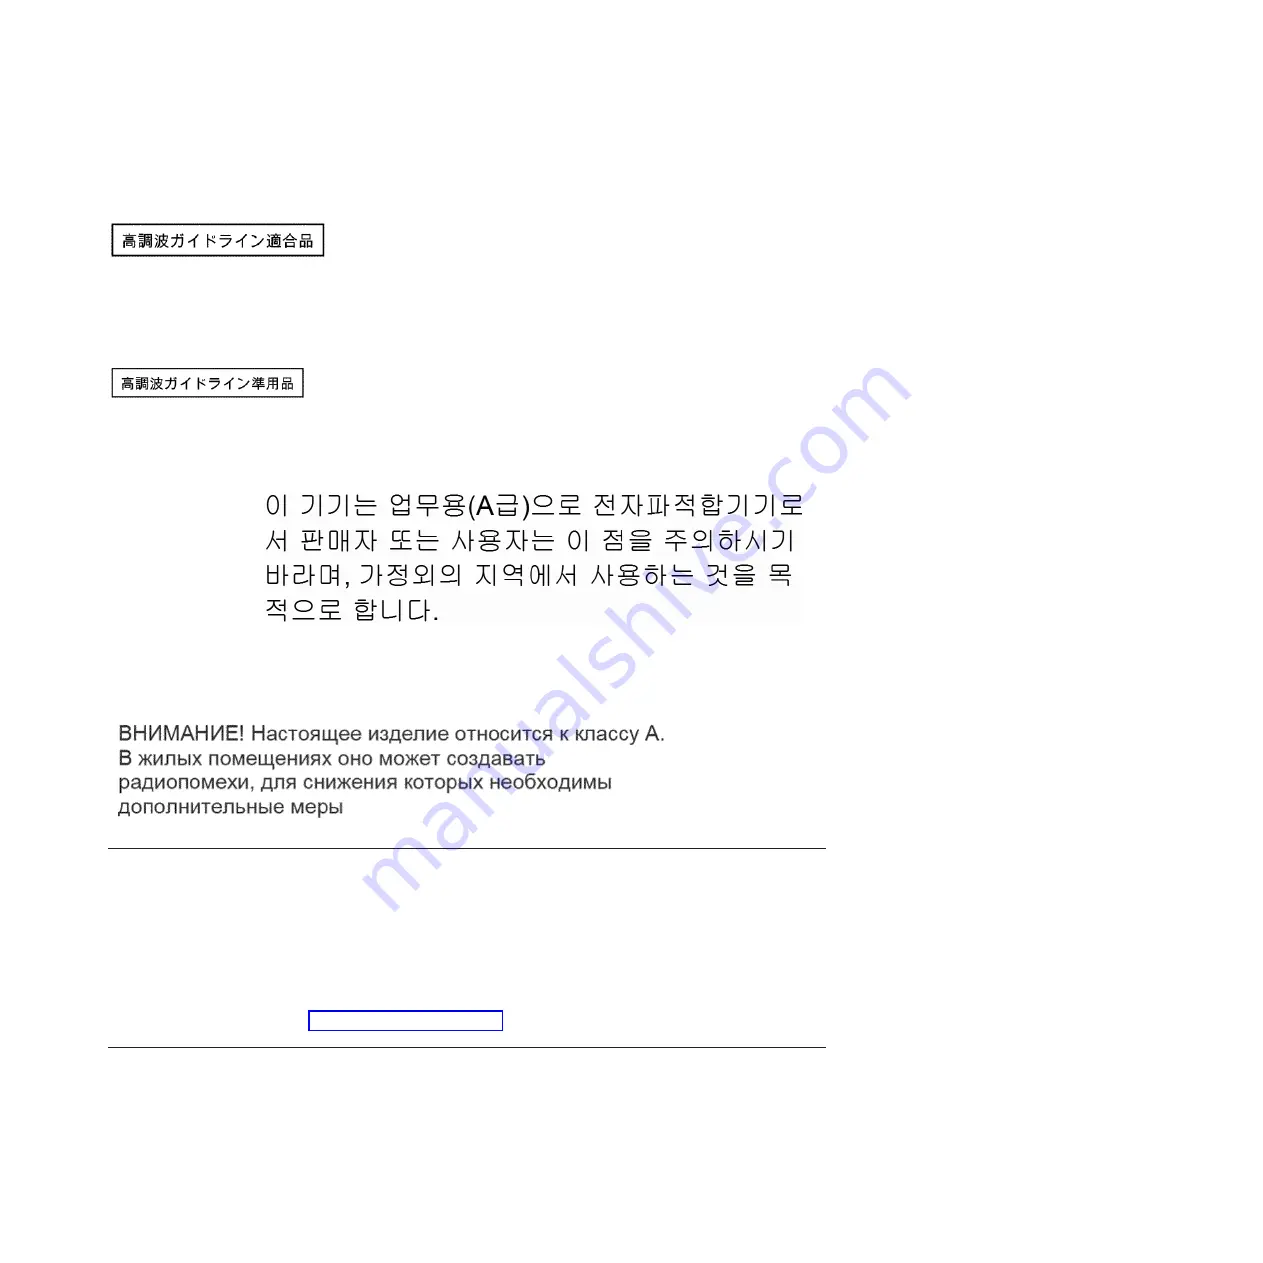
This explains the JEITA statement for greater than 20 A per phase.

Korean Communications Commission Class A Statement

This explains the Korean Communications Commission (KCC) statement.

Russia Electromagnetic Interference Class A Statement

This statement explains the Russia Electromagnetic Interference (EMI) statement.

European Contact Information

This topic contains the product service contact information for Europe.

European Community contact:
IBM Technical Regulations
Pascalstr. 100, Stuttgart, Germany 70569
Tele: 0049 (0)711 785 1176
Fax: 0049 (0)711 785 1283
Email: mailto: tjahn @ de.ibm.com

Taiwan Contact Information

This topic contains the product service contact information for Taiwan.

IBM Taiwan Product Service Contact Information:
IBM Taiwan Corporation
3F, No 7, Song Ren Rd., Taipei Taiwan
Tel: 0800-016-888

jjieta1

jjieta2

rusemi

Notices

57

Summary of Contents for Storwize V3700

Page 1: ...IBM Storwize V3700 Quick Installation Guide GC27 4219 01...

Page 2: ...tices on page ix as well as the information in the IBM Environmental Notices and User Guide which is provided on a DVD This edition applies to IBM Storwize V3700 and is valid until replaced by new edi...

Page 3: ...osures 34 Connecting Ethernet cables for system management 37 Connecting Ethernet cables to 1 Gbps iSCSI 4 port host interface cards 37 Connecting fibre cables to a 10 Gbps iSCSI FCoE 2 port host inte...

Page 4: ...iv Storwize V3700 Quick Installation Guide...

Page 5: ...27 19 Where to install the cache memory upgrade 28 20 Installing memory module option 29 21 Reinstalling the canister cover 30 22 Installing a node canister 31 23 Removing a filler panel 32 24 Instal...

Page 6: ...vi Storwize V3700 Quick Installation Guide...

Page 7: ...ary xvi 3 IBM documentation and related websites xvii 4 IBM websites for help services and information xviii 5 Steps for different installation scenarios 1 6 Storwize V3700 model numbers 4 7 Default u...

Page 8: ...viii Storwize V3700 Quick Installation Guide...

Page 9: ...ety instructions on the Storwize V3700 website Go to www ibm com storage support storwize v3700 and click the documentation link Safety notices and labels Review the safety notices and safety informat...

Page 10: ...e indicates the presence of a hazard that has the potential of causing death or serious personal injury D002 CAUTION A caution notice indicates the presence of a hazard that has the potential of causi...

Page 11: ...onnect any equipment that will be attached to this product to properly wired outlets v When possible use one hand only to connect or disconnect signal cables v Never turn on any equipment when there i...

Page 12: ...r you v Do not perform any action that causes a hazard or that makes the equipment unsafe v Before you start the device ensure that other personnel are not in a hazardous position v Place removed cove...

Page 13: ...ackage and install it directly into your Storwize V3700 without putting it down If it is necessary to put the device down place it onto its static protective bag If your device is an adapter place it...

Page 14: ...xiv Storwize V3700 Quick Installation Guide...

Page 15: ...o provide the most current documentation The information center is available at the following website pic dhe ibm com infocenter storwize v3700_ic index jsp Storwize V3700 library Unless otherwise not...

Page 16: ...a number that you can use to locate the corresponding statement in your language in the IBM Systems Safety Notices document G229 9054 IBM Storwize V3700 Read First Flyer This document introduces the...

Page 17: ...keting material The IBM Publications Center offers customized search functions to help you find the publications that you need Some publications are available for you to view or download at no charge...

Page 18: ...sage assistance break and fix service support and the latest technical information For more information refer to Table 4 Table 4 IBM websites for help services and information Website Address Director...

Page 19: ...al information hints tips and new device drivers or to submit a request for information Using the documentation Information about your IBM storage system is available in the documentation that comes w...

Page 20: ...l IBM Sales or IBM Support for this offering availability and to purchase it if available in your country What s new New and updated information was included in this version of the book as a result of...

Page 21: ...ion Installation scenarios Depending on your order this documentation steps you through setting up your system for the following scenarios v Setting up a new system that consists of a control enclosur...

Page 22: ...hernet cables for system management on page 37 Chapter 3 Configuring the system on page 45 Powering on the system on page 42 Chapter 3 Configuring the system on page 45 1 Complete these steps for each...

Page 23: ...or disconnect signal cables Never turn on any equipment when there is evidence of fire water or structural damage Disconnect the attached power cords telecommunications systems networks and modems bef...

Page 24: ...3700 LFF Expansion Enclosure 2072 24C ACBN 2072S2C IBM Storwize V3700 SFF Dual Control Enclosure 2072 24E ACBS 2072SEU IBM Storwize V3700 SFF Expansion Enclosure __ v Rack mounting hardware kit includ...

Page 25: ...ure and expansion enclosure Control enclosure components Figure 1 shows the rear view of a control enclosure and identifies the location of the power supply units and node canisters v 1 Node canisters...

Page 26: ...management Can optionally be used for iSCSI host connectivity Port 2 Optional Can be used for iSCSI host connectivity or to provide an alternative redundant management address v 3 Serial attached SCS...

Page 27: ...anister and identifies the SAS port locations v 1 LEDs v 2 SAS ports Each canister has two SAS ports that are numbered 1 on the left and 2 on the right Port 1 is always used Port 2 is used only if thi...

Page 28: ...rks reliably This procedure includes verifying that adequate space in a suitable rack is available and that requirements for power and environmental conditions are met This documentation assumes that...

Page 29: ...space at the front of the rack for two persons to carry the enclosure safely v Install all enclosures that constitute one system in contiguous positions in a rack with control enclosure at the top v E...

Page 30: ...10 Storwize V3700 Quick Installation Guide...

Page 31: ...the enclosures You are now ready to begin installing the hardware components and connecting the data cables and power cords Installing the support rails Before installing an enclosure you must first i...

Page 32: ...Attach the circle end of the spring around the stud on the rail see Figure 7 b Pulling on the spring attach the hook end of the spring to the tab on the rail v3500067 Figure 7 Installing the rail spr...

Page 33: ...ach rail comes with two medium bracket pins in the front bracket and two medium bracket pins in the rear bracket The medium bracket pins are for installation in a 19 inch IBM rack cabinet If you are i...

Page 34: ...bracket see Figure 9 6 Align the holes in the rail bracket with the holes on the front and rear rack cabinet flanges Ensure that the rails are aligned on the inside of the rack cabinet v3500116 1 Fig...

Page 35: ...les in the rack flanges and close the front hinge bracket to secure the rail to the rack cabinet flange see Figure 10 9 Secure the rear of the rail to the rear rack flange with an M5 screw see Figure...

Page 36: ...th the front of the rack cabinet 2 Carefully slide the enclosure into the rack along the rails until the enclosure is fully inserted see Figure 11 Note The rails are not designed to hold an enclosure...

Page 37: ...open each node canister and install the options Note You must install the same options in all node canisters First open the canister as described in Opening the node canister on page 18 Then refer to...

Page 38: ...following steps 1 If the canister is already installed in the enclosure remove it as shown in Figure 12 a Unlatch the release levers and pull them open The canister moves out of the slot approximatel...

Page 39: ...n the cover as shown in Figure 13 a Press the recessed blue touch points on the cover b Slide the cover away from the thumbscrew end of the canister v3500178 Figure 13 Removing the canister cover Chap...

Page 40: ...tions in both canisters Do not start installation until you have two of the 8 Gbps Fibre Channel 4 port host interface card options About this task Note The host interface card has four ports but only...

Page 41: ...gn the mounting bracket of the host interface card with the inside of the host interface card aperture at the thumbscrew end of the canister ensuring that the tab at the end of the faceplate is aligne...

Page 42: ...t pre installed for you you must install it in the node canister Before you begin The 10 Gbps iSCSI FCoE 2 port host interface card is installed in the node canisters in the control enclosure If your...

Page 43: ...ure 16 6 Align the mounting bracket of the host interface card with the inside of the host interface card aperture adjacent to the thumbscrew ensuring that the tab at the end of the faceplate is align...

Page 44: ...ining thumbscrew 1 10 Reinstall the SFP transceivers that were removed in step 1 on page 22 To install a transceiver push it fully into the port and close the release handle Note Return the SFP transc...

Page 45: ...the control enclosure If your control enclosure has two node canisters you must install the same options in both canisters Do not start installation until you have two of the 1 Gbps iSCSI 4 port host...

Page 46: ...e to the opposite edge of the host interface card to push the card into the host interface card connector 8 Check that the host interface card is installed squarely in its slot and tighten the retaini...

Page 47: ...e of the host interface card aperture at the rear of the canister ensuring that the tab at the end of the faceplate is aligned with the catch slot 6 Align the connecting edge of the host interface car...

Page 48: ...you must install the same options in both canisters Do not start installation until you have two of the Cache Upgrade options About this task The Cache Upgrade option consists of a 4 GB memory module...

Page 49: ...e so that the keys align correctly with the connector 5 Insert the memory module into the connector by aligning the edges of the module with the slots at the ends of the connector see Figure 20 6 Firm...

Page 50: ...e Procedure To close the canister complete the following steps 1 Reinstall the cover as shown in Figure 21 a Align the four hook slots on the cover with the pins on the canister b Slide the cover towa...

Page 51: ...a With the latch and release levers fully extended slide the canister into the enclosure until the levers begin to move inwards b Simultaneously close both latch and release levers v3500100 OK OK IN I...

Page 52: ...of drives into arrays Procedure To install a drive complete the following steps 1 Remove the filler panel from the slot into which you want to install the drive as shown in Figure 23 a Grip the front...

Page 53: ...e is in the open unlocked position b Align the drive assembly with the guide rails in the slot c Gently push the drive assembly into the slot until the drive stops d Rotate the drive handle to the clo...

Page 54: ...e it v When inserted correctly the connector can only be removed by pulling the tab Be aware of these guidelines when you begin to attach the cables to the SAS ports v No more than two expansion enclo...

Page 55: ...es connect the control enclosure to the first expansion enclosure as shown in Figure 26 on page 36 a Connect SAS port 4 of the left node canister in the control enclosure to SAS port 1 of the left exp...

Page 56: ...ly installed expansion enclosure b Connect SAS port 2 of the right expansion canister in the previous expansion enclosure to SAS port 1 of the right expansion canister in the newly installed expansion...

Page 57: ...h Figure 27 shows these optional cables in a lighter color Connecting Ethernet cables to 1 Gbps iSCSI 4 port host interface cards If you installed 1 Gbps iSCSI 4 port host interface cards you must con...

Page 58: ...connected in pairs Both canisters must have the same number of cables connected Procedure To install the cables complete the following steps 1 Identify the correct pair of fibre cables for the Ethern...

Page 59: ...e 30 shows an example configuration with two Fibre Channel cables connected to each canister 2 If you want to connect additional Fibre Channel cables make sure to connect the same number of cables to...

Page 60: ...ing on the requirements of the host v Mini SAS HD to Mini SAS HD Figure 32 v Mini SAS HD to Mini SAS Figure 33 1 2 3 4 6 1 2 1 2 OK IN 1 2 3 4 6 1 2 1 2 OK IN v3500062 Figure 31 Example configuration...

Page 61: ...etermining the number of cables required Note When connecting to the SAS ports on the left side of the node canister each host must be connected to both canisters Both canisters must have the same num...

Page 62: ...es by plugging the power cords into properly grounded electrical outlets There is no power switch Note Each enclosure has two power supply units To provide power failure redundancy connect the two pow...

Page 63: ...ower failure redundancy connect the two power cords to separate power circuits 5 Check the LEDs on each node canister in the control enclosure see Figure 37 v 1 Power v 2 Status v 3 Fault The canister...

Page 64: ...44 Storwize V3700 Quick Installation Guide...

Page 65: ...v Initializing the system with an Apple Macintosh computer on page 47 v Initializing the system with a Linux computer on page 48 The steps for adding an expansion enclosure to an existing system are...

Page 66: ...led all the enclosures drives and other options you have purchased v You need a personal computer to complete the initialization procedure The personal computer must have A USB port A supported browse...

Page 67: ...ystem go to the workstation you will use to manage the system and start a supported browser Direct the browser to the management address you specified for the system 8 Log in with user name superuser...

Page 68: ...ctions given by the initialization tool You will be instructed to complete the following actions a Enter the details of the system management address you wish to use b Take the USB flash drive to the...

Page 69: ...ther information is optional but useful for enabling additional capabilities The IP address of a Network Time Protocol NTP server for automated setting of date and time The IP address of a simple mail...

Page 70: ...When adding an expansion enclosure to an existing system you must use the Storwize management GUI to update the system configuration About this task The management GUI requires a supported web browser...

Page 71: ...nd inquiries in writing to Intellectual Property Licensing Legal and Intellectual Property Law IBM Japan Ltd 19 21 Nihonbashi Hakozakicho Chuo ku Tokyo 103 8510 Japan The following paragraph does not...

Page 72: ...ore some measurements may have been estimated through extrapolation Actual results may vary Users of this document should verify the applicable data for their specific environment Information concerni...

Page 73: ...tml Adobe the Adobe logo PostScript and the PostScript logo are either registered trademarks or trademarks of Adobe Systems Incorporated in the United States and or other countries Intel and Intel Xeo...

Page 74: ...Canadian ICES 003 Cet appareil num rique de la classe A est conform la norme NMB 003 du Canada Australia and New Zealand Class A Statement Attention This is a Class A product In a domestic environment...

Page 75: ...asse A Diese Einrichtung kann im Wohnbereich Funk St rungen verursachen in diesem Fall kann vom Betreiber verlangt werden angemessene Mabnahmen zu ergreifen und daf r aufzukommen Deutschland Einhaltun...

Page 76: ...ontact Information IBM Taiwan Corporation 3F No 7 Song Ren Rd Taipei Taiwan Tel 0800 016 888 Japan VCCI Council Class A statement This explains the Japan Voluntary Control Council for Interference VCC...

Page 77: ...pean Contact Information This topic contains the product service contact information for Europe European Community contact IBM Technical Regulations Pascalstr 100 Stuttgart Germany 70569 Tele 0049 0 7...

Page 78: ...f2c00790 58 Storwize V3700 Quick Installation Guide...

Page 79: ...n contact information 57 European Union EU EMC Directive conformance statement 54 expansion canister data ports 7 LEDs 42 expansion enclosure adding to an existing system 50 attachment cables 34 insta...

Page 80: ...labels ix safety notices ix SAS 4 port host interface card installing 26 SAS cables 34 40 send a comment xvii SFP transceiver 10 Gbps iSCSI FCoE 2 port host interface card 22 8 Gbps Fibre Channel 4 p...

Page 81: ......

Page 82: ...Part Number 00AR171 Printed in USA GC27 4219 01 1P P N 00AR171...

Reviews: