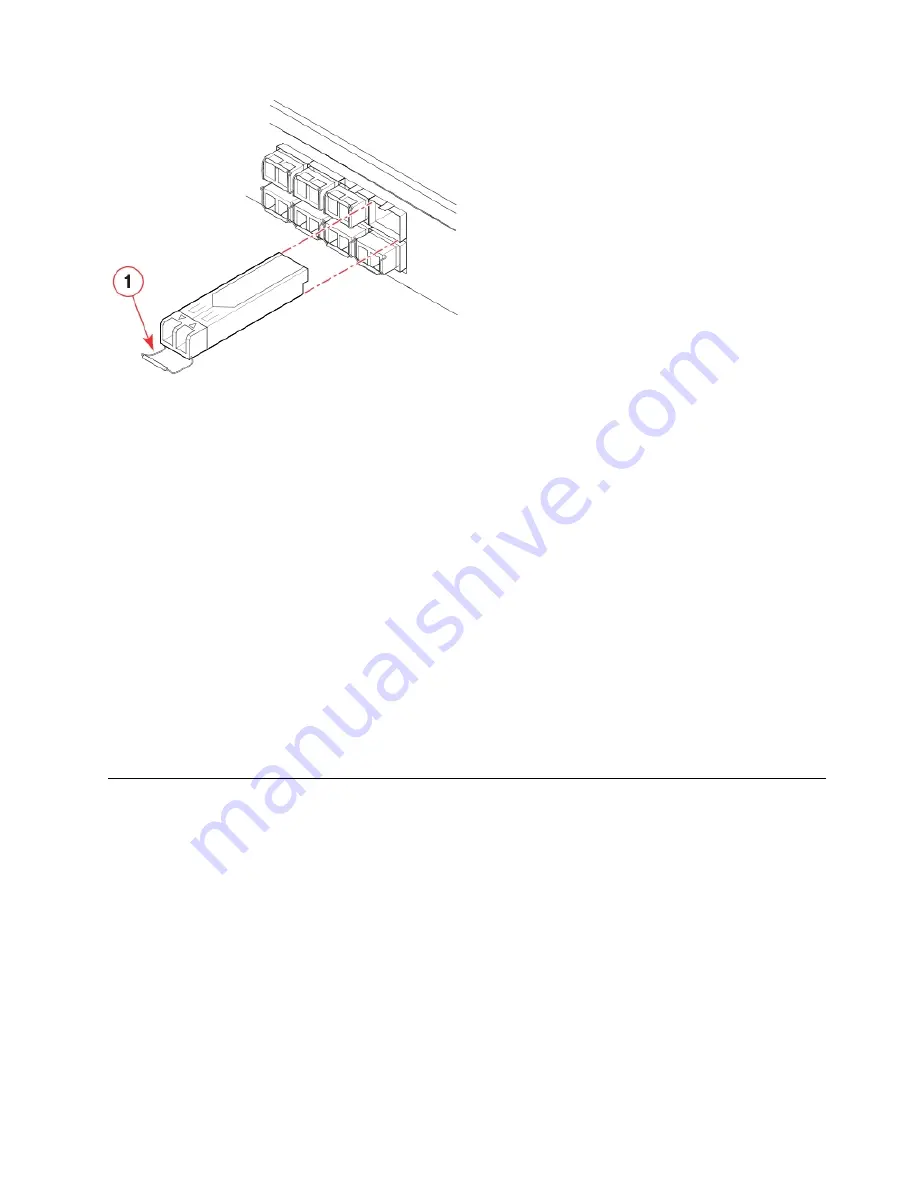
1 - Bail
3.
To install the transceiver, perform one of the following steps depending on
your transceiver type:
v
If transceiver has a pull tab (16 and 32 Gbps SFP+ transceivers), use the pull
tab to help push the transceiver into the port until it is firmly seated and the
latching mechanism clicks.
v
If transceiver has a bail latch mechanism (10 GbE transceivers), ensure that
the bail (wire handle) is in the unlocked position, grasp the transceiver, and
push it into the port until firmly seated. Close the bail to latch the
transceiver in the slot.
Transceivers are keyed so that they can only be inserted with the correct
orientation. If a transceiver does not slide in easily, ensure that it is correctly
oriented.
4.
Position a cable so that the key (the ridge on one side of the cable connector) is
aligned with the slot in the transceiver. Insert the cable into the transceiver
until the latching mechanism clicks.
Cables are keyed so that they can be inserted in only one way. If a cable does
not slide in easily, ensure that it is correctly oriented.
Installing a QSFP transceiver
About this task
The device supports only IBM-qualified transceivers. If you use an unqualified
transceiver, the
switchshow
command output shows the port in a Mod_Inv state.
Fabric OS also logs the issue in the system error log. Also note the following:
v
Each QSFP contains four individual 16 Gbps or 32 Gbps ports. Be aware that
any problems with one port could affect all four ports in the quad if the QSFP
must be replaced.
v
Although installation and removal procedures are the same for QSFP
transceivers installed in port blades and extension blades, these transceivers are
not interchangeable between the two blade types.
v
Some QSFPs, such as the 4x16 Gbps 2 km QSFP, have an integrated cable
attached. You do not need to install a separate cable.
To insert an QSFP transceiver and cable, complete the following steps.
Figure 23. Installing an SFP+ transceiver with bail latch into blade port
Chapter 5. Installing Transceivers and Cables
65
Summary of Contents for SAN512B-6
Page 2: ......
Page 8: ...vi SAN512B 6 Installation Service and User Guide...
Page 10: ...viii SAN512B 6 Installation Service and User Guide...
Page 12: ...x SAN512B 6 Installation Service and User Guide...
Page 40: ...16 SAN512B 6 Installation Service and User Guide...
Page 60: ...36 SAN512B 6 Installation Service and User Guide...
Page 128: ...104 SAN512B 6 Installation Service and User Guide...
Page 140: ...116 SAN512B 6 Installation Service and User Guide...
Page 170: ...146 SAN512B 6 Installation Service and User Guide...
Page 184: ...160 SAN512B 6 Installation Service and User Guide...
Page 196: ...172 SAN512B 6 Installation Service and User Guide...
Page 208: ...184 SAN512B 6 Installation Service and User Guide...
Page 258: ...234 SAN512B 6 Installation Service and User Guide...
Page 274: ...250 SAN512B 6 Installation Service and User Guide...
Page 285: ......
Page 286: ...IBM Part Number 01JC152 Printed in USA SC27 8966 02 1P P N 01JC152...


