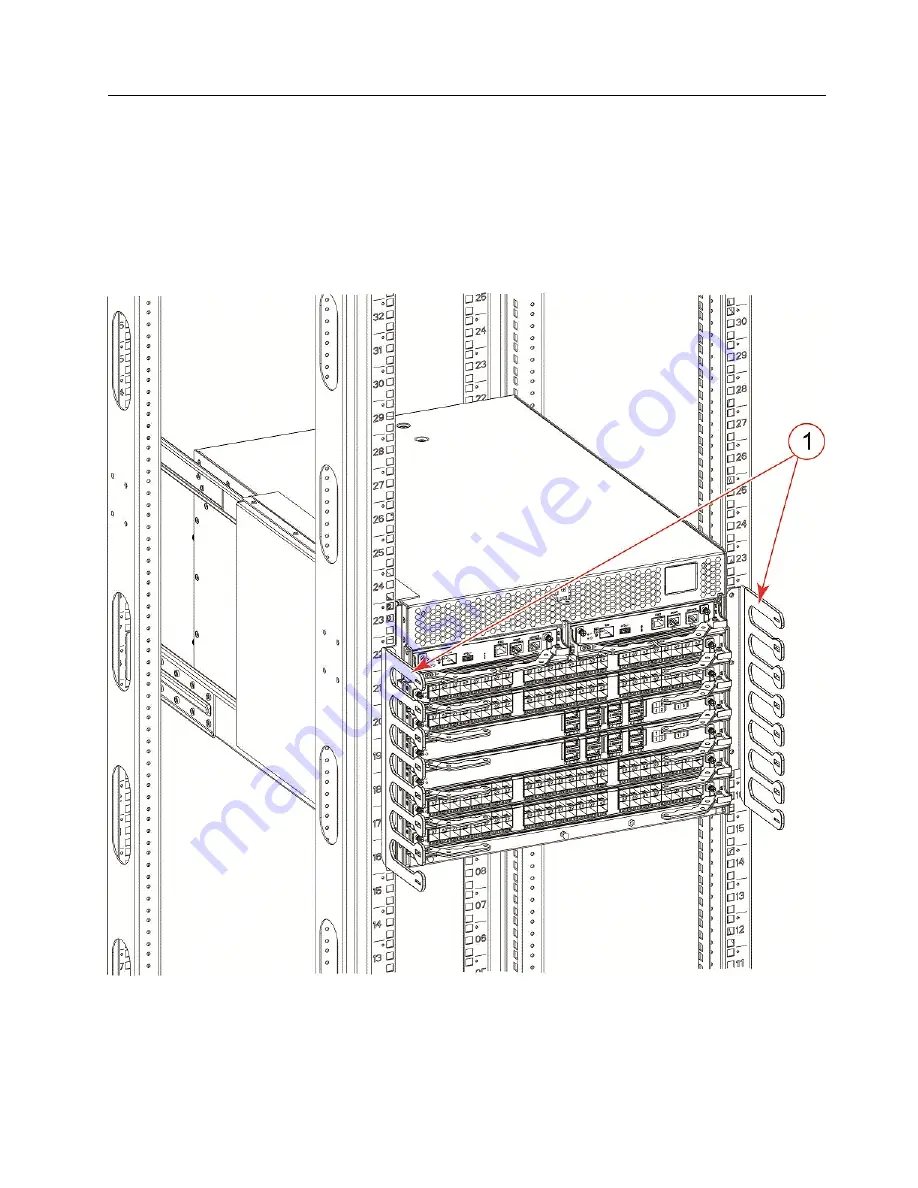
Installing the cable management fingers
About this task
Complete the following steps to install the cable management finger assembly.
Procedure
1.
Position and tighten the three (3) screws to secure the vertical cable management finger assembly to
the rack upright. Cable management fingers are shown installed in following illustration.
1 - Cable management finger assemblies
2.
Arrange the cables along the cable management finger assembly.
3.
If necessary, repeat steps 1 and 2 for the other cable management finger assembly.
Figure 77. Cable management finger assemblies
Cable management fingers
185
Summary of Contents for SAN256B-6
Page 6: ...vi SAN256B 6 Installation Service and User Guide...
Page 10: ...x SAN256B 6 Installation Service and User Guide...
Page 22: ...xxii SAN256B 6 Installation Service and User Guide...
Page 24: ...xxiv SAN256B 6 Installation Service and User Guide...
Page 34: ...6 SAN256B 6 Installation Service and User Guide...
Page 72: ...44 SAN256B 6 Installation Service and User Guide...
Page 92: ...64 SAN256B 6 Installation Service and User Guide...
Page 108: ...80 SAN256B 6 Installation Service and User Guide...
Page 152: ...124 SAN256B 6 Installation Service and User Guide...
Page 162: ...134 SAN256B 6 Installation Service and User Guide...
Page 198: ...170 SAN256B 6 Installation Service and User Guide...
Page 206: ...178 SAN256B 6 Installation Service and User Guide...
Page 210: ...182 SAN256B 6 Installation Service and User Guide...
Page 214: ...186 SAN256B 6 Installation Service and User Guide...
Page 218: ...190 SAN256B 6 Installation Service and User Guide...
Page 258: ...230 SAN256B 6 Installation Service and User Guide...
Page 278: ...250 SAN256B 6 Installation Service and User Guide...
Page 286: ...258 SAN256B 6 Installation Service and User Guide...
Page 289: ...WWN card power down replacement 156 Index 261...
Page 290: ...262 SAN256B 6 Installation Service and User Guide...
Page 291: ......
Page 292: ...IBM Part Number 01JC333 Printed in USA SC27 8967 03 1P P N 01JC333...


