


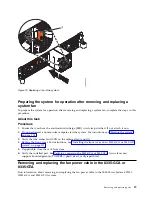


11.
Place the disk drive and fan card on the table.
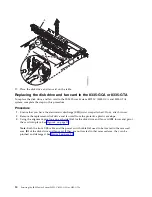
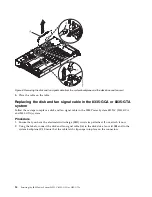
Replacing the disk drive and fan card in the 8335-GCA or 8335-GTA
To replace the disk drive and fan card in the IBM Power System S822LC (8335-GCA and 8335-GTA)
system, complete the steps in this procedure.
Procedure
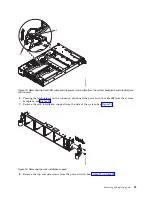
1.
Ensure that you have the electrostatic discharge (ESD) wrist strap attached. If not, attach it now.
2.
Remove the replacement disk drive and fan card from the protective plastic envelope.
3.
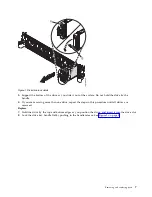
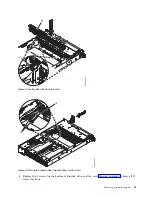
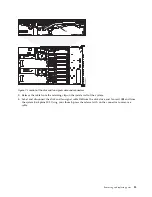
Using the alignment pins (one on each side) (A) for the disk drive and fan card (B), lower and pivot
the card into place. See Figure 4 on page 11.
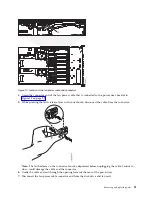
Note:
Both the front USB cable and the power switch cable (A) need to be located in the recessed
area (B) of the disk drive and fan card. If they are not located in that recessed area, they can be
pinched and damaged. See Figure 5 on page 11.
10
Servicing the IBM Power System S822LC (8335-GCA or 8335-GTA)
Summary of Contents for S822LC
Page 1: ...Power Systems Servicing the IBM Power System S822LC 8335 GCA or 8335 GTA IBM...
Page 2: ......
Page 3: ...Power Systems Servicing the IBM Power System S822LC 8335 GCA or 8335 GTA IBM...
Page 16: ...xiv Servicing the IBM Power System S822LC 8335 GCA or 8335 GTA...
Page 134: ...118 Servicing the IBM Power System S822LC 8335 GCA or 8335 GTA...
Page 145: ...Notices 129...
Page 146: ...IBM Printed in USA...


