5.
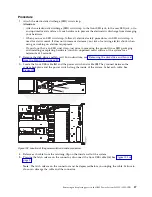
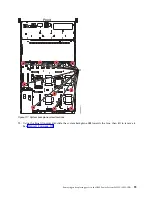
Replace the top and side screws for the power switch as shown in Figure 110.
6.
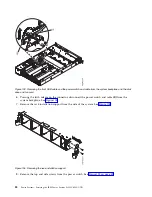
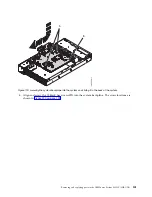
Using the labels, plug the front USB cable (A) and the power switch and cable (B) to the system
backplane as shown in Figure 111 on page 92. Ensure that the cable latch clip snaps into place on the
connectors.
Figure 109. Replacing the power switch and cables
Figure 110. Replace the top and side screws
Removing and replacing parts in the IBM Power System S822LC (8335-GTB)
91
Summary of Contents for S822LC
Page 1: ...Power Systems Servicing the IBM Power System S822LC 8335 GTB IBM ...
Page 2: ......
Page 3: ...Power Systems Servicing the IBM Power System S822LC 8335 GTB IBM ...
Page 16: ...xiv Power Systems Servicing the IBM Power System S822LC 8335 GTB ...
Page 204: ...188 Power Systems Servicing the IBM Power System S822LC 8335 GTB ...
Page 242: ...226 Power Systems Servicing the IBM Power System S822LC 8335 GTB ...
Page 243: ......
Page 244: ...IBM ...


