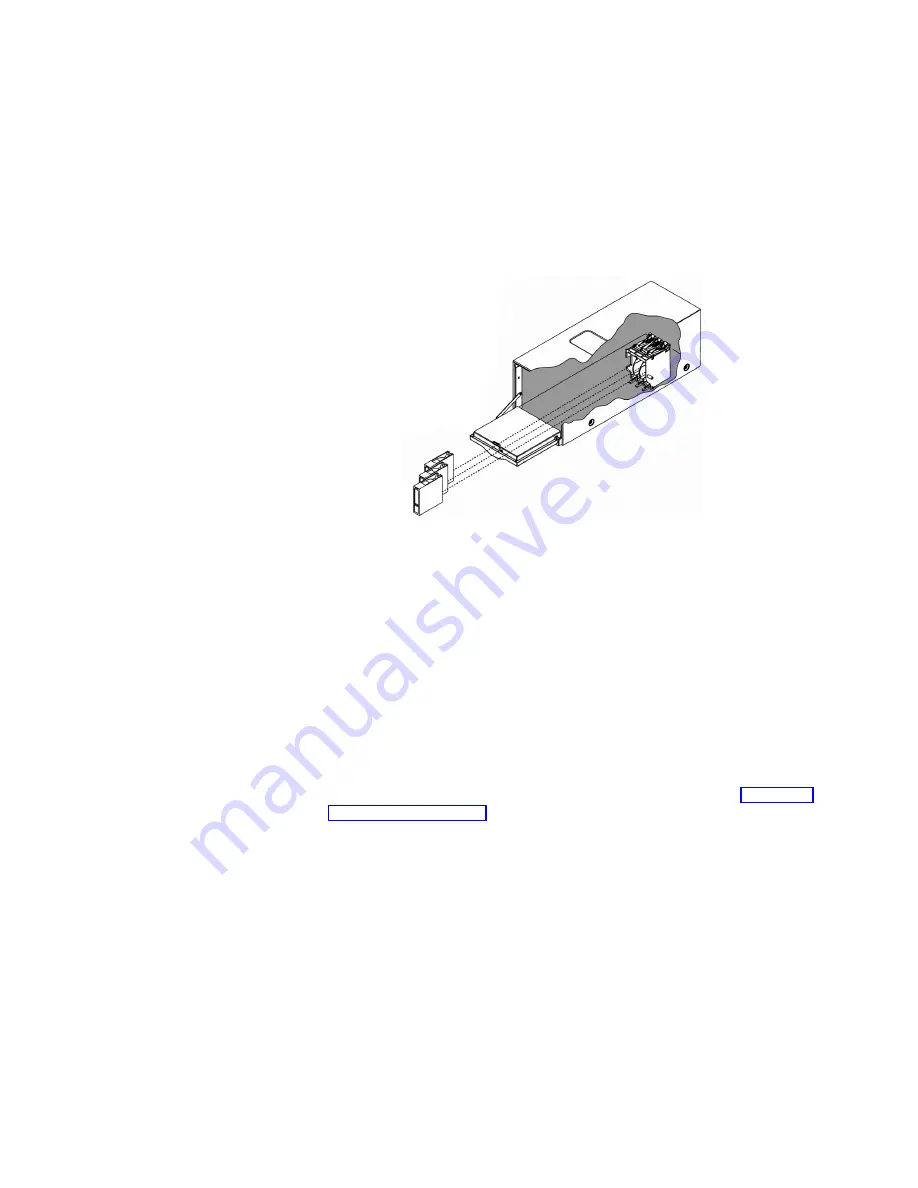
2.
Follow the steps on the previous page to open the door and remove the front
magazine.
If you are loading tapes for the first time, ensure you turn the autoloader
on, wait until the autoloader is ready and then turn it off before loading any tapes.
This procedure moves the transport away from the back slots.
3.
Unload tapes from the internal slots by pressing the tape in until it clicks and
releases. Remove the tape after it partially ejects.
Note:
Always remove back tapes by first pushing them in until they click and
release. Do not remove back tapes by pulling them straight out.
4.
With the write-protect switch facing out of the autoloader and at the bottom,
load the internal slots by pushing the tape in until it clicks into place.
Drive and tape operations
This section contains information about loading and unloading tapes, cleaning the
drive, and moving tapes between slots.
Loading a tape into a drive:
To load a tape into a drive, do the following:
1.
Select
Main-->Operations-->Drive operations--->Load Tape to Drive
.
2.
Use the [-] or [+] key to select any full slot and then select
OK
.
3.
Select
Load
to move the tape from a slot to the drive. The drive makes a
clicking noise as the tape is being loaded. A status screen indicates that the tape
is being loaded.
Note:
To view the slot numbering scheme on the Home screen see “Using the
front panel” on page 13.
Unloading a tape from the drive:
To unload a tape from the drive, do the
following:
1.
Select
Main-->Operations-->Drive operations--->Unload Tape from Drive
to
move the tape from the drive to the original tape location (the location it
occupied before being loaded into the drive). If that slot is occupied, you are
prompted to select another slot location.
The tape automatically rewinds before it is unloaded. A status screen displays
autoloader progress as the tape is relocated.
2.
From the Drive and Tape Operations menu, select
Menu
to return to the
Operations menu.
Cleaning a drive:
To clean a drive, do the following:
Chapter 2. Autoloader operation
17
Summary of Contents for LTO
Page 1: ...LTO Autoloader User s Guide IBM...
Page 2: ......
Page 3: ...LTO Autoloader User s Guide IBM...
Page 6: ...iv LTO Autoloader User s Guide...
Page 8: ...vi LTO Autoloader User s Guide...
Page 11: ...6 Power cord receptacle 7 SCSI connectors Chapter 1 Installation and user s guide 3...
Page 20: ...12 LTO Autoloader User s Guide...
Page 32: ...24 LTO Autoloader User s Guide...
Page 38: ...30 LTO Autoloader User s Guide...
Page 50: ...42 LTO Autoloader User s Guide...
Page 68: ...60 LTO Autoloader User s Guide...
Page 69: ......


