

Handling precautions
!
Wear a wrist strap while handling the drive to pre-
vent damage from Electrostatic Discharge (ESD).
!
Set the drive down gently to prevent damage from
impact or vibration.
!
Do not open the ESD bag containing the drive until
needed.
!
Handle the drive carefully by the edges. Do not
touch the exposed printed circuit board or any
electronic components.
!
Do not press on the top or bottom of the drive.
!
Do not cover the drive’s breather hole.
Quick installation*
IMPORTANT: Back up all data before proceeding with
installation!
*It is important to note that the use of Travelstar drives in
some notebooks will require reuse of unique hardware
(for example — mounting trays, connecting cable,
insulating material). If in doubt please consult your
notebook manufacturer as this operation may require a
qualified technician.
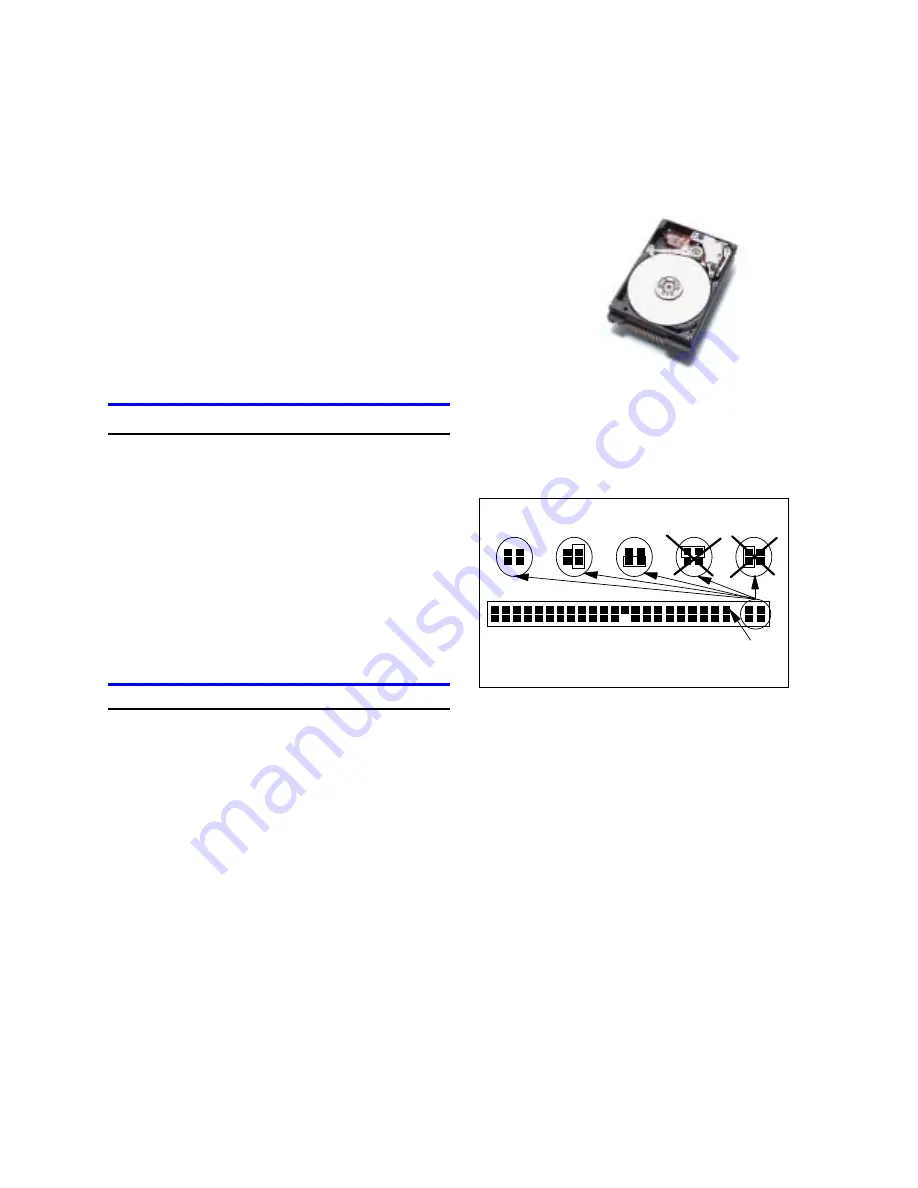
Set the jumpers
!
Master drive. No jumper is required if the drive is
the only drive in a system or the Master drive in a
two-drive system.
!
Slave drive. If the drive is the Slave drive in a two-
drive system, jumper setting A2 is required. See A2
setting in illustration
!
Cable Select. Consult the system manual to see if
your computer supports Cable Select before choos-
ing the A3 jumper setting
.
See Illustration.
Attach the drive
For instructions on how to complete the physical instal-
lation of the drive consult your system manual.
Jumper settings
A1.
A2.
A3.
A4.
A5.
Pin 1
djsa_qi1.prz
A1. Master
A2. Slave
A3. Cable Select
A4. Never Attach a Jumper Here!
A5. Never Attach a Jumper Here!
Configure your computer
1. Turn on your computer. Your computer may detect a
configuration change and prompt you to proceed to
the Setup screen.
2. If your computer does not prompt you to reconfigure,
enter your computer’s Setup, usually by key selection
or keyboard combinations during power-on or during
a reboot. Refer to your system manual for the proper
key sequence. If the computer fails to boot up, power
off, remove the drive, and return your system to its
original configuration. Reboot and enter your com-
puter’s Setup. Follow the directions in step 3, then
attach the drive.
3. Select Auto Detect if your computer Setup supports
this feature. If your computer does not support Auto
Detect, select the appropriate UDT (User Definable
Type) for the drive.
ibm
Quick installation guide
Travelstar 48GH, 30GN & 15GN
2.5 inch ATA/IDE hard disk drive
IC25N012ATDA04
IC25N005ATDA04
IC25N015ATDA04
IC25N006ATDA04
IC25N020ATDA04
IC25N007ATDA04
IC25N030ATDA04
IC25N010ATDA04
IC25T048ATDA05
Models:
IBM storage products
Page 1
IBM Technology Group Support Center
version 2.0


