


Installing the storage enclosure in the rack cabinet
To install the storage enclosure, complete the following steps.
Note:
For more information about how to use a lift tool, see the documentation that came with the lift
tool.
1.
Prepare the storage enclosure for installation:
a.
Position the lift tool so that it is facing one side of the shipping box.
b.
Remove the foam shipping material from the sides and ends of the storage enclosure.
c.
If necessary, cut away the sides of the shipping box so that the lift tool has access to the storage
enclosure.
d.
Open the plastic bag and tuck it under the storage enclosure. The plastic bag reduces friction and
makes it easier to slide the unit off of the shipping box onto the lift tool, and off of the lift tool
and into the rack cabinet.
e.
Install the four handles on the sides of the storage enclosure. See “Installing and removing the
handles” on page 10 for detailed instructions.
56.7 kg (125 lbs)
102 kg (225 lbs)
(12 x 5)
(60X)
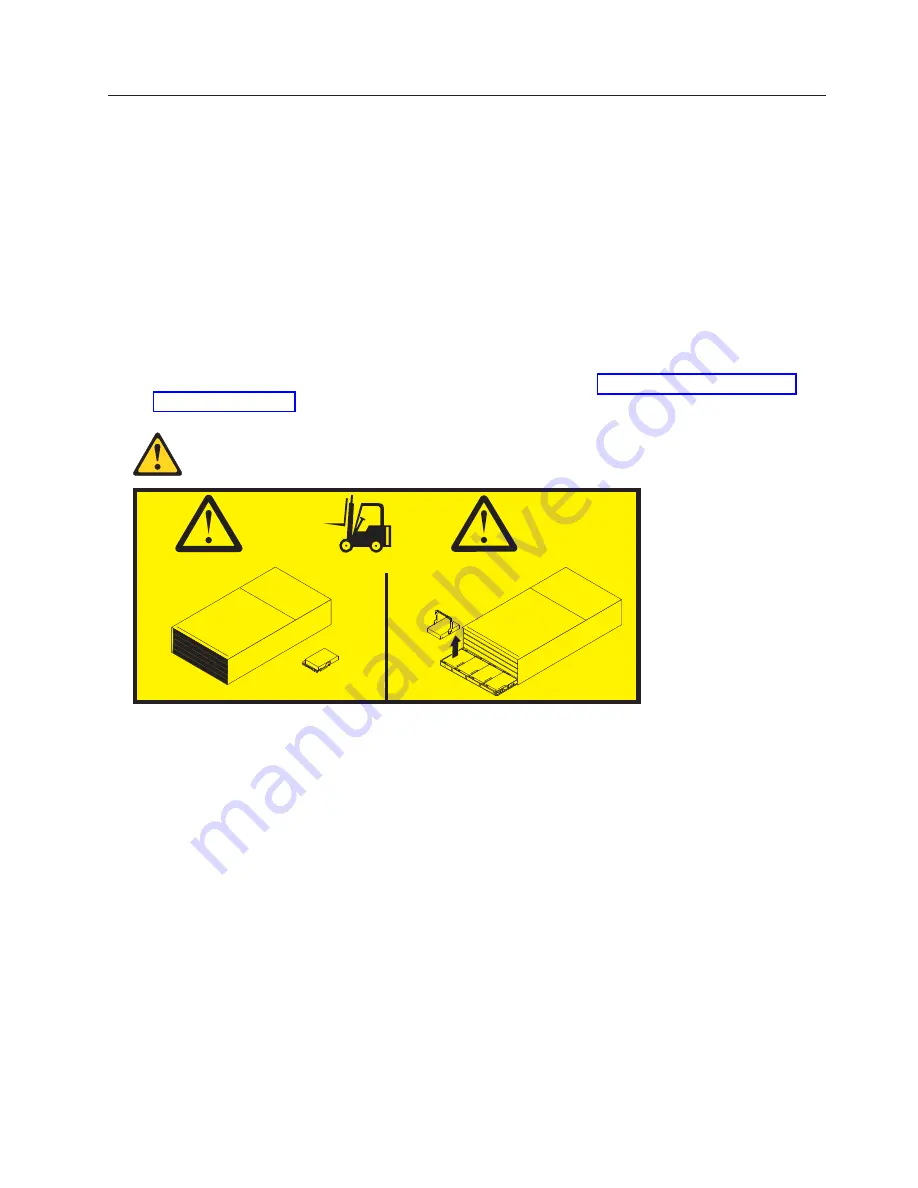
Attention:
a.
Because of the size and weight of the storage enclosure as shipped, a lift tool and a minimum of
two trained service technicians are required to push the enclosure out of its custom-designed
package and onto the lift tool. If a lift tool is not available, see Appendix E, “Component weights”,
in the
IBM System Storage DCS3700 Storage Subsystem and DCS3700 Storage Subsystem with
Performance Module Controllers Installation, User's, and Maintenance Guide.
for additional information.
b.
Before you move or relocate a rack that contains DCS3700 storage enclosures, see “Relocating a
populated rack” in the
IBM System Storage DCS3700 Storage Subsystem and DCS3700 Storage
Subsystem with Performance Module Controllers Installation, User's, and Maintenance Guide.
for more
information. for additional information.
2.
With the help of a lift tool and a minimum of two trained service technicians, or a lift tool and
professional movers, slide the storage enclosure off of the side of the shipping box and onto the lift
tool. Align it in front of the rack.
3.
Put the rear edge of the storage enclosure on the support rails.
4.
Remove the two handles (one on each side) at the rear of the storage enclosure. Do not remove the
front handles on the sides of the unit.
5.
Slide the storage enclosure halfway into the rack. Remove the remaining two handles at the front of
the unit.
11


