background image

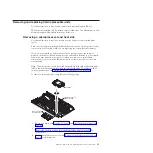
7.

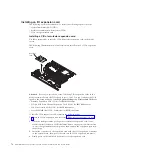
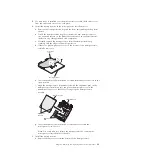
Rotate the locking lever on the microprocessor socket to the closed and locked
position. Make sure that the lever is secured in the locked position by pressing
the tab on the microprocessor socket.

8.

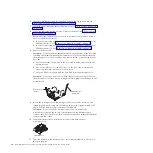
If you are reinstalling a heat sink that were removed from the blade server,
complete the following steps:

Attention:

a.

Thermal grease must be removed using an alcohol wipe from the
microprocessor and heat sink if either component has been replaced. New
thermal grease muse then be applied to the heat sink before it is installed
(see “Thermal grease” on page 92).

b.

Do not touch the thermal material on the bottom of the heat sink.
Touching the thermal material will contaminate it. If the thermal material
on the microprocessor or heat sink becomes contaminated, contact your
service technician.

a.

Make sure that the microprocessor and the heat sink were the same pair
that were removed from the blade server. If they are not, the old thermal
grease must be removed using an alcohol wipe and new thermal grease
must be applied to the heat sink (see “Thermal grease” on page 92).

b.

Make sure that the thermal material is still on the bottom of the heat sink
and on the top of the microprocessor.

c.

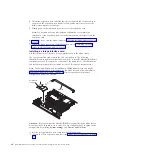
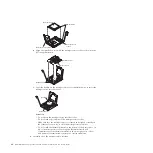
Align and place the heat sink on top of the microprocessor in the retention
bracket, thermal material side down. Press firmly on the heat sink.

d.

Align the three screws on the heat sink with the holes on the heat-sink
retention module.

e.

Press firmly on the captive screws and tighten them with a screwdriver,
alternating among the screws until they are tight. If possible, each screw
should be rotated two full rotations at a time. Repeat until the screws are
tight. Do not overtighten the screws by using excessive force. If you are
using a torque wrench, tighten the screws to 8.5 Newton-meters (Nm) to
13 Nm (6.3 foot-pounds to 9.6 foot-pounds).

9.

If you are installing a new heat sink, complete the following steps:

Attention:

v

Do not set down the heat sink after you remove the plastic cover.

v

Do not touch the thermal material on the bottom of the heat sink. Touching
the thermal material will contaminate it. If the thermal material on the
microprocessor or heat sink becomes contaminated, contact your service
technician.

a.

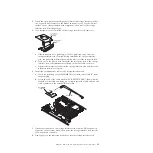
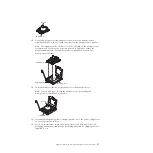
Remove the plastic protective cover from the bottom of the heat sink.

b.

Apply thermal grease to the heat sink (see “Thermal grease” on page 92).

c.

Align and place the heat sink on top of the microprocessor in the retention
bracket, thermal material side down. Press firmly on the heat sink.

d.

Align the three screws on the heat sink with the holes on the heat-sink
retention module.

e.

Press firmly on the captive screws and tighten them with a screwdriver,
alternating among the screws until they are tight. If possible, each screw
should be rotated two full rotations at a time. Repeat until the screws are
tight. Do not overtighten the screws by using excessive force. If you are
using a torque wrench, tighten the screws to 8.5 Newton-meters (Nm) to
13 Nm (6.3 foot-pounds to 9.6 foot-pounds).

10.

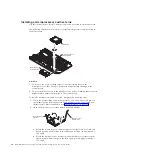
Reinstall the memory module closest to the microprocessor you installed.

Chapter 5. Removing and replacing blade server components

91

Summary of Contents for BladeCenter HS22V 7871

Page 1: ...BladeCenter HS22V Type 7871 and 1949 Problem Determination and Service Guide...

Page 2: ......

Page 3: ...BladeCenter HS22V Type 7871 and 1949 Problem Determination and Service Guide...

Page 4: ...mation and IBM Systems Environmental Notices and User Guide documents on the IBM Documentation CD The most recent version of this document is available at http www ibm com systems support Thirteenth E...

Page 5: ...iability guidelines 50 Handling static sensitive devices 50 Returning a device or component 51 Removing the blade server from the BladeCenter unit 52 Installing the blade server in a BladeCenter unit...

Page 6: ...tting help and technical assistance 225 Before you call 225 Using the documentation 226 Getting help and information from the World Wide Web 226 How to send DSA data to IBM 226 Creating a personalized...

Page 7: ...dukt Lees voordat u dit product installeert eerst de veiligheidsvoorschriften Ennen kuin asennat t m n tuotteen lue turvaohjeet kohdasta Safety Information Avant d installer ce produit lisez les consi...

Page 8: ...e produto leia as Informa es sobre Seguran a Antes de instalar este producto lea la informaci n de seguridad L s s kerhetsinformationen innan du installerar den h r produkten Bu r n kurmadan nce g ven...

Page 9: ...nd the power cords are disconnected 2 Make sure that the exterior cover is not damaged loose or broken and observe any sharp edges 3 Check the power cords v Make sure that the third wire ground connec...

Page 10: ...controls is near you and is available to turn off the power if necessary When you work with powered on electrical equipment use only one hand Keep the other hand in your pocket or behind your back to...

Page 11: ...to this product v When possible use one hand only to connect or disconnect signal cables v Never turn on any equipment when there is evidence of fire water or structural damage v Disconnect the attac...

Page 12: ...fiber optic devices or transmitters are installed note the following v Do not remove the covers Removing the covers of the laser product could result in exposure to hazardous laser radiation There ar...

Page 13: ...oltage current and energy levels are present inside any component that has this label attached There are no serviceable parts inside these components If you suspect a problem with one of these parts c...

Page 14: ...stalling the blade Statement 32 CAUTION To avoid personal injury before lifting the unit remove all the blades power supplies and removable modules to reduce the weight 108 kg 237 lbs 2X 6X 4X 4X 43 2...

Page 15: ...ays install stabilizer brackets on the rack cabinet v Always install servers and optional devices starting from the bottom of the rack cabinet v Always install the heaviest devices in the bottom of th...

Page 16: ...xiv BladeCenter HS22V Type 7871 and 1949 Problem Determination and Service Guide...

Page 17: ...ght path diagnostics on page 181 for information about using light path diagnostics LEDs v Event logs See Error logs on page 99 for information about notification events and diagnosis v Software or op...

Page 18: ...n DSA click Firmware VPD to view system firmware levels or click Software to view operating system levels 2 Download and install updates of code that is not at the latest level To display a list of av...

Page 19: ...e problem might cause multiple symptoms Follow the troubleshooting procedure for the most obvious symptom If that procedure does not diagnose the problem use the procedure for another symptom if possi...

Page 20: ...4 BladeCenter HS22V Type 7871 and 1949 Problem Determination and Service Guide...

Page 21: ...ter cartridges that have depletable life is your responsibility If IBM acquires or installs a consumable part at your request you will be charged for the service v Tier 1 customer replaceable unit CRU...

Page 22: ...er s Guide This document is in PDF on the IBM website This document explains how to use the functions of the IMM installed in an IBM server The IMM works with IBM System x Server Firmware to provide s...

Page 23: ...e also in the multilingual Safety Information document which is on the IBM Documentation CD Each statement is numbered for reference to the corresponding statement in the Safety Information document T...

Page 24: ...ced system management are provided by the BladeCenter unit 2 The operating system in the blade server must provide USB support for the blade server to recognize and use USB media drives and devices Th...

Page 25: ...server on 10 C to 32 C 50 F to 89 6 F Altitude 914 4 m to 2133 6 m 3000 ft to 7000 ft Blade server off 10 C to 43 C 50 F to 109 4 F Altitude 914 4 m to 2133 6 m 3000 ft to 7000 ft Blade server storage...

Page 26: ...ch the keyboard video and mouse control to the blade server Using a keyboard that is directly attached to the Advanced Management Module you can press keyboard keys in the following sequence to switch...

Page 27: ...M switching time frame up to 20 seconds Activity LED When this green LED is lit it indicates that there is activity on the external storage device or network Location LED The system administrator can...

Page 28: ...n Power control button Use your finger to open the access panel on the front of the blade server then press the power control button to turn on or turn off the blade server Note The power control butt...

Page 29: ...r is communicating with the management module the operating system supports the Wake on LAN feature and the Wake on LAN feature has not been disabled through the management module the Wake on LAN feat...

Page 30: ...ations in this document might differ slightly from your hardware Blade server connectors Use this information to locate blade server system board components and connectors for optional devices The fol...

Page 31: ...f but it can be on or off in a functioning system SW1 2 Trusted Platform Module TPM physical presence The default position is off Turning this switch to the on position indicates a physical presence t...

Page 32: ...off For trained service technician only SW1 7 Wake on LAN WOL disable The default position is off Turning this switch to the on position disables WOL SW1 8 Force H8 update The default position is off...

Page 33: ...lade server from the BladeCenter unit open the cover or remove any optional expansion units and press the light path diagnostics switch see System board switches on page 15 to light any error LEDs tha...

Page 34: ...18 BladeCenter HS22V Type 7871 and 1949 Problem Determination and Service Guide...

Page 35: ...omation that reduces hands on time and user errors Wizards and other default settings enable customization capabilities The low touch set once and walk away feature reduces the hands on server setup t...

Page 36: ...on the version of the Unified Extensible Firmware Interface UEFI some menu items might differ slightly from these descriptions Use the help within the Setup utility for more information on the availab...

Page 37: ...EFI compliant Integrated Management Module Select this choice to view or change the settings for the integrated management module POST Watchdog Timer Select this choice to view or enable the POST watc...

Page 38: ...the System Event Manager where you can view the error messages in the system event logs You can use the arrow keys to move between pages in the error log The system event logs contain all event and er...

Page 39: ...ry on page 71 and Installing the battery on page 72 Using the Boot Menu program Use the Boot Menu program to temporarily redefine the first startup device without changing settings in the Setup utilit...

Page 40: ...ent Module IMM to set the UUID v Online from the target system LAN or keyboard console style KCS access v Remote access to the target system LAN based v Bootable media containing ASU LAN or KCS depend...

Page 41: ...uuid_value user user_id password password Example that does use the userid and password default values asu set SYSTEM_PROD_DATA SysInfoUUID uuid_value v Online KCS access unauthenticated and user res...

Page 42: ...d the version for your operating system You can download the ASU from the IBM Web site To download the ASU and update the DMI complete the following steps Note Changes are made periodically to the IBM...

Page 43: ...t SYSTEM_PROD_DATA SysInfoSerialNum lts n access_method asu set SYSTEM_PROD_DATA SysEncloseAssetTag ltasset_tag access_method Where m t_model The server machine type and model number Type mtm xxxxyyy...

Page 44: ...sponding mapping layer See the Advanced Settings Utility Users Guide at http www 947 ibm com systems support supportsite wss docdisplay brandind 5000008 lndocid MIGR 55021 for more details The followi...

Page 45: ...ation program that is designed for your blade server The ServerGuide program detects the blade server model and optional hardware devices that are installed and uses that information during setup to c...

Page 46: ...gure any supported IBM blade server model The setup program provides a list of tasks that are required to set up the blade server Note Features and functions can vary slightly with different versions...

Page 47: ...de server must provide USB support for the blade server to recognize and use the keyboard mouse and removable media drives The BladeCenter unit uses USB for internal communication with these devices C...

Page 48: ...alled hard disk drives 4 The ServerGuide program prompts you to insert your operating system CD and restart the blade server At this point the installation program for the operating system takes contr...

Page 49: ...press Ctrl S after the prompt is displayed 3 Follow the instructions on the screen to change the settings of the selected items Firmware updates Use this information to update the blade server to the...

Page 50: ...1000 Mbps full duplex interface for connecting to one of the Ethernet compatible I O modules in I O module bays 1 and 2 which enables simultaneous transmission and reception of data on the Ethernet lo...

Page 51: ...com servers eserver serverproven compat us For the blade server you must configure the RAID by using the LSI Configuration Utility program If an optional RAID expansion card is installed you can use...

Page 52: ...s in band communications to the IMM the IMM hardware on the system board presents an internal Ethernet NIC from the IMM to the operating system LAN over USB is also called the USB in band interface in...

Page 53: ...interface a Log in to the IMM on which you want to disable the USB device driver interface b In the navigation pane click System Settings and scroll down to the Miscellaneous area c Select the Do not...

Page 54: ...ls and then click Details 4 Select Hardware Management 5 Click Next The installation wizard opens and guides you through the installation Note The Windows installation disk might be required LAN over...

Page 55: ...work Device appears under Network Adapters 11 Open a command prompt type ipconfig and press Enter The local area connection for the IBM USB RNDIS appears with an IP address in the range of 169 254 xxx...

Page 56: ...02 netmask 255 255 0 0 This interface is configured to come up with an IP address in the 169 254 xxx xxx range each time that the operating system is booted 40 BladeCenter HS22V Type 7871 and 1949 Pro...

Page 57: ...hanges are made periodically to the IBM Web site The actual procedure might vary slightly from what is described in this document 1 Go to http www ibm com systems support 2 Under Product support click...

Page 58: ...03 1 60 GHz 1066MHz 4MB 80W quad core model A5x 81Y5952 3 Microprocessor Intel Xeon L5609 1 86 GHz 1066MHz QPI 12MB 40W quad core 69Y0783 3 Microprocessor Intel Xeon L5618 1 87 GHz 1066MHz QPI 12MB 40...

Page 59: ...5958 3 Microprocessor Intel Xeon X5672 3 20 GHz 1333MHz 12M 95W quad core model C5x 81Y5957 3 Microprocessor Intel Xeon X5680 3 33 GHz 6 4 GTps QPI 1333MHz 12MB 95W six core model F2x 69Y0849 3 Microp...

Page 60: ...ver base assembly includes the system board without a microprocessor models F2x F3x D4x 91x and 92x 69Y4719 14 Expansion card 2 4 Port Ethernet CFFh option 44W4488 14 Expansion card 4GB Fibre Channel...

Page 61: ...are ESXi 4 1 without USB key 81Y2028 VMware ESXi 4 1 Update 1 95Y3065 Windows Server 2008 R2 Datacenter 2 CPU 5 UserCAL multilingual 59Y7332 Windows Server 2008 R2 Datacenter 2 CPU 5 UserCAL Simplifie...

Page 62: ...ual 88Y7794 Windows Server 2008 R2 Datacenter Service Pack 1 Simplified Chinese 88Y7795 Windows Server 2008 R2 Datacenter Service Pack 1 Traditional Chinese 88Y7796 Windows Server 2008 R2 Foundation S...

Page 63: ...Storage Server 2008 R2 Enterprise multilingual 95Y3214 Consumable parts are not covered by the IBM Statement of Limited Warranty The following consumable parts are available for purchase from the reta...

Page 64: ...48 BladeCenter HS22V Type 7871 and 1949 Problem Determination and Service Guide...

Page 65: ...d assistance see the Warranty and Support Information document Installation guidelines Use these guidelines before you install the blade server or optional devices Before you install optional devices...

Page 66: ...unit for additional information v Each microprocessor socket always contains either a microprocessor dust cover and heat sink filler or a microprocessor and heat sink If the blade server has only one...

Page 67: ...vice If it is necessary to set down the device put it back into its static protective package Do not place the device on the blade server cover or on a metal surface v Take additional care when you ha...

Page 68: ...mation and update options are established according to blade server bay number if you reinstall the blade server into a different bay you might have to reconfigure the blade server To remove the blade...

Page 69: ...the blade server at least one blade bay is required Notes a When any blade server or device is in blade bay 7 through 14 power modules must be installed in all four power module bays For additional in...

Page 70: ...y indicating that the blade server is receiving power and is turned on 8 If you have other blade servers to install do so now 9 Optional Write identifying information on one of the labels that come wi...

Page 71: ...read Safety on page v and Installation guidelines on page 49 2 If the blade server is installed in a BladeCenter unit remove it see Removing the blade server from the BladeCenter unit on page 52 for i...

Page 72: ...server install it now see Installing an optional expansion unit on page 58 2 Lower the cover so that the slots at the rear slide down onto the pins at the rear of the blade server as shown in the illu...

Page 73: ...ver if one is installed see Removing the blade server cover on page 55 for instructions 5 Remove the expansion unit a If the expansion unit has an extraction device use the extraction device to diseng...

Page 74: ...ective package that contains the optional expansion unit to any unpainted metal surface on the BladeCenter unit or any unpainted metal surface on any other grounded rack component then remove the opti...

Page 75: ...nit is installed remove it see Removing an optional expansion unit on page 57 5 Carefully lay the blade server on a flat static protective surface 6 Press the bezel assembly release on each side of th...

Page 76: ...the blade server Note Some hardware installation and removal procedures that refer to this installation process do not require the control panel cable to be installed For example the DIMM connectors c...

Page 77: ...Removing the bezel assembly on page 59 Attention When you remove an SSD drive use a felt tip pen to write which SSD connector the drive was removed from on the drive label Installing an SSD drive into...

Page 78: ...connectors on page 14 Attention To maintain a RAID array an SSD storage drive must be installed into the same SSD connector it was removed from 2 Touch the static protective package that contains the...

Page 79: ...ee Blade server connectors on page 14 Determine which DIMM you want to remove from the blade server Attention To avoid breaking the retaining clips or damaging the DIMM connectors handle the clips gen...

Page 80: ...lled the blade server can support a minimum of 2 GB and a maximum of 288 GB of system memory Before you install the quad rank DIMMs read the following information v Quad rank DIMMs must be installed f...

Page 81: ...annel mode 1 microprocessor continued Installed memory DIMM connector 1 2 3 4 5 6 7 8 9 10 11 12 13 14 15 16 17 18 9 DIMMs X1 X X X1 X X X1 X X 1 Not supported when a quad rank DIMM is installed Chapt...

Page 82: ...X X X X X X X 10 DIMMs X X X X X X X X X X 11 DIMMs X X X X X X X X X X X 12 DIMMs X X X X X X X X X X X X 13 DIMMs X1 X X X X X X X X X X X X 14 DIMMs X1 X X X X X X X1 X X X X X X 15 DIMMs X1 X X X1...

Page 83: ...e Table 5 System memory configuration for mirrored channel mode 1 microprocessor Installed memory DIMM socket 1 2 3 4 5 6 7 8 9 10 11 12 13 14 15 16 17 18 2 DIMMs X X 4 DIMMs X X X X 6 DIMMs X1 X X X1...

Page 84: ...he Setup utility to view the system summary and verify the type of microprocessor installed in your blade server see Using the Setup utility on page 20 The following table shows the order that memory...

Page 85: ...you are installing the DIMM for at least two seconds then remove the DIMM from its package c Turn the DIMM so that the DIMM keys align correctly with the DIMM connector on the system board Attention...

Page 86: ...tional expansion unit is installed remove the expansion unit see Removing an optional expansion unit on page 57 5 If an optional CIOv expansion card is installed remove the CIOv expansion card see Rem...

Page 87: ...component in the rack in which you are installing the USB module for at least two seconds then remove the USB module from its package 4 Orient the connector on the USB Flash key with the USB connector...

Page 88: ...blade server The following notes describe information that you must consider when you are replacing the battery in the blade server v You must replace the battery with a lithium battery of the same ty...

Page 89: ...board see Blade server connectors on page 14 7 Orient the battery so that the positive side faces in towards the center of the blade server 8 Tilt the battery so that you can insert it into the bottom...

Page 90: ...remove a CIOv expansion card complete the following steps 1 Before you begin read Safety on page v and Installation guidelines on page 49 2 If the blade server is installed in a BladeCenter unit remo...

Page 91: ...pansion card complete the following steps 1 Before you begin read Safety on page v and Installation guidelines on page 49 2 If the blade server is installed in a BladeCenter unit remove it see Removin...

Page 92: ...teps 1 Before you begin read Safety on page v and Installation guidelines on page 49 2 If the blade server is installed in a BladeCenter unit remove it see Removing the blade server from the BladeCent...

Page 93: ...he cable then pull the cable away from the backup battery 7 The backup battery is installed in DIMM connector ten To remove the backup battery complete the following steps DIMM 10 connector Battery Ca...

Page 94: ...et Expansion Card CIOv for IBM BladeCenter v QLogic 4 Gb Fibre Channel Expansion Card CIOv for IBM BladeCenter v SAS Connectivity Card CIOv for IBM BladeCenter v ServeRAID MR10ie CIOv Controller for I...

Page 95: ...rd Expansion card standoff Release lever Attention Before you install one of the following CFFh expansion cards in the blade server make sure the PCIe speed is set to Gen1 You can configure the PCIe s...

Page 96: ...s The following illustrations and installation instructions show how to install a ServeRAID MR10ie controller into the CIOv expansion connector of the blade server The illustrations and installation i...

Page 97: ...and simultaneously lift up on the controller as shown c Separate the interposer card from the storage interface card and store the interposer card in a safe place 4 Install the backup battery cable to...

Page 98: ...hat it lays flat over the top of the heat sink for microprocessor two Battery Cable B 10 If you removed an optional expansion unit reinstall it see Installing an optional expansion unit on page 58 11...

Page 99: ...s on page 14 7 Remove any SSD storage drives from the SSD storage tray see Removing a SSD storage drive on page 61 Attention When you remove an SSD drive use a felt tip pen to write which SSD connecto...

Page 100: ...ighten the screws until the SSD drive tray is secure Note Make sure the SSD drives are installed into the same SSD connector that they were removed from to maintain any RAID array that might be config...

Page 101: ...le the heat sink and microprocessor when you remove or install these components Do not touch the thermal material or otherwise allow it to become contaminated Note The microprocessor and heat sink ass...

Page 102: ...to break the seal with the microprocessor b Use a screwdriver to loosen the screws on the heat sink rotating each screw two full turns until each screw is loose c Use your fingers to gently pull the...

Page 103: ...r bracket Installation tool Microprocessor Alignment pins 13 Twist the handle clockwise to attach the tool to the microprocessor Note You can pick up or release the microprocessor by twisting the micr...

Page 104: ...To install a microprocessor and heat sink complete the following steps 1 If you are not installing a new microprocessor and a new heat sink remove the thermal grease from the heat sink and microproce...

Page 105: ...n the bottom of the microprocessor carefully remove it Microprocessor Protective cover e Twist the handle of the installation tool counterclockwise so that it is in the open position f Align the micro...

Page 106: ...or into the socket v Do not touch exposed pins of the microprocessor socket v Make sure that the microprocessor is oriented and aligned correctly in the socket before you try to close the microprocess...

Page 107: ...d tighten them with a screwdriver alternating among the screws until they are tight If possible each screw should be rotated two full rotations at a time Repeat until the screws are tight Do not overt...

Page 108: ...server into the BladeCenter unit see Installing the blade server in a BladeCenter unit on page 53 Thermal grease Use this information to determine the guidelines for using thermal grease on a heat sin...

Page 109: ...ick mark on the syringe If the grease is properly applied approximately half 0 22 mL of the grease will remain in the syringe 6 Continue with step 5 on page 89 Chapter 5 Removing and replacing blade s...

Page 110: ...ove the blade server cover see Removing the blade server cover on page 55 5 If an optional expansion unit is installed remove the expansion unit see Removing an optional expansion unit on page 57 6 Re...

Page 111: ...orm factor expansion card on page 79 and Installing a storage interface card on page 80 v Storage drives See Installing a SSD storage drive on page 62 v Microprocessors and heat sinks See Installing a...

Page 112: ...96 BladeCenter HS22V Type 7871 and 1949 Problem Determination and Service Guide...

Page 113: ...the system board to diagnose system errors If the system error LED on the system LED panel on the front or rear of the BladeCenter unit is lit one or more error LEDs on the BladeCenter unit components...

Page 114: ...on password is set you must type the password and press Enter when you are prompted for POST to run If POST is completed without detecting any problems the server startup will continue If POST detects...

Page 115: ...nts are assertion type events v Integrated management module IMM event log This log contains a filtered subset of all IMM POST and system management interrupt SMI events You can view the IMM event log...

Page 116: ...vary slightly from what is described in this document 1 Go to http www ibm com systems support 2 Under Product support click BladeCenter 3 Under Popular links click Software and device drivers 4 Under...

Page 117: ...is not installed insert the DSA Preboot CD and restart the blade server to start DSA Preboot and view the event logs v Alternatively you can restart the blade server and press F1 to start the Setup ut...

Page 118: ...l threshold Reading X Threshold Y 1 If the under voltage problem is occurring on all blade servers look for other events in the log related to power and resolve those events see Error logs on page 99...

Page 119: ...010200 Error System board Planar 3 3V voltage under critical threshold Reading X Threshold Y 1 Remove all expansion cards from the blade server see Removing an I O expansion card on page 74 2 Remove a...

Page 120: ...esolve those events see Error logs on page 99 2 View the event log provided by the advanced management module for your BladeCenter unit and resolve any power related errors that might be displayed 3 I...

Page 121: ...or System board Planar 12V voltage over critical threshold Reading X Threshold Y 1 If the over voltage problem is occurring on all blade servers look for other events in the log related to power and r...

Page 122: ...BladeCenter unit and on the blade server are blocked 3 Make sure that all of the fans on the BladeCenter unit are running 0x80070100 Warning Memory device X temperature DIMM X Temp warning Note X 1 1...

Page 123: ...rror System board voltage Planar Fault critical 1 Reseat the blade server in the BladeCenter unit see Removing the blade server from the BladeCenter unit on page 52 and Installing the blade server in...

Page 124: ...t critical 1 Make sure that the latest firmware is being used see Firmware updates on page 33 2 Reseat the blade server in the BladeCenter see Removing the blade server from the BladeCenter unit on pa...

Page 125: ...BladeCenter unit has either a device or a filler installed 5 Make sure that the blade server is not missing any heat sinks DIMMs heat sink fillers or DIMM fillers see Chapter 4 Parts listing Types 78...

Page 126: ...rough nine are controlled by the first microprocessor and DIMM sockets ten through eighteen are controlled by the second microprocessor See Removing a microprocessor and heat sink on page 85 and Insta...

Page 127: ...rained service technician only If the error still occurs replace the microprocessor that controls the failing memory module Note DIMM sockets one through nine are controlled by the first microprocesso...

Page 128: ...on page 85 and Installing a microprocessor and heat sink on page 88 5 Trained service technician only If the error continues replace the system board assembly see Removing the system board assembly on...

Page 129: ...are see Firmware updates on page 33 2 Follow the UEFI recovery procedure in Recovering from a UEFI update failure on page 212 0x806F0013 Error Chassis NMI State diagnostic interrupt 1 Verify that you...

Page 130: ...ned service technician only If the error continues replace the system board assembly see Removing the system board assembly on page 94 and Installing the system board assembly on page 95 0x806F0013 Er...

Page 131: ...an I O expansion card on page 74 7 Replace failing adapter and reinstall any other expansion cards that were removed see Installing an I O expansion card on page 78 8 Trained service technician only I...

Page 132: ...and heat sink on page 88 7 Trained service technician only If the error still occurs replace the microprocessor that controls the failing memory module See Removing a microprocessor and heat sink on p...

Page 133: ...nstall the affected memory modules as indicated by the error LEDs on the system board or the event logs to a different memory channel or microprocessor see Installing a memory module on page 64 for me...

Page 134: ...modules as indicated by the error LEDs on the system board or the event logs to a different memory channel or microprocessor see Installing a memory module on page 64 for memory population sequence 5...

Page 135: ...Install the affected memory modules as indicated by the error LEDs on the system board or the event logs to a different memory channel or microprocessor see Installing a memory module on page 64 for m...

Page 136: ...ry modules as indicated by the error LEDs on the system board or the event logs to a different memory channel or microprocessor see Installing a memory module on page 64 for memory population sequence...

Page 137: ...em board or the event logs to a different memory channel or microprocessor see Installing a memory module on page 64 for memory population sequence 5 If the error still occurs on the same memory modul...

Page 138: ...d heat sink on page 85 and Installing a microprocessor and heat sink on page 88 5 Trained service technician only If the error continues replace the system board assembly see Removing the system board...

Page 139: ...roprocessor and heat sink on page 85 and Installing a microprocessor and heat sink on page 88 5 Trained service technician only If the error continues replace the system board assembly see Removing th...

Page 140: ...This error indicates a microprocessor fault and will reboot the blade server up to three times to correct the error If the error continues error codes 0x806F0007 and 0x806F0807 will be logged Follow...

Page 141: ...ccurs on the same memory module replace the affected memory module 6 Trained service technician only If the problem occurs on the same DIMM connector check the DIMM connector If the connector is damag...

Page 142: ...ite for an applicable retain tip or firmware update that applies to this memory event If no memory fault is recorded in the logs and no DIMM connector error LED is lit re enable the memory modules usi...

Page 143: ...expansion card is up to date 3 Run the Setup utility and restore system setting to defaults see Using the Setup utility on page 20 4 Check the event logs for other related error messages see Error log...

Page 144: ...3 Run the Setup utility and restore system setting to defaults see Using the Setup utility on page 20 4 Check the event logs for other related error messages see Error logs on page 99 5 Reseat any exp...

Page 145: ...lled in the blade server see Removing an I O expansion card on page 74 and Installing an I O expansion card on page 78 6 Remove each expansion card one at a time until the error does not occur see Rem...

Page 146: ...ware see Firmware updates on page 33 3 Run the Setup utility see Using the Setup utility on page 20 a Make sure that both processors are displayed by the system b Load the default settings c Go to the...

Page 147: ...different memory channel or microprocessor see Installing a memory module on page 64 for memory population sequence 4 If the error occurs again on the same memory module replace the affected memory m...

Page 148: ...or microprocessor see Installing a memory module on page 64 for memory population sequence 4 If the error occurs again on the same memory module replace the affected memory module 5 Trained service t...

Page 149: ...a different memory channel or microprocessor see Installing a memory module on page 64 for memory population sequence 4 If the error occurs again on the same memory module replace the affected memory...

Page 150: ...l or microprocessor see Installing a memory module on page 64 for memory population sequence 4 If the error occurs again on the same memory module replace the affected memory module 5 Trained service...

Page 151: ...or check the DIMM connector If the connector is damaged replace the system board assembly see Removing the system board assembly on page 94 and Installing the system board assembly on page 95 6 Traine...

Page 152: ...ate 3 Run the Setup utility and restore system setting to defaults see Using the Setup utility on page 20 4 Check the event logs for other related error messages see Error logs on page 99 5 Reseat any...

Page 153: ...ch expansion card is up to date 3 Run the Setup utility and restore system setting to defaults see Using the Setup utility on page 20 4 Check the event logs for other related error messages see Error...

Page 154: ...3 Run the Setup utility and restore system setting to defaults see Using the Setup utility on page 20 4 Check the event logs for other related error messages see Error logs on page 99 5 Reseat any exp...

Page 155: ...on page 74 and Installing an I O expansion card on page 78 6 Remove each expansion card one at a time until the error does not occur see Removing an I O expansion card on page 74 7 Replace failing ada...

Page 156: ...le error 1 Verify that you have the latest system firmware see Firmware updates on page 33 2 Trained service technician only If the error still occurs replace microprocessor X see Removing a microproc...

Page 157: ...06F0807 Information Group 4 processor All CPUs disabled 1 Remove the blade server and ensure the processors are installed correctly see Installing a microprocessor and heat sink on page 88 2 Check the...

Page 158: ...system event log and the system event log as it may contain additional information see Error logs on page 99 2 Reseat the blade server in the BladeCenter see Removing the blade server from the BladeC...

Page 159: ...ice technician only that step must be performed only by a trained service technician Error Code Type Error Message Action 0x806F0813 Error Group 4 Critical Int bus uncorrectable error 1 Verify that th...

Page 160: ...ink on page 85 and Installing a microprocessor and heat sink on page 88 2 Trained service technician Complete the following steps a Remove microprocessor 2 and restart the server see Removing a microp...

Page 161: ...ink on page 85 and Installing a microprocessor and heat sink on page 88 2 Trained service technician Complete the following steps a Remove microprocessor 2 and restart the server see Removing a microp...

Page 162: ...the server see Removing a microprocessor and heat sink on page 85 and Installing a microprocessor and heat sink on page 88 b If the problem remains remove microprocessor 1 and install microprocessor...

Page 163: ...service technician Complete the following steps a Remove microprocessor 2 and restart the server see Removing a microprocessor and heat sink on page 85 and Installing a microprocessor and heat sink on...

Page 164: ...r firmware update that applies to this memory event If no memory fault is recorded in the logs and no DIMM connector error LED is lit re enable the memory modules using the Setup utility or the Advanc...

Page 165: ...o the power source and restart the server 4 If the problem remains replace the affected DIMMs 5 Trained service technician only If the problem occurs on the same DIMM connector check the DIMM connecto...

Page 166: ...mbly on page 94 and Installing the system board assembly on page 95 00580A1 Unsupported DIMM populated for mirroring mode 1 If a DIMM connector error LED is lit on the system board check the event log...

Page 167: ...IMMs as indicated by the error LEDs on the system board or the event logs to a different memory channel or microprocessor see Installing a memory module on page 64 for memory population sequence 4 If...

Page 168: ...ed service technician only Replace the system board see Removing the system board assembly on page 94 and Installing the system board assembly on page 95 0058006 Spare copy failover complete 1 Make su...

Page 169: ...he server 4 Install the affected DIMMs as indicated by the error LEDs on the system board or the event logs to a different memory channel or microprocessor see Installing a memory module on page 64 fo...

Page 170: ...DIMM see Removing the system board assembly on page 94 and Installing the system board assembly on page 95 0068001 Planar POST failure 1 Restart the server 2 Trained service technician only If the pro...

Page 171: ...oard assembly on page 94 and Installing the system board assembly on page 95 2010000 PCI X PERR 1 Reseat the expansion cards see Removing an I O expansion card on page 74 and Installing an I O expansi...

Page 172: ...e Setup utility see Using the Setup utility on page 20 and disable unused resource to make more space available v Select Start Options v Select Planar Ethernet PXE DHCP to disable the on board Etherne...

Page 173: ...rts to disable any of the on board devices 3 If the problem remains replace the following components one at a time in the order shown restarting the server each time v Expansion cards see Removing an...

Page 174: ...gal software state halted 1 Run the Setup utility see Using the Setup utility on page 20 Select Load Default Settings and save the settings 2 Reseat the following components one at a time in the order...

Page 175: ...71 and Installing the battery on page 72 v Expansion cards see Removing an I O expansion card on page 74 and Installing an I O expansion card on page 78 v Trained service technician only Replace the...

Page 176: ...ings and save the settings 2 Update the firmware to the latest level see Firmware updates on page 33for more information 3 Reseat the following components one at a time in the order shown restarting t...

Page 177: ...server from the BladeCenter unit on page 52 and Installing the blade server in a BladeCenter unit on page 53 2 Update the IMM firmware see Firmware updates on page 33 3 Trained service technician onl...

Page 178: ...2 Update the IMM firmware see Firmware updates on page 33 3 Trained service technician only If the problem remains replace the system board see Removing the system board assembly on page 94 and Insta...

Page 179: ...n page 164 and Solving undetermined problems on page 222 v For intermittent problems check the error log see Error logs on page 99 and Dynamic system analysis diagnostic programs and messages on page...

Page 180: ...neral hardware problem Follow the suggested actions in the order in which they are listed in the Action column until the problem is solved v See Chapter 4 Parts listing Types 7871 and 1949 on page 41...

Page 181: ...omponents on page 49 The blade server stops responding during the Fixed Disk or SAS Attached Disk diagnostic test 1 Remove the storage drive that was being tested when the blade server stopped respond...

Page 182: ...e following table and Solving shared BladeCenter resource problems on page 217 v See Chapter 4 Parts listing Types 7871 and 1949 on page 41 to determine which components are CRUs and which components...

Page 183: ...and enable the DIMM see Using the Setup utility on page 20 3 Reseat the DIMM and the optional expansion unit if one is installed see Removing a memory module on page 63 Installing a memory module on p...

Page 184: ...video see Recovering from a UEFI update failure on page 212 v The device drivers are installed correctly 5 Follow the UEFI recovery procedure in Recovering from a UEFI update failure on page 212 6 Tra...

Page 185: ...ly by a trained service technician Symptom Action One or more blade servers are unable to communicate with the network 1 Check the function of the shared BladeCenter unit resources See Solving shared...

Page 186: ...servers eserver serverproven compat us v You followed the installation instructions that came with the device and the device is installed correctly See the instructions that came with the device v You...

Page 187: ...g the blade server each time a Optional expansion unit if one is installed See Removing an optional expansion unit on page 57 and Installing an optional expansion unit on page 58 b Trained service tec...

Page 188: ...r resource problems on page 217 3 Trained service technician only Replace the system board assembly See Removing the system board assembly on page 94 and Installing the system board assembly on page 9...

Page 189: ...l only Note If the problem remains complete the following steps 1 Reseat the blade server See Removing the blade server from the BladeCenter unit on page 52 and Installing the blade server in a BladeC...

Page 190: ...ice technician only that step must be performed only by a trained service technician Symptom Action The power control button does not work 1 Reseat the control panel connector See Blade server control...

Page 191: ...erver from the BladeCenter unit on page 52 and Installing the blade server in a BladeCenter unit on page 53 6 If you just installed a device in the blade server remove it and restart the blade server...

Page 192: ...age 10 b If the blade server fails during POST and the power control button does not work remove the blade server from the bay and reseat it See Removing the blade server from the BladeCenter unit on...

Page 193: ...Solving shared BladeCenter resource problems on page 217 3 Run the Setup utility and make sure that the drive is enabled See Setup utility menu on page 20 4 For SAS storage drive problems make sure th...

Page 194: ...server connectors on page 14 to locate the storage drive connector The operating system installation program continuously loops Make more space available on the hard disk The ServerGuide program will...

Page 195: ...emory that is needed to use the software For memory requirements see the information that comes with the software Note If you have just installed an adapter or memory the blade server might have a mem...

Page 196: ...e technician only that step must be performed only by a trained service technician Symptom Action A USB device does not work 1 Make sure that the media tray select button LED on the front of the blade...

Page 197: ...view the light path diagnostics LEDs in the following order 1 Look at the control panel on the front of the blade server see Blade server controls and LEDs on page 10 v If the information LED is lit...

Page 198: ...D SSD 1 error LED Microprocessor 1 error LED Light path diagnostic panel The following illustrations show the system board light path diagnostics panel and LEDs on the system board light path diagnost...

Page 199: ...Viewing the light path diagnostics LEDs on page 181 2 Check the BMC log for information about an error that is not represented by a light path diagnostics LED See Using the Setup utility on page 20 Ba...

Page 200: ...page 88 MIS Microprocessor mismatch Make sure that microprocessors 1 and 2 are identical number of cores cache size and type clock speed internal and external clock frequencies 1 Verify the type of mi...

Page 201: ...ns on page 8 for temperature information Dynamic system analysis diagnostic programs and messages Use this information to learn more about using the dynamic system analysis DSA diagnostic programs and...

Page 202: ...ive test results To run the DSA Preboot diagnostic programs complete the following steps 1 If the blade server is running turn off the blade server and all attached devices 2 Turn on all attached devi...

Page 203: ...that is not controlled by the blade server you cannot use the Next Cat and Prev Cat buttons to select categories All other mouse selectable functions are available through function keys To view serve...

Page 204: ...in the table make sure that the latest level of the UEFI code is installed To download the latest firmware for the blade server go to http www ibm com systems support The following table describes th...

Page 205: ...Make sure that the component firmware level is up to date upgrade if necessary then rerun the test The installed firmware level can be found in the DSA Diagnostic Event Log within the Firmware VPD se...

Page 206: ...stic Event Log within the Firmware VPD section for this component The latest level firmware for this component can be found on the IBM support Web site at http www ibm com support docview wss uid psg1...

Page 207: ...using the Setup utility to assign a unique interrupt to the device see Using the Setup utility on page 20 3 If the failure remains refer to Chapter 5 Removing and replacing blade server components on...

Page 208: ...s up to date upgrade if necessary then rerun the test The latest code can be found on the IBM support Web site at http www ibm com support docview wss uid psg1SERV DSA 3 Make sure that the system firm...

Page 209: ...at http www ibm com support docview wss uid psg1SERV DSA 3 Make sure that the system firmware level is up to date upgrade if necessary then rerun the test The installed firmware level can be found in...

Page 210: ...ary then rerun the test up to date upgrade if necessary The latest code can be found on the IBM support Web site at http www ibm com support docview wss uid psg1SERV DSA 4 Make sure that the system fi...

Page 211: ...p to date upgrade if necessary The latest code can be found on the IBM support Web site at http www ibm com support docview wss uid psg1SERV DSA 3 Make sure that the system firmware level is up to dat...

Page 212: ...n page 53 and Turning on the blade server on page 13 3 Rerun the test See Diagnostic tools overview on page 97 4 Make sure that the DSA Diagnostic code is up to date upgrade if necessary then rerun th...

Page 213: ...that the DSA Diagnostic code is up to date upgrade if necessary then rerun the test The latest code can be found on the IBM support Web site at http www ibm com support docview wss uid psg1SERV DSA 5...

Page 214: ...nd on the IBM support Web site at http www ibm com support docview wss uid psg1SERV DSA 5 Make sure that the component firmware level is up to date upgrade if necessary then rerun the test The install...

Page 215: ...test code can be found on the IBM support Web site at http www ibm com support docview wss uid psg1SERV DSA 5 Make sure that the IMM firmware level is up to date upgrade if necessary then rerun the te...

Page 216: ...age 97 4 Make sure that the DSA Diagnostic code is up to date upgrade if necessary then rerun the test The latest code can be found on the IBM support Web site at http www ibm com support docview wss...

Page 217: ...on the IBM support Web site at http www ibm com support docview wss uid psg1SERV DSA 5 Make sure that the IMM firmware level is up to date upgrade if necessary then rerun the test The installed firmwa...

Page 218: ...at http www ibm com support docview wss uid psg1SERV DSA 5 Make sure that the IMM firmware level is up to date upgrade if necessary then rerun the test The installed firmware level can be found in the...

Page 219: ...the blade server from the BladeCenter unit on page 52 2 Make sure that the DSA Diagnostic code is at the latest level then rerun the test Diagnostic tools overview on page 97 The latest code can be f...

Page 220: ...the IBM support Web site at http www ibm com support docview wss uid psg1SERV DSA 3 Make sure that the system BIOS firmware is at the latest level upgrade if necessary then rerun the test Diagnostic...

Page 221: ...erun the test Diagnostic tools overview on page 97 The latest code can be found on the IBM support Web site at http www ibm com support docview wss uid psg1SERV DSA 3 Make sure that the system BIOS fi...

Page 222: ...on for information about replacing the optical drive media tray 3 Make sure that the cable for the optical drive is not damaged then replace the cable if damage is present See your BladeCenter documen...

Page 223: ...al drive media tray 4 Make sure that the cable for the optical drive is not damaged and replace the cable if damage is present See your BladeCenter documentation for information about the optical driv...

Page 224: ...rive media was not detected 1 Insert a new CD or DVD into the drive and wait for 15 seconds for the media to be recognized then rerun the test See Diagnostic tools overview on page 97 2 Make sure that...

Page 225: ...e your BladeCenter documentation for information about the optical drive media tray 3 Make sure that the cable for the optical drive is not damaged and replace the cable if damage is present See your...

Page 226: ...the optical drive is not damaged then replace the cable if damage is present See your BladeCenter documentation for information about replacing the optical drive media tray 4 Make sure that the DSA D...

Page 227: ...test See Diagnostic tools overview on page 97 7 Replace the CD or DVD drive See your BladeCenter documentation for information about replacing the optical drive media tray 8 If the failure remains co...

Page 228: ...ssor IMM error codes Use this information to view the IMM error log The Integrated Management Module IMM log contains up to 512 of the most recent service processor errors in IPMI format These message...

Page 229: ...From a command line type filename s where filename is the name of the executable file that you downloaded with the firmware update package 13 Reboot the server and verify that it completes POST see Tu...

Page 230: ...he blade server in a BladeCenter unit on page 53 8 Restart the blade server see Turning on the blade server on page 13 The system begins the power on self test POST 9 Boot the server to the operating...

Page 231: ...event log entry or Booting Backup Image is displayed on the firmware splash screen otherwise use the in band manual recovery method 1 Download the blade server UEFI firmware update from the World Wid...

Page 232: ...OST with the default configuration there might be a problem with the system board To specify the number of consecutive restart attempts that will trigger the Nx boot failure feature complete the follo...

Page 233: ...wn good blade server v Try the blade server in a different blade server bay v Try a known good blade server in the blade server bay Keyboard or mouse problems Use this information to diagnose and reso...

Page 234: ...the blade server each time 1 USB cable if applicable 2 Media tray cable if applicable 3 Media tray d Continue with Media tray problems 4 For problems that affect only the diskette drive make sure that...

Page 235: ...problem is solved 1 Make sure that v The network cables are securely connected to the I O module v Power configuration of the BladeCenter unit supports the I O module configuration v Installation of...

Page 236: ...talled v The BladeCenter unit blowers are correctly installed and operational If these procedures do not solve the problem it is likely a problem with the blade server See Power error messages on page...

Page 237: ...ions in the order in which they are listed in the Action column until the problem is solved v See Chapter 4 Parts listing Types 7871 and 1949 on page 41 to determine which components are CRUs and whic...

Page 238: ...t the UEFI code is damaged see Recovering from a UEFI update failure on page 212 Check the LEDs on all the power supplies of the BladeCenter unit in which the blade server is installed If the LEDs ind...

Page 239: ...del v Microprocessor and hard disk drive upgrades v Failure symptoms Does the blade server fail the diagnostic tests What occurs When Where Does the failure occur on a single server or on multiple ser...

Page 240: ...224 BladeCenter HS22V Type 7871 and 1949 Problem Determination and Service Guide...

Page 241: ...ce contract Your IBM service technician will request that you upgrade your software and firmware if the problem has a documented solution within a software upgrade v If you have installed new hardware...

Page 242: ...vers and updates To access these pages go to http www ibm com supportportal Getting help and information from the World Wide Web Up to date information about IBM products and support is available on t...

Page 243: ...lanetwide for support telephone numbers In the U S and Canada call 1 800 IBM SERV 1 800 426 7378 Hardware service and support You can receive hardware service through your IBM reseller or IBM Services...

Page 244: ...228 BladeCenter HS22V Type 7871 and 1949 Problem Determination and Service Guide...

Page 245: ...OT LIMITED TO THE IMPLIED WARRANTIES OF NON INFRINGEMENT MERCHANTABILITY OR FITNESS FOR A PARTICULAR PURPOSE Some states do not allow disclaimer of express or implied warranties in certain transaction...

Page 246: ...n referring to processor storage real and virtual storage or channel volume KB stands for 1024 bytes MB stands for 1 048 576 bytes and GB stands for 1 073 741 824 bytes When referring to hard disk dri...

Page 247: ...mits because numerous other factors such as temperature or moisture content of the air can influence the impact of particulates or environmental corrosives and gaseous contaminant transfer In the abse...

Page 248: ...to include the publication part number and title When you send information to IBM you grant IBM a nonexclusive right to use or distribute the information in any way it believes appropriate without inc...

Page 249: ...Canada Cet appareil num rique de la classe A est conforme la norme NMB 003 du Canada Australia and New Zealand Class A statement Attention This is a Class A product In a domestic environment this prod...

Page 250: ...kann vom Betreiber verlangt werden angemessene Ma nahmen zu ergreifen und daf r aufzukommen Deutschland Einhaltung des Gesetzes ber die elektromagnetische Vertr glichkeit von Ger ten Dieses Produkt e...

Page 251: ...the user may be required to take corrective actions Korea Communications Commission KCC statement This is electromagnetic wave compatibility equipment for business Type A Sellers and users need to pa...

Page 252: ...236 BladeCenter HS22V Type 7871 and 1949 Problem Determination and Service Guide...

Page 253: ...ssor 14 storage drive 14 system board 14 contamination particulate and gaseous 231 controller enable or disable Ethernet 20 enable or disable SCSI 20 cover closing 56 opening 55 CPU stress test error...

Page 254: ...1 flag 2 211 flag 23 211 flag 4 211 Temp 183 UEFI update 212 USB port 180 video problems 220 European Union EMC Directive conformance statement 233 event log 97 event logs 99 exit configuration utilit...

Page 255: ...c 185 microprocessor connectors 14 heat sink 91 install guidelines 88 removal guidelines 85 specifications 8 microprocessor options 20 microprocessor problems 163 minimum configuration 222 monitor pro...

Page 256: ...board switch description 15 SW1 3 system board switch description 15 SW1 4 system board switch description 15 SW1 5 system board switch description 16 SW1 6 system board switch description 16 SW1 7 s...

Page 257: ......

Page 258: ...Part Number 00Y8038 Printed in USA 1P P N 00Y8038...

Reviews: