Step 7. Install the Model 6C4 into the Rack Enclosure
Attention:
When installing this system drawer into a rack, ensure that a hazardous
condition is not created due to uneven mechanical loading If your rack uses a stabilizer
bar, it must be firmly attached before installing or removing this system.
To mount the Model 6C4 into the rack, do the following:
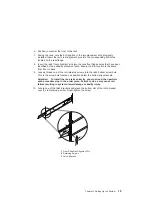
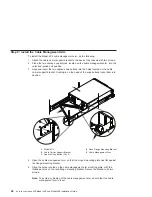
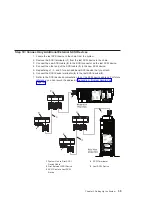
1. Using eight retaining screws, four on each side, mount the inner rails to each side
of the system drawer. Tighten each of the screws with a screwdriver or similar tool.
Note: The safety release tab, located on each inner rail, is mounted onto the side
of the system facing away from the system drawer. See the illustration on
page 14.
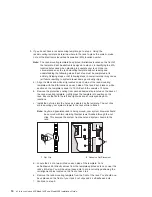
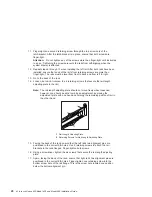
2. Using three persons, grasp the two handles located on each side of the system
drawer, and lift the system drawer.
3. Insert the inner rails located on the system drawer into the rails mounted in the
rack.
Attention:
When matching the inner rails to the outer rails, ensure that both
rail-face plates glide past each other.
Do not, under any circumstances, force the
rails. If the system drawer does not glide freely into the rack, completely remove the
drawer away from the outer rails. After the drawer is clear of the outer rails,
reposition the system, then reinsert the inner rails. Do this until the system drawer
glides freely into the rack.
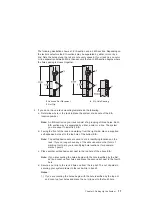
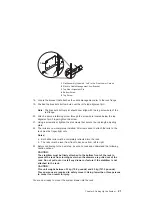
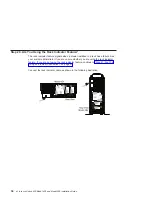
4. Simultaneously depress safety latches, located on each side of the system drawer,
and push the system into the rack.
5. Slide the system drawer in and out of the rack 2 or 3 times. This allows the system
drawer to align the rails to itself. The system drawer should glide on the rails.
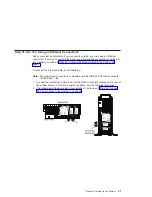
6. Push the system drawer back into the rack. Using a screwdriver or similar tool,
tighten the back four retaining screws that secure the slide rails to the rack’s back
flange.
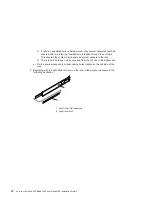
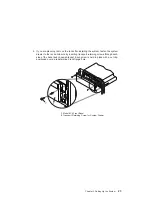
7. Slide the system drawer about halfway out of the rack.
8. Using a screwdriver or similar tool, tighten the front four retaining screws that
secure the slide rails to the rack’s front flange.
Note: After the system rails are installed, do not extend them past their safety
latches. The safety release latches stop the rails from over-extending and
separating. This action prevents the system drawer from being accidentally
pulled out too far and dropped.
Attention:
If any binding is detected, loosen the eight rail retaining screws (front
and back) and repeat steps 4 through 7.
22
Eserver
pSeries 630 Model 6C4 and Model 6E4 Installation Guide
Summary of Contents for @Server pSeries 630 6C4
Page 1: ...pSeries 630 Model 6C4 and Model 6E4 Installation Guide SA38 0605 01 ERserver IBM...
Page 2: ......
Page 3: ...pSeries 630 Model 6C4 and Model 6E4 Installation Guide SA38 0605 01 ERserver IBM...
Page 12: ...x Eserver pSeries 630 Model 6C4 and Model 6E4 Installation Guide...
Page 14: ...xii Eserver pSeries 630 Model 6C4 and Model 6E4 Installation Guide...
Page 22: ...6 Eserver pSeries 630 Model 6C4 and Model 6E4 Installation Guide...
Page 64: ...48 Eserver pSeries 630 Model 6C4 and Model 6E4 Installation Guide...
Page 148: ...132 Eserver pSeries 630 Model 6C4 and Model 6E4 Installation Guide...
Page 152: ...136 Eserver pSeries 630 Model 6C4 and Model 6E4 Installation Guide...
Page 156: ...140 Eserver pSeries 630 Model 6C4 and Model 6E4 Installation Guide...
Page 166: ...150 Eserver pSeries 630 Model 6C4 and Model 6E4 Installation Guide...
Page 179: ......
Page 180: ...IBMR Part Number 00P3937 Printed in U S A August 2002 SA38 0605 01 1P P N 00P3937...


