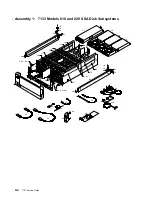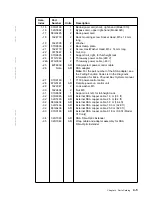
Remote-Power-On Control Unit
|
This section has two subsections; one is for Models 010 and 020, the other is for Models
|
500 and 600. Go to the appropriate subsection.
|
Remote-Power-On Control Unit (Models 010 and 020)
Note: Unless you have a particular reason to do so, do not turn off the using system or
the 7133 when removing or installing the remote-power-on control unit.
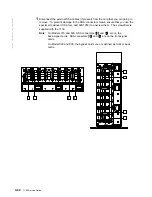
1
At the back of the 7133, remove all cables from the remote-power-on control
unit
2
.
Note: If the 7133 is still connected to the mainline power source, and you have not
set the 7133 Power switch to Off, the internal dc power turns on (if previously turned
off by the using-system power control) when you remove the cables.
2
Remove the two nuts
1
and their lock washers.
3
Remove the remote-power-on control unit
2
.
4
Replace parts in the reverse order.
Note: If the 7133 remained operational while you removed the remote-power-on
control unit, ensure that the power switch of the remote-power-on control unit that
you are going to install is set to | (on) before you reinstall any power-control cables.
Otherwise, when you install the cables, the internal dc power of the 7133 might turn
off.
Chapter 3. Removal and Replacement Procedures
3-55
Summary of Contents for 7133 Series
Page 1: ...7133 SSA Disk Subsystems Service Guide SY33 0185 02...
Page 2: ......
Page 3: ...7133 SSA Disk Subsystems Service Guide SY33 0185 02...
Page 8: ...vi 7133 Service Guide...
Page 14: ...xii 7133 Service Guide...
Page 44: ...Labels Dummy Fan and Power Supply Assembly 1 30 7133 Service Guide...
Page 94: ...2 10 7133 Service Guide...
Page 110: ...2 2021 6 7133 Service Guide...
Page 114: ...2 2022 4 7133 Service Guide...
Page 138: ...2 2330 18 7133 Service Guide...
Page 146: ...2 16 7133 Service Guide...
Page 210: ...3 64 7133 Service Guide...
Page 222: ...4 12 7133 Service Guide...
Page 229: ......
Page 230: ...Part Number 32H6990 Printed in the United Kingdom 32H699 SY33 185 2...

