background image

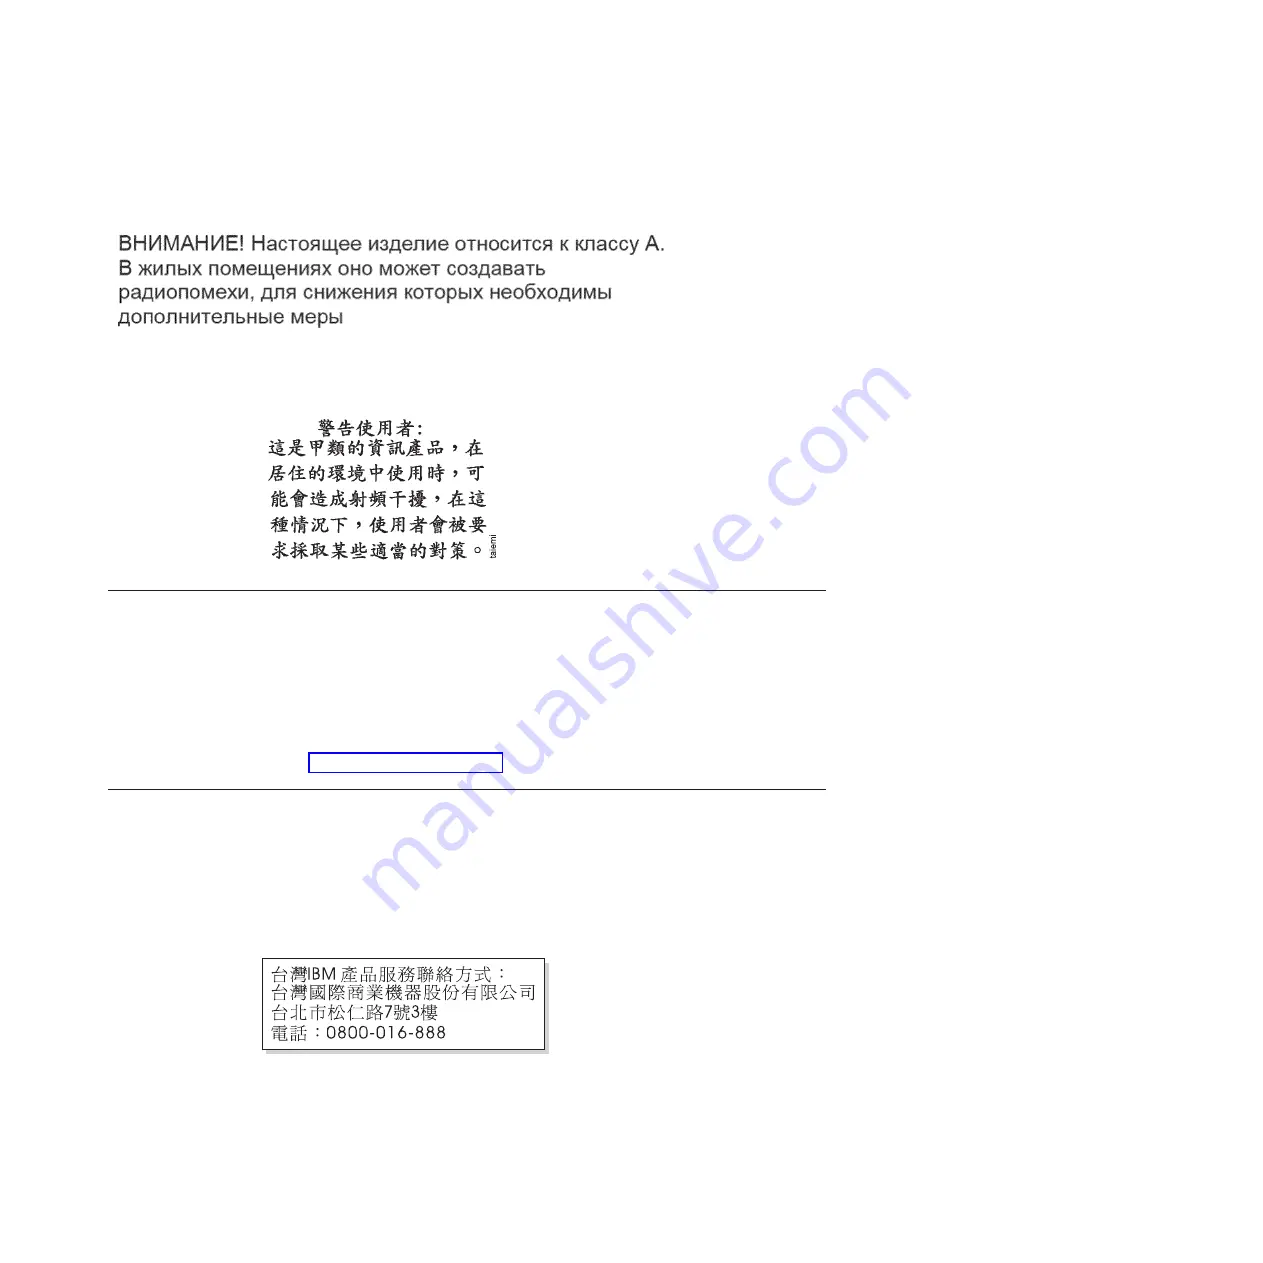
Russia Electromagnetic Interference (EMI) Class A Statement

Taiwan Class A compliance statement

European Contact Information

This topic contains the product service contact information for Europe.

European Community contact:
IBM Technical Regulations
Pascalstr. 100, Stuttgart, Germany 70569
Tele: 0049 (0)711 785 1176
Fax: 0049 (0)711 785 1283
Email: mailto: tjahn @ de.ibm.com

Taiwan Contact Information

This topic contains the product service contact information for Taiwan.

IBM Taiwan Product Service Contact Information:
IBM Taiwan Corporation
3F, No 7, Song Ren Rd., Taipei Taiwan
Tel: 0800-016-888

rusemi

f2c00790

Notices

69

Summary of Contents for 2073-700

Page 1: ...IBM Storwize V7000 Unified Version 1 3 0 Machine Types 2073 700 and 2076 Quick Installation Guide GA32 1056 01 ...

Page 2: ... IBM Environmental Notices and User Guide which is provided on a DVD This edition applies to the IBM Storwize V7000 Unified Version 1 3 0 and to all subsequent releases and modifications until otherwise indicated in new editions This edition replaces GC27 2290 00 Copyright IBM Corporation 2011 US Government Users Restricted Rights Use duplication or disclosure restricted by GSA ADP Schedule Contra...

Page 3: ... Configure the software 46 Change default passwords 56 Check the Storwize V7000 Unified system status 57 Upgrade the Storwize V7000 Unified software 57 Problems with initial configuration 57 Enable IBM Tivoli Assist On Site AOS 59 Appendix Accessibility 61 Notices 63 Trademarks 65 Electronic emission notices 65 Federal Communications Commission FCC statement 65 Industry Canada compliance statement...

Page 4: ...iv Storwize V7000 Unified Quick Installation Guide ...

Page 5: ...o the rack 21 24 Install the cable management support arm The graphic shows the rear of the rack 22 25 Install the cable management arm 22 26 Adjust the location of the cable management arm 23 27 Connect and route the cables 23 28 Secure the cable management arm and the file module in the rack for shipping if needed 24 29 Install the front screws 24 30 Internal cables This is a logical diagram of ...

Page 6: ...vi Storwize V7000 Unified Quick Installation Guide ...

Page 7: ...ifying the IP addresses and information necessary to set up the initialization tool The table entries serve as a guide only Fill in the Value column with your system information 41 9 Create two files and enter one line each adjusted to the values fitting to your environment 44 10 This table optional is useful for completing the Easy Setup wizard The table entries serve as a guide only Enter the Va...

Page 8: ...viii Storwize V7000 Unified Quick Installation Guide ...

Page 9: ...inor personal injury C001 DANGER A danger notice indicates the presence of a hazard that has the potential of causing death or serious personal injury D002 2 Locate IBM Systems Safety Notices with the user publications that were provided with the Storwize V7000 Unified hardware 3 Find the matching identification number in the IBM Systems Safety Notices Then review the topics concerning the safety ...

Page 10: ...x Storwize V7000 Unified Quick Installation Guide ...

Page 11: ... you are unable to access the internet there is a copy of the information center on the software CD that was shipped with the product it contains the environmental notices the publication PDFs and the information center content This documentation steps you through setting up a system Setting up a new system consists of installing a control enclosure and two file modules and up to nine expansion en...

Page 12: ...losure models 2076 112 2076 124 2076 312 or 2076 324 or expansion enclosure models 2076 212 or 2076 224 The last two digits of the model number identify the number of drive slots either 12 or 24 __ v Rack mounting hardware kit including __ Two rails right and left assembly __ Two M5 x 15 Hex Phillips screws per rail two rails __ Two M5 x 15 Hex Phillips screws per chassis Note Two parts of the rai...

Page 13: ...wo file modules Each file module box contains __ v File module server __ v Rack mounting hardware kit including __ Two sets of two rails right and left assembly __ Large cable tie __ Cable ties __ Two sets of four M6 screws per rail two rails __ Two sets of two 10 32 screws per chassis __ Cable management support arm __ Cable management arm mounting bracket __ Cable management arm stop bracket __ ...

Page 14: ...at is shipped with the file modules for configuration Set aside the USB keys that were shipped with the control enclosures Control enclosure Each enclosure has drives that are located on the front Figure 1 and Figure 2 show the front of an enclosure that has space for up to 12 or 24 drives 2 depending on the model and a left end cap 1 and a right end cap 3 Control enclosure components Figure 3 on ...

Page 15: ... the middle of the enclosure Each canister is known as a node canister The upper canister as shown in Figure 3 is canister 3 and the lower canister is canister 4 Canister 3 is top side up and canister 4 is inverted or top side down Figure 4 shows the rear view of a model 2076 112 or a model 2076 124 control enclosure and identifies the location of the ports 1 2 3 svc00662 4 Figure 3 Rear view of a...

Page 16: ...er They are numbered 1 on the left and 2 on the right Port 1 must be connected first if you are adding one expansion enclosure Port 2 must be connected if you are adding a second expansion enclosure Note The reference to the left and right locations applies to canister 1 which is the upper canister The port locations are inverted for canister 2 which is the lower canister Figure 5 shows the rear v...

Page 17: ...p and canister 2 is inverted or top side down Figure 7 shows the rear view of an expansion enclosure and identifies the SAS port locations Each canister has two SAS ports that are numbered 1 on the left 1 and 2 on the right 2 Port 1 must be connected if you are adding one expansion enclosure Port 2 must be connected if you are adding a second expansion enclosure Note The reference to the left and ...

Page 18: ...are components Figure 9 on page 9 identifies the various rear ports and hardware for the file module v 1 Fibre Channel ports right is port 1 left is port 2 v 2 10 Gbps Ethernet ports right is port 0 left is port 1 v 3 Power supply v 4 USB ports v 5 Serial port v 6 Video port v 7 1 Gbps Ethernet ports left is port 1 right is port 2 v 8 1 Gbps Ethernet ports left is port 3 right is port 4 v 9 Not us...

Page 19: ...upported web browser from the following website Support for Storwize V7000 Unified website at www ibm com storage support storwize v7000 unified 1 From the Search support input field type browser You are shown a search result for IBM Storwize V7000 Unified Supported Hardware List Device Driver Firmware and Recommended Software Levels Click the search entry 2 Scroll down to the Other Hardware and S...

Page 20: ... control enclosure it is preferable to add the enclosure directly below the control enclosure v When you add a second expansion enclosure it is preferable to add the enclosure directly above the control enclosure For each additional expansion enclosure that you add alternately add it below or above the control enclosure v Position the enclosures in the rack so that you can easily view them and acc...

Page 21: ...ing the layout must be developed prior to the start of the installation ifs00010 File Module File Module Expansion Enclosure 8 Expansion Enclosure 6 Expansion Enclosure 4 Expansion Enclosure 2 Control Enclosure Expansion Enclosure 1 Expansion Enclosure 3 Expansion Enclosure 5 Expansion Enclosure 7 Expansion Enclosure 9 Figure 10 Recommended rack locations Chapter 1 Before you begin the installatio...

Page 22: ...12 Storwize V7000 Unified Quick Installation Guide ...

Page 23: ...te the rack mounting rails and screws The rail assembly is made up of two sets of rails One set of rails is already installed or preinstalled on the sides of the enclosures The other set of rails must be installed in the rack cabinet The rails on the sides of the enclosures slide into the rails that are installed in the rack cabinet 2 Working at the front of the rack cabinet identify the two stand...

Page 24: ...vel between the front and the back Figure 12 shows two rack units with the back mounting holes identified v 1 Bottom rail location pin hole v 2 Rack mounting screw hole v 3 Top rail location pin hole 7 Insert the rail location pins through the holes in the rack cabinet 8 Insert a clamping screw into the rack mounting hole between the rail location pins 9 Tighten the screw to secure the rail to the...

Page 25: ...he front of the rack cabinet 3 Carefully slide the enclosure into the rack along the rails until the enclosure is fully inserted Notes a The preinstalled rails on the sides of the enclosure must fit into the rack mounted rails that you previously installed b The rails are not designed to hold an enclosure that is partially inserted The enclosure must always be in a fully inserted position c Do not...

Page 26: ...ver the open space and to help ensure proper air circulation v Install the file module only in a rack cabinet with perforated doors v Plan the device installation starting from the bottom of the rack cabinet v Install the heaviest device in the bottom of the rack cabinet v Do not extend more than one device out of the rack cabinet at the same time v Remove the rack doors and side panels to provide...

Page 27: ...ted on the left side The installation instructions in this document can be reversed if you are installing the cable management arm on the side of the file module not shown The following illustration shows the items that you need to install the file module in the rack cabinet If any items are missing or damaged contact your place of purchase The contents from the slide rail box and the cable manage...

Page 28: ...ith either an R right or an L left Select one of the slide rails and pull the rear bracket all the way back If a thumbscrew is installed in the slide rail remove it Friction rail left Friction rail right M6 screws Front of rails ifs00019 Figure 16 Friction rail box contents Front Rear Upper U for 2U system Lower U Optional screw to secure system into the rack Pins ifs00020 Figure 17 Locate a 2U sp...

Page 29: ...o pins on the rear of the slide rail in the selected unit on the rear of the rack Push the rails so that the pins go into the holes and slide the rails into the rack to lock the rear of the slide rails into the rack 4 Push the blue button to allow the latch to slide forward Then pull the slide rail forward and locate the front latch in the appropriate unit space in front of the rack EIA rail Adjus...

Page 30: ...1 until they click two times into place Carefully lift the file module and tilt it into position over the slide rails so that the rear nail heads 2 on the device line up with the slide rails Slide the file module down until the rear nail heads slip into the two rear slots and then slowly lower the front of the file module 3 until the other nail heads slip into the other slots on the slide rails if...

Page 31: ...nto the rack until it clicks into place 3 Insert both ends of the cable management support arm to the slide rail ifs00025 2 3 1 Figure 22 Install the file module on the slide rails ifs00026 2 1 Figure 23 Slide the file module into the rack Chapter 2 Performing the hardware installation 21 ...

Page 32: ...abs into the slots on both inside and outside of the slide rail Push the tabs until they snap into place ifs00028 Arm junctions 5 Make sure that the support rail is located between the 2 nail head features ifs00027 Figure 24 Install the cable management support arm The graphic shows the rear of the rack Figure 25 Install the cable management arm 22 Storwize V7000 Unified Quick Installation Guide ...

Page 33: ...r hook and loop fasteners Note Allow slack in all cables to avoid tension in the cables as the cable management arm moves 7 Insert the M6 screws to the rear of the slides Use a cable tie to secure the free end of the cable management arm to the rack if needed ifs00029 Figure 26 Adjust the location of the cable management arm ifs00030 1 Figure 27 Connect and route the cables Chapter 2 Performing th...

Page 34: ...he enclosure terminology that is used in this topic is described fully in Step 2 Identifying the hardware components on page 4 Be aware of these guidelines when you begin to attach the cables to the SAS ports v No more than five expansion enclosures can be chained to port 1 below the control enclosure The connecting sequence from port 1 of the node canister is called chain 1 ifs00031 Figure 28 Sec...

Page 35: ... and must unplug a SAS cable pull the blue tag to release the cable 1 Review Table 1 and the following figures before attaching the SAS cables Table 1 How to connect SAS cables to expansion units SAS Connections How the first unit connects to the second unit First Unit Second Unit Number of Expansions Controller Expansion 1 1 Expansions Upper canister port 1 Upper canister port 1 Lower canister po...

Page 36: ...expansion enclosure is below the control enclosure E1 E2 H1 H2 H3 H4 D1 D2 Top Canister E1 E2 H1 H2 H3 H4 D1 D2 Bottom Canister Control enclosure D1 D2 Top Canister D1 D2 Bottom Canister D1 D2 Top Canister D1 D2 Bottom Canister D1 D2 Top Canister D1 D2 Bottom Canister D1 D2 Top Canister D1 D2 Bottom Canister Expansion units 1 3 5 Expansion units 2 4 6 Legend 1G Ethernet 6G SAS 8G FC 10G Ethernet i...

Page 37: ...upper canister Port 1 on the lower canister is opposite port 1 on the upper canister Note The connecting sequence from port 1 of the node canister is called chain 1 3 Attach the SAS cables from the control enclosure to the second expansion enclosure as shown in Figure 32 on page 28 The second expansion enclosure is above the control enclosure Control enclosure Expansion enclosure 1 2 4 svc00661 1 ...

Page 38: ...nverted from the port locations on the upper canister Port 1 on the lower canister is opposite port 1 on the upper canister Note The connecting sequence from port 2 of the node canister is called chain 2 4 Attach the SAS cables from the first expansion enclosure to the third expansion enclosure Control enclosure Expansion enclosure 1 2 Expansion enclosure 2 6 8 4 svc00660 1 5 3 7 Figure 32 Adding ...

Page 39: ...sion enclosure 2 a Add the enclosures alternately to chain 1 and then chain 2 b Use port 2 on the canisters that are already connected to attach to port 1 on the canisters of the enclosures that you want to add 6 Verify your cabling Step 10 Attaching the Ethernet cables This task guides you through connecting both the internal and external Ethernet connections for your system Control enclosure Exp...

Page 40: ...iSCSI E2 Built in Ethernet port 2 1 Gbps external network connection No Optional management and service port optional iSCSI Not shown Ethernet port 3 on a 2076 312 or 2076 324 10 GbE external network connection No Optional iSCSI Not shown Ethernet port 4 on a 2076 312 or 2076 324 10 GbE external network connection No Optional iSCSI E1 E2 H1 H2 H3 H4 D1 D2 Top Canister E1 E2 H1 H2 H3 H4 D1 D2 Botto...

Page 41: ...n your new Storwize V7000 Unified control enclosures might conflict with existing devices that are attached to the network or with other new control enclosures that you are installing The service IP address 192 168 70 121 subnet mask 255 255 255 0 is preconfigured on Ethernet port 1 of the upper canister canister 1 The service IP address 192 168 70 122 subnet mask 255 255 255 0 is preconfigured on...

Page 42: ...atures of the rack File modules to external host ports network 10 GB Fibre Ethernet You have two 10 Gbps Fibre Ethernet ports available for host connections from each file module The ports are on the PCI card located in slot 4 Connect your network cables to the Ethernet ports in these slots as applicable Refer to Figure 9 on page 9 Step 11 Attaching the Fibre Channel cables File modules To attach ...

Page 43: ... Channel port 2 Note If you are using the Storwize V7000 Unified for remote copy or block I O connect the Fibre cables to the remaining controller canisters Fibre channel ports 3 and 4 if s00033 3 4 PCI 3 4 PCI 2 1 3 4 5 6 7 8 CAUTIO N CAUTIO N CAUTIO N CAUTIO N Disconnect all supply power for complete isolation Disconnect all supply power for complete isolation Disconnect all supply power for com...

Page 44: ...ention bracket away from the power supply unit until there is enough room to attach the cable retention bracket to the cable When sliding the bracket away from the cable plug in pull the lever on the bracket that controls the cable tie slightly towards the center of the canister You do not need to pull the lever to slide the bracket towards the cable plug in 4 Attach a power cord to each of the tw...

Page 45: ...r redundancy Route the power cords through the Cable Management Arms 2 Repeat the previous step for the other file module 3 Secure any excess cable length using the cable retention features of the rack Step 13 Powering the system on and off Follow the procedures for powering on the expansion enclosure and file modules and in the order specified Here are the general procedures to be followed 1 Powe...

Page 46: ...fied Problem Determination Guide PDF on the CD if problems are encountered Both Figure 38 and Figure 39 show the location of the LEDs on the power supply units located at the front of the expansion enclosure Figure 40 on page 37 shows the location of the LEDs on the power supply units located at the rear of the expansion enclosure The LEDs are located at position 1 Table 5 LED status front of cont...

Page 47: ... unit 1 which is the left power supply The LED locations are inverted for power supply unit 2 which is the right power supply Power supply upper right LED is on Fan failure LED is off dc power failure LED is off ac power failure LED is off Powering on a control enclosure 1 Power on the control enclosure if it is not already powered on and configured Use the power switch on each of the two power su...

Page 48: ...ol enclosure is powered on Hardware component LED name If power on and no fault is detected Left enclosure end cap front of enclosure Power top LED is on Fault middle LED is off Identify bottom LED is off svc00670 1 1 Figure 41 LEDs on the power supply units of the control enclosure 38 Storwize V7000 Unified Quick Installation Guide ...

Page 49: ...he LED is flashing if the node canister is in service or candidate state If the LED is off the node canister might still be booting up Wait up to 5 minutes for the node canister to complete booting up Fault status middle LED is off Power status right LED is on Power supply unit control enclosure The reference to the left and right locations applies to power supply unit 1 which is the left power su...

Page 50: ...ent module For example it can respond to a remote request to turn on the file module While the file module remains connected to power one or more fans might continue to run To remove all power from the file module you must disconnect it from the power source Important To view the error LEDs on the system board leave the file module connected to a power source Some operating systems require an orde...

Page 51: ...ze V7000 Unified file module management IP address file module 1 and 2 IP addresses subnet mask and gateway address you must provide non VLAN based network information After the system is configured use the chnwmgt command to change the Storwize V7000 Unified network settings to switch to a VLAN based subnet This recreates the network with a VLAN based subnet Table 8 This table optional is useful ...

Page 52: ...31 range but does not use IP addresses in the 192 168 range then select range 2 3 If the customer network uses IP addresses in the 172 31 range and the 192 168 range but does not use IP addresses in the 10 254 range then select range 3 File module management name Name associated with the file module management address such as filemod1 File module management IP address Designated customer managemen...

Page 53: ...entation package Use the USB key that was shipped with the file modules not the USB key that was shipped with the control enclosure Note You might encounter a problem where the code cannot be run if you use your own USB key The USB key that you use must v Contain a FAT32 formatted file system on its first partition NTFS and other filesystem types are not supported v Contain a copy of the Microsoft...

Page 54: ...ay 9 111 167 254 serviceip1 9 111 160 51 serviceip2 9 111 160 52 internalips 10 254 0 1 storwizeip 9 111 160 10 Where v ip File module management IP address v netmask Storwize V7000 Unified subnet mask v gateway Storwize V7000 Unified gateway address v serviceip1 File module 1 IP address v serviceip2 File module 1 IP address v internalips Internal IP address range v storwizeip Storwize V7000 Unifi...

Page 55: ...modules blue LED s are flashing If both LED s are not flashing allow at least 30 minutes for a full boot cycle If both LED s are still not flashing reboot the file module that is not flashing and allow 30 minutes for a boot cycle Continue with step 2 once both LED s are flashing If the problem persist call support 2 Insert the USB key that was used to configure the Storwize V7000 into file module ...

Page 56: ...n Center Specify the number corresponding to a location in the time zone where the system is being installed Example If the machine is being installed in Tucson Arizona USA the best math for the time zone is America Phoenix and the corresponding number is 161 Network Time Protocol NTP Server Site NTP server address Alternate NTP server Alternate NTP server if applicable VLAN ID Optional This list ...

Page 57: ...a path connections use Ethernet bonding so a single IP address along with a subnet mask and gateway is used for all available Ethernet ports on a singlefile module The system automatically load balances between the physical ports on a single file module Subnet Where subnet is the numeric IP address of the public network data path It is used for all of the Ethernet data path connections Subnet mask...

Page 58: ...a Center Rd City State Customer Contact Phone Number This is the primary phone number that IBM service calls if the system calls home to report a problem Off Shift Customer Contact Phone Number This is the alternate phone number that IBM service calls if the system calls home to report a problem IP ADDRESS OF PROXY SERVER FOR CALL HOME _____ _____ _____ _____ Optional If a proxy server is needed t...

Page 59: ...ss Cs 255 255 248 0 21 8 Class Cs 255 255 240 0 20 16 Class Cs 255 255 224 0 19 32 Class Cs 255 255 192 0 18 64 Class Cs 255 255 128 0 17 128 Class Cs 255 255 0 0 16 Class B 255 254 0 0 15 2 Class Bs 255 252 0 0 14 4 Class Bs 255 248 0 0 13 8 Class Bs 255 240 0 0 12 16 Class Bs 255 224 0 0 11 32 Class Bs 255 192 0 0 10 64 Class Bs 255 128 0 0 9 128 Class Bs 255 0 0 0 8 Class A 254 0 0 0 7 2 Class ...

Page 60: ...of AD or PDC only One or more of these optional capabilities may be used to extend the capabilities of the authentication method selected previously If none of these options are needed then leave this row blank If you checked Microsoft Active Directory in the Authentication Method field of Table 13 then you must complete this table Table 14 Active Directory Configuration Information Field Value No...

Page 61: ...roup with a valid UNIX GID assigned to it The SFU users must have the same UNIX Attribute primary group and Windows primary group The UNIX UID GID that are assigned to such users groups must be in the ID range provided with cp parameter of the cfgsfu command The range for UID GID must not intersect with 10000000 11000000 this range is used by Scale Out Network Attached Storage internally for other...

Page 62: ...oup suffix to be used Bind Distinguished Name This is the bind distinguished name from the etc openldap slapd conf file on the customer s LDAP server In the example following note 1 below the bind distinguished name is cn Manager dc sonasldap dc com Bind Password This is the bind password from the etc openldap slapd conf file on the customer s LDAP server In the example following note 1 below the ...

Page 63: ...ch are text strings allowing UNIX servers to access Network Attached Storage devices that use Microsoft Active Directory or PDC to authenticate users If you checked None in the Authentication Method field of Table 13 on page 50 then select Basic If you checked either of the NIS items in the Options field of Table 13 on page 50 then select Extended Domain Map If the NIS Mode is Basic leave this fie...

Page 64: ...s if they do not have a mapping entry in the NIS Example ad_domain1 DENY_ACCESS v AUTO a new ID for the user is generated from the specific domain which does not have an entry in the NIS This ID is generated from a pre specified ID range and is auto incremented The administrator must make sure that existing NIS IDs do not fall in this provided ID range This mapping is kept in Scale Out Network Att...

Page 65: ...mple 30000 40000 Note The Group Range values must be a minimum of 1024 1 Go to a personal computer that has an Ethernet connection to the file module management IP address refer to Table 8 on page 41 and point a supported browser to that address Use https prefix for example https 9 11 136 208 You must use a supported browser You can verify that you are using a supported browser by going to the Sup...

Page 66: ...y selecting Next and configure the storage using the GUI at a later time Note You have to configure the storage before using the system 9 Select the New Network button to add one or more public network addresses Refer to Table 10 on page 46 for information to set up the public network information It is important to make a selection at the Interface drop down menu that you want the system use If yo...

Page 67: ...toring icon on the left of the page and select Events A listing of errors will be posted 4 Click on the error for further analysis and details of corrective actions to take Upgrade the Storwize V7000 Unified software Use the management GUI to install the latest Storwize V7000 Unified software Select Settings and then General from the management GUI From the General menu select Upgrade Software Thi...

Page 68: ...ing v Check CD for blemishes and clean the problem CD v Reboot the server and try again v Try another CD if one is available Blue LED on file module where the USB key was inserted keeps flashing does not turn solid as stated in the instructions v Allow 5 minutes at least remove the USB key insert it into your laptop Verify that the InitTool set up information is correct navigate to the SONAS_resul...

Page 69: ... On Site from within the session of the third party support tool For restricted use only Assist On Site supports IBM diagnostic tools to function over the Assist On Site connection for the purpose of debugging hardware devices and IBM software The AOS feature is disabled by default To enable it do the following 1 From the Storwize V7000 Unified GUI select Support under Setting icon 2 Click the AOS...

Page 70: ...60 Storwize V7000 Unified Quick Installation Guide ...

Page 71: ...e GUI login panel You can use this option to navigate to all the panels without manually typing the web addresses v To go to the next frame press Ctrl Tab v To move to the previous frame press Shift Ctrl Tab v To navigate to the next link button or topic within a panel press Tab inside a frame page v To move to the previous link button or topic within a panel press Shift Tab v To select GUI object...

Page 72: ...ype your edit and press Enter to issue the change command Accessing the publications You can find the HTML version of the IBM Storwize V7000 Unified information at the following website publib boulder ibm com infocenter storwize unified_ic index jsp You can access this information using screen reader software and a digital speech synthesizer to hear what is displayed on the screen The information ...

Page 73: ...d inquiries in writing to Intellectual Property Licensing Legal and Intellectual Property Law IBM Japan Ltd 1623 14 Shimotsuruma Yamato shi Kanagawa 242 8502 Japan The following paragraph does not apply to the United Kingdom or any other country where such provisions are inconsistent with local law INTERNATIONAL BUSINESS MACHINES CORPORATION PROVIDES THIS PUBLICATION AS IS WITHOUT WARRANTY OF ANY ...

Page 74: ...Users of this document should verify the applicable data for their specific environment Information concerning non IBM products was obtained from the suppliers of those products their published announcements or other publicly available sources IBM has not tested those products and cannot confirm the accuracy of performance compatibility or any other claims related to non IBM products Questions on ...

Page 75: ...ries in the United States and other countries Linux is a registered trademark of Linus Torvalds in the United States other countries or both Microsoft Windows Windows NT and the Windows logo are trademarks of Microsoft Corporation in the United States other countries or both UNIX is a registered trademark of The Open Group in the United States and other countries Java and all Java based trademarks...

Page 76: ... Canada Avis de conformité à la réglementation d Industrie Canada Cet appareil numérique de la classe A est conforme à la norme NMB 003 du Canada Australia and New Zealand Class A Statement Attention This is a Class A product In a domestic environment this product might cause radio interference in which case the user might be required to take adequate measures European Union Electromagnetic Compat...

Page 77: ...dem Warnhinweis versehen werden Warnung Dieses ist eine Einrichtung der Klasse A Diese Einrichtung kann im Wohnbereich Funk Störungen verursachen in diesem Fall kann vom Betreiber verlangt werden angemessene Mabnahmen zu ergreifen und dafür aufzukommen Deutschland Einhaltung des Gesetzes über die elektromagnetische Verträglichkeit von Geräten Dieses Produkt entspricht dem Gesetz über die elektroma...

Page 78: ... This product has been designed and built to comply with IEC Standard 950 United Kingdom telecommunications requirements This apparatus is manufactured to the International Safety Standard EN60950 and as such is approved in the U K under approval number NS G 1234 J 100003 for indirect connection to public telecommunications systems in the United Kingdom Korean Communications Commission KCC Class A...

Page 79: ...ommunity contact IBM Technical Regulations Pascalstr 100 Stuttgart Germany 70569 Tele 0049 0 711 785 1176 Fax 0049 0 711 785 1283 Email mailto tjahn de ibm com Taiwan Contact Information This topic contains the product service contact information for Taiwan IBM Taiwan Product Service Contact Information IBM Taiwan Corporation 3F No 7 Song Ren Rd Taipei Taiwan Tel 0800 016 888 rusemi f2c00790 Notic...

Page 80: ...70 Storwize V7000 Unified Quick Installation Guide ...

Page 81: ......

Page 82: ... Part Number 00L4661 Printed in USA GA32 1056 01 1P P N 00L4661 ...

Reviews: