Removing
the Upper
Stack
sleeve (part #2 pg. 9)
7—Push upper shock assembly out (pg 7). If you are replacing any part of the
upper shock assembly, not the main springs, proceed to reassembly step 4.
8—Slide the boot off the frame.
9—Loosen the pinch bolt on the frame and remove the aluminum shock
sleeve, taking care not to spread the frame apart.
Inspection
While the shock is apart, Inspect the boot for cracks or holes, replace if
necessary. Also check the shock sleeve for gouges or worn anodization. Small
longitudinal scratches along the shock inner bore will not affect performance,
large gouges will. Replace if necessary. Inspect the main shock springs and
upper shock parts for bulging or cracks, and inspect the delrin guide and inner
sleeve for wear or damage. Replace worn components.
Reassembly
1—Using a cloth, clean all the parts you are reassembling, including threads
in shock sleeve and adjuster. Do not use solvents, as they could attack
the spring material.
2—Slide shock sleeve into frame, tighten pinch bolt to 65 inch pounds.
3—Slide boot onto 1" frame stub.
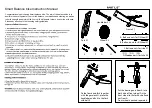
4—Upper Stack:
a) Spread a small amount of lube on the inside
bore of the supple spring and damper discs. You
can tell the difference between the damper discs
and the spring discs by the chamfer found on
one edge of the damper discs. The springs have
no chamfer.
b) Insert inner sleeve 3/4 of the way into the
supple spring.
c) Install the Delrin guide.
d) Slide the two damper discs onto inner sleeve,
with chamfers facing each other (right).
e) Remove excess lube from each end of inner
sleeve, use q-tip to remove from lube from inside
the supple spring.
Important: Be sure to remove excess grease or Loctite will not adhere.
f) Lube the outside surface of the damper discs liberally and reinsert stack
g) Apply light grade thread lock (Loctite® Threadlocker 242) to first half
inch of central bolt threads, insert and tighten to 75 inch pounds.
Important: this is a critical measurement, and improper torque can
cause failure of the shock bolt.
Upper Stack
8


