


To display the timestamp on the video screen, check off
Show Date/Time
checkbox. To display the day of the week,
Important
Click Save to apply any setting changes.
check off
Show Day of the Week
checkbox.
In the
Format
drop-down menu select the desired timestamp format: YYYY-MM-DD, MM-DD-YYYY, or DD-MM-YYYY.
In the
Style
drop-down menu select the desired style for the timestamp display: Transparent & Flashing, Transparent &
Steady, Opaque & Flashing, Opaque & Steady. The time stamp will be displayed in a contrasting color depending on the
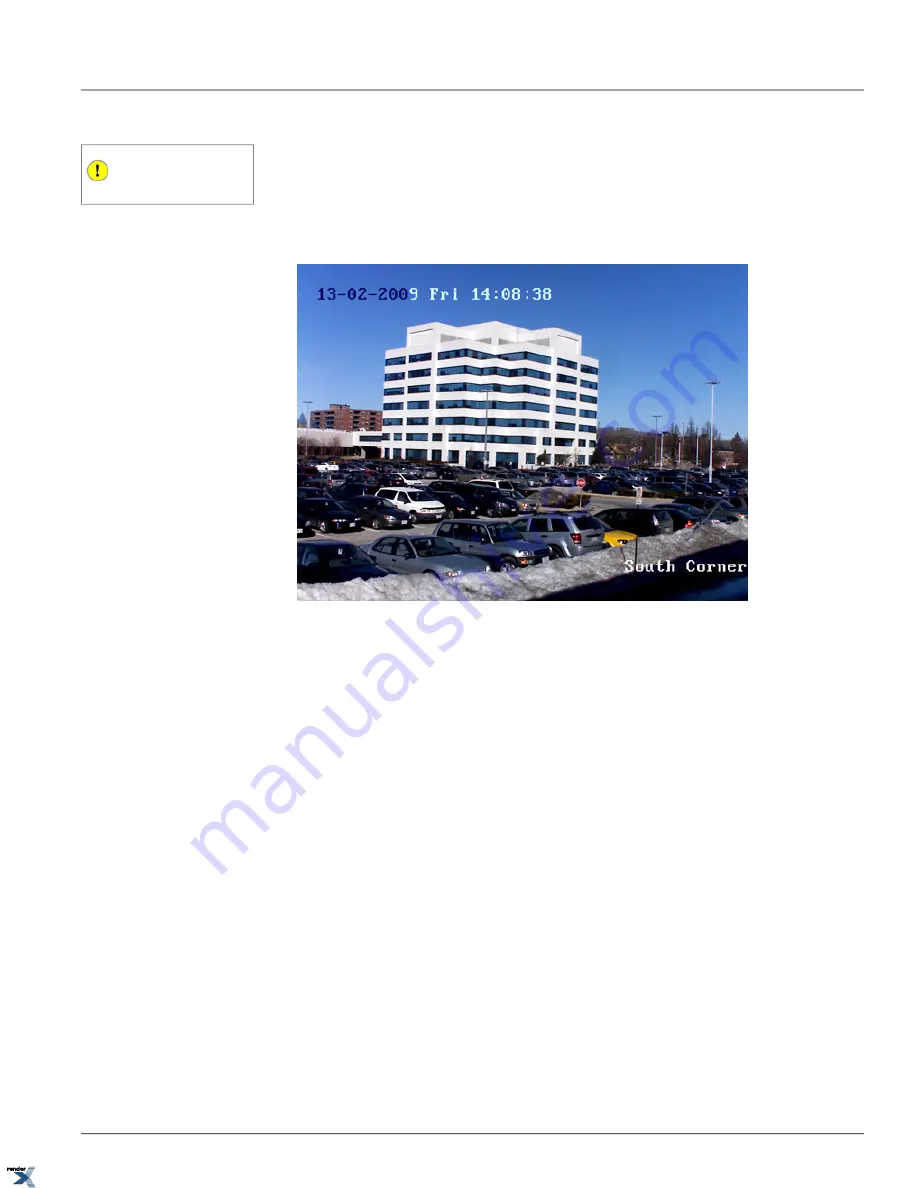
predominant background color (see image below).
To achieve the on screen display above, the Channel Name was set to "South Corner", Channel Name display and
Date/Time/Day of the Week displays were enabled. Time stamp format was set to DD-MM-YYYY and the style was set
to Opaque & Steady.
2.6.7.1. Custom Text Overlay
In addition to the Date/Time stamp and the Channel Name on-screen-displays, each video channel can have up to 4 lines
of custom text.
To add custom text overlay to the Annexxus video channel, do the following:
1. Enable up to 4 different text areas by checking off one or more check boxes in the Text Overlay area of the Channels
setup tab.
2. Enter X and Y positions to set the new text position on the screen
3. Position the mouse cursor over the
Content
line corresponding to the enabled text overlay area. Left-click inside the
Content
line and type the new text.
In the example below, three additional text lines have been added to the video display: "Annexxus 301C2M Camera",
"Please monitor continuously", and "Tel: 1.877.877.7241".
4. Click
Save
to save the new settings.
45
On Screen Displays Setup
Chapter 2. Remote Connection via SRX-Pro/iP-Pro
Server
XML to PDF by RenderX XEP XSL-FO Formatter, visit us at