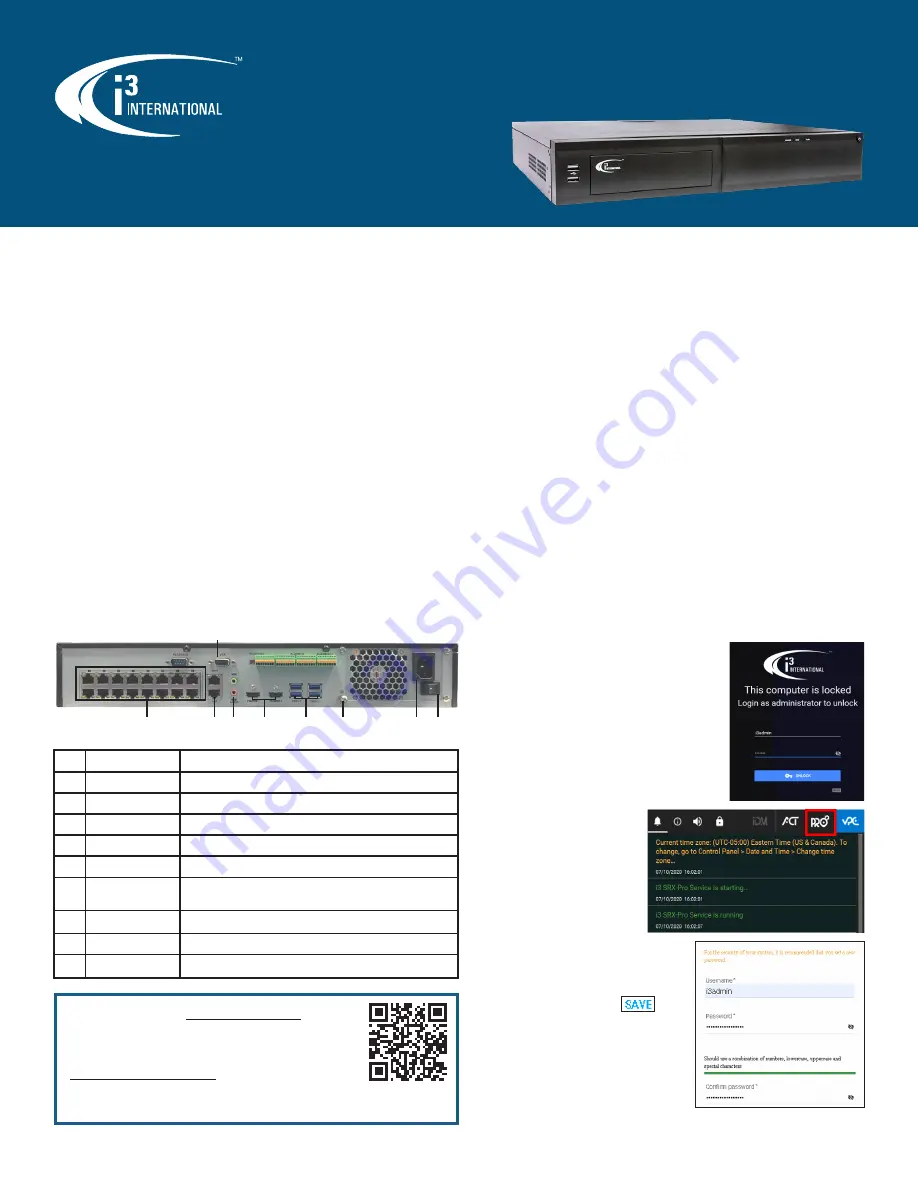
U12
16-channel NVR with PoE
Quick Start Guide
i3-TRNG-DVR-
U12_QSG
.indd
Rev. 200723
QR Code for Complete
User Manual and ACT
and download
Annexxus Configuration Tool v1.7 (ACT)
and
additional documentation.
Contact our Technical Support team at:
1.877.877.7241
or
if you have any questions
or concerns regarding camera installation or if you require
software services or support.
Thank you for purchasing i3 International’s U12 16-channel NVR. Your U12 NVR
comes with the built-in 16-port PoE switch and i3’s flagship SRX-Pro software.
Purchase enough IP licenses to support your IP cameras.
SAFETY
When installing your U12 NVR, be sure to avoid:
• excessive heat, such as direct sunlight or heating appliances
• contaminants such as dust and smoke
• strong magnetic fields
• moisture and humidity
• areas with mechanical vibrations
• temperatures below 10°C (50°F) and above 30°C (86°F).
POWER SUPPLY
U12 Power consumption requirements: AC 100~ 240VAC.
PACKAGE CONTENTS
Ensure that the items received match the following. In addition to this Quick Guide
and the U12 NVR, the packing box includes:
1.
USB ke mouse (x1)
2.
Power cable (x1)
3.
SRX-Pro Software and Utilities DVD (x1)
4.
Security label (x1)
5.
Rackmount bracket (ear x2) + bracket screws (x6)
6.
HDMI cable (x1)
7.
CAT5 Network cable. Connect to the Gigabit switch (x1
)
INSTALLATION
U12 NVR comes with a 1.5U chassis for convenient Rackmount installation.
Follow all safety precautions when selecting an installation location for your U12
NVR.
Tip:
Ensure the NVR is within 1 meter (3 feet) from the UPS and the NVR and its cables
have sufficient space. The system must be placed on an even surface (shelf or Rack
mount).
1.
Use supplied screws to secure provided rack brackets to the U12 unit.
Then install the U12 NVR into the server rack.
2.
Turn the Power Switch (#9) to the OFF position.
3.
Plug the USB mouse and the USB keyboard into the USB ports on the front
panel.
4.
Plug in the HDMI (#5) or VGA (#3) monitor using video output ports.
5.
Plug IP cameras into the RJ45 PoE ports (#1).
6.
Connect Mic and Speaker into Audio In/Out ports (#2), if using.
7.
Use the RJ45 Ethernet port labeled WAN (#2) to connect U12 to your network.
8.
Plug in the supplied power cable into the AC Power In port (#8) and connect
the NVR to an Uninterrupted Power Supply (UPS).
Note:
Uninterrupted Power Supply usage is mandatory for the reliability and
longevity of your NVR. Failure to use UPS may void your factory warranty.
9.
Return the Power Switch (#9) into the ON position. The NVR will then power
on.
FIRST STARTUP
Your U12 NVR is running Windows 10 IoT OS and comes pre-installed with the latest
version of SRX-Pro software.
As part of the first startup, you will need to:
A.
Set a new administrative password.
B.
Ensure the Time Zone is configured correctly.
Set New Admin Password
When the NVR first boots up, you will see the Windows
Lock Screen
1.
Unlock the NVR with default credentials.
Username:
i3admin
Password:
i3admin
2.
Click
PRO
icon in the SRX-Pro
monitor utility to open SRX-Pro
Setup in a web browser.
3.
Set the new administrative password for
i3admin username and click
.
Follow suggested password guidelines for a
strong password.
Keep your new password secure.
Note: Unmarked components are not in use.
No. Item
Description
1
PoE & VIDEO
16 x 100Mbps RJ45 PoE ports for 1.3-3MP IP cameras
2
Network Port
2x RJ45 10/100/1000 Mbps Ethernet interface
3
AUDIO IN/OUT
Audio Input / Output, Mic Level, 3.5mm
4
VGA Output
1x VGA video output
5
HDMI Outputs
2x HDMI video outputs
6
USB
4x USB 3.0 interface
2x USB 2.0 interfaces on front panel
7
GND
Ground
8
AC Power In
AC Power in Port
9
Power Switch
Power ON/OFF
1
2
3
4
5
6
7
8 9


